
Planning your wedding tablescape comes down to the little details that make a big impact, and table numbers are one of the easiest DIY ways to put your personal style spin on it. Whether you're dreaming of a modern boho beach celebration, a timeless ballroom soirée, or a rustic garden party, table numbers are not just about helping guests find their seats. They're also an opportunity to showcase your creativity even when you're pressed for time with all of your other wedding planning things to do.
If you're a Cricut beginner, you're in the right place! Every one of these 20 Cricut wedding table number ideas is beginner-friendly, budget-conscious, and adaptable to your color palette or theme. From acrylic arches and frosted glass to faux leather and thrifted finds, this list is packed with DIY inspiration to match just about every wedding style. And if you're already thinking about where to buy, we've included quick links or you can check out our top tips on sourcing secondhand table numbers in bulk for a more eco-minded alternative.
So, grab your favorite materials, pick a font that speaks to you, and get ready to make your own table numbers that are as beautiful as they are functional.
Which Cricut machine is best for wedding table numbers?
Short answer is any of them! Because table numbers are relatively small compared to a lot of other wedding DIY projects, you can use the Cricut Joy, Joy Xtra, Explore family, or Maker family cutting machines as you won't be restricted on machine's cutting width size. The most popular material to make table numbers with is adhesive vinyl, and this can be cut on any Cricut machine. If you'd like to explore more 3D number options like basswood or chipboard, you would need a Maker family machine as you would need to use its compatible knife blade to cut.
For a more in-depth guide on machines, check out our Which Cricut Machine is Best for Wedding DIY guide.
What font size or style works best for readability at a wedding?
Visibility is key as you need to communicate to your guests where they need to go! We recommend using a contrasted color with your table number blank. The number should 'pop' out against its backdrop. For clear acrylic signage, be sure to nestle it with your centerpieces to help give you some contrast, particularly in dim-lit reception rooms. There's a reason why a lot of table numbers end up with white, matte gold, or black vinyl – it's pretty and practical!
For font size, it depends on the size of your blank. You may have limited space on your tables, so before you make all of your table numbers, do a test cut for size and placement. Put it across a room to see if you can easily view it. If you can, you've likely got the proper size! All of the table numbers featured in this roundup are from real weddings we've featured or our own DIY tutorials, so they are great examples of what works well.
For using adhesive vinyl on table numbers, does it matter if it's removable or permanent?
It depends on how long you need your table numbers to last. For most weddings, removable vinyl works beautifully because it peels off cleanly without leaving sticky residue which is perfect if you're reselling or reusing your blanks after the big day. Permanent vinyl is a great choice if you want extra durability; it's water-resistant and holds up well in humidity, making it ideal for beach or outdoor weddings. Both options look identical on your tables, so the choice really comes down to whether you want easy cleanup or long-term staying power. Availability of certain colors and the type of blank surface may also sway your decision.
TL;DR: Both cut the same and both will work just fine for your wedding reception.
Wavy Sea Glass Table Number
Materials used with Cricut: Adhesive vinyl, transfer tapeWith its softly frosted sea glass and elegant script, this wavy table number brings breezy sophistication to any reception. Using white vinyl cut on your Cricut and applied with transfer tape, it's an easy DIY project that feels polished and perfectly suited for a beach or coastal-themed wedding.
Photography: Lundy Photo // see the wedding

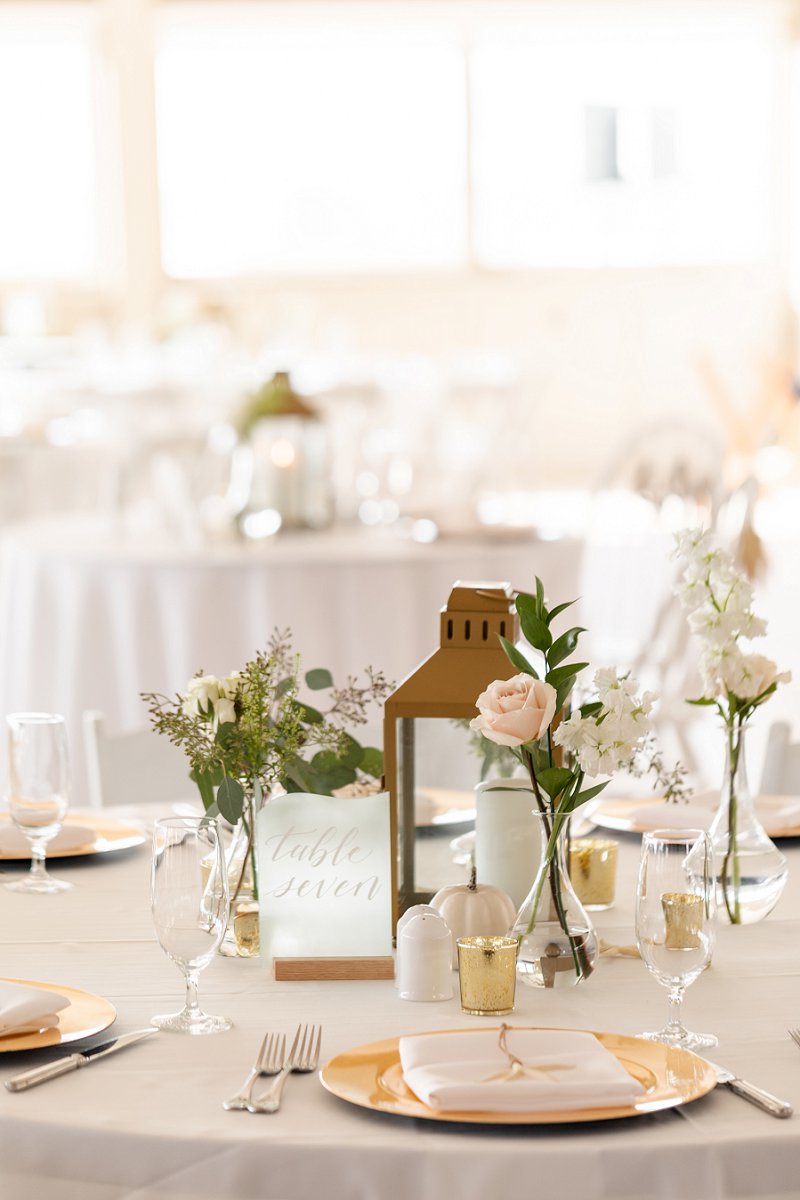
Classic Paper Table Number
Materials used with Cricut: Adhesive vinyl + transfer tape OR home printer + cardstockClassic and timeless, these elegant card table numbers shine with a touch of gold. You can easily create them with your Cricut using metallic gold adhesive vinyl and transfer tape for a luxe finish. Or go the quicker route with Design Space's Print Then Cut feature for the same glamorous look without the layering – use your home printer and ivory-colored cardstock instead! Perfect for pairing with chic florals and gilded accents.
Photography: Wolfcrest Photography // see the wedding
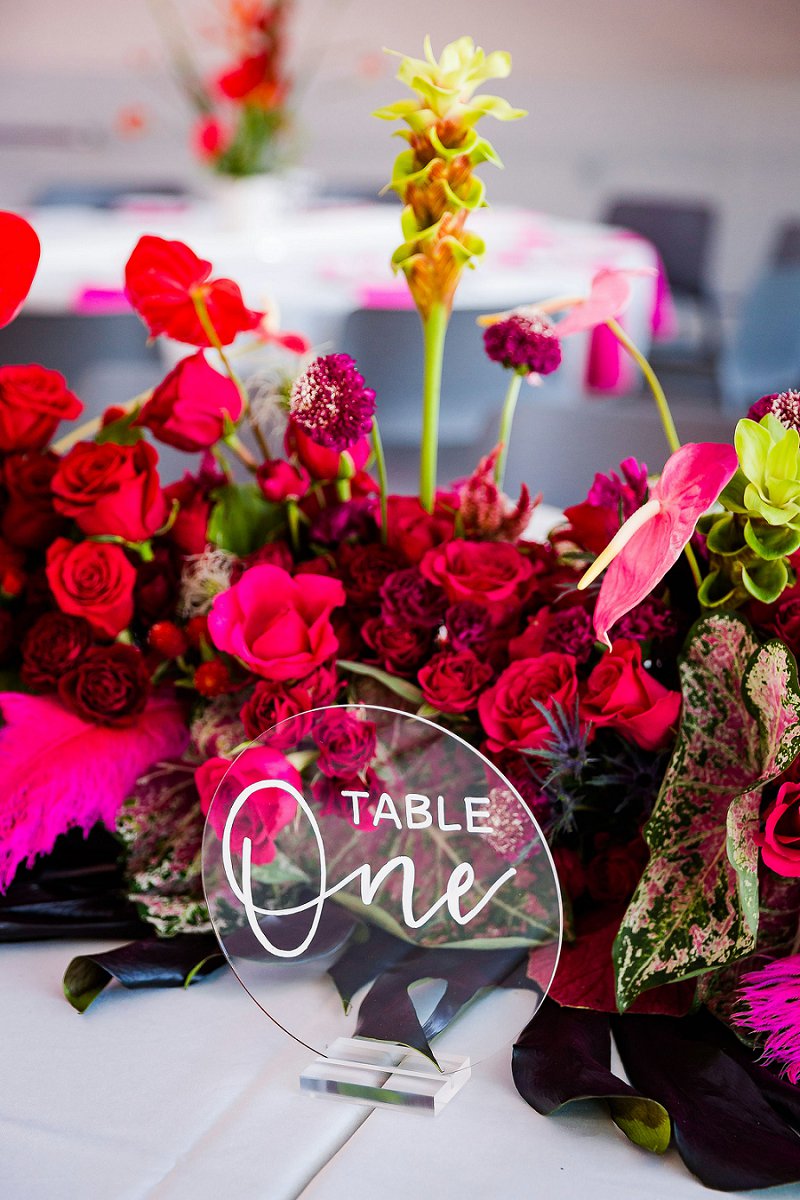
Round Modern Table Number
Materials used with Cricut: Adhesive vinyl, transfer tapeSleek and modern, this clear round acrylic table number makes a bold statement against vibrant florals. Cut from white adhesive vinyl and applied with transfer tape, it's simply perfect for couples wanting a contemporary look for their table numbers!
Photography: Steven and Lily Photography // see the wedding
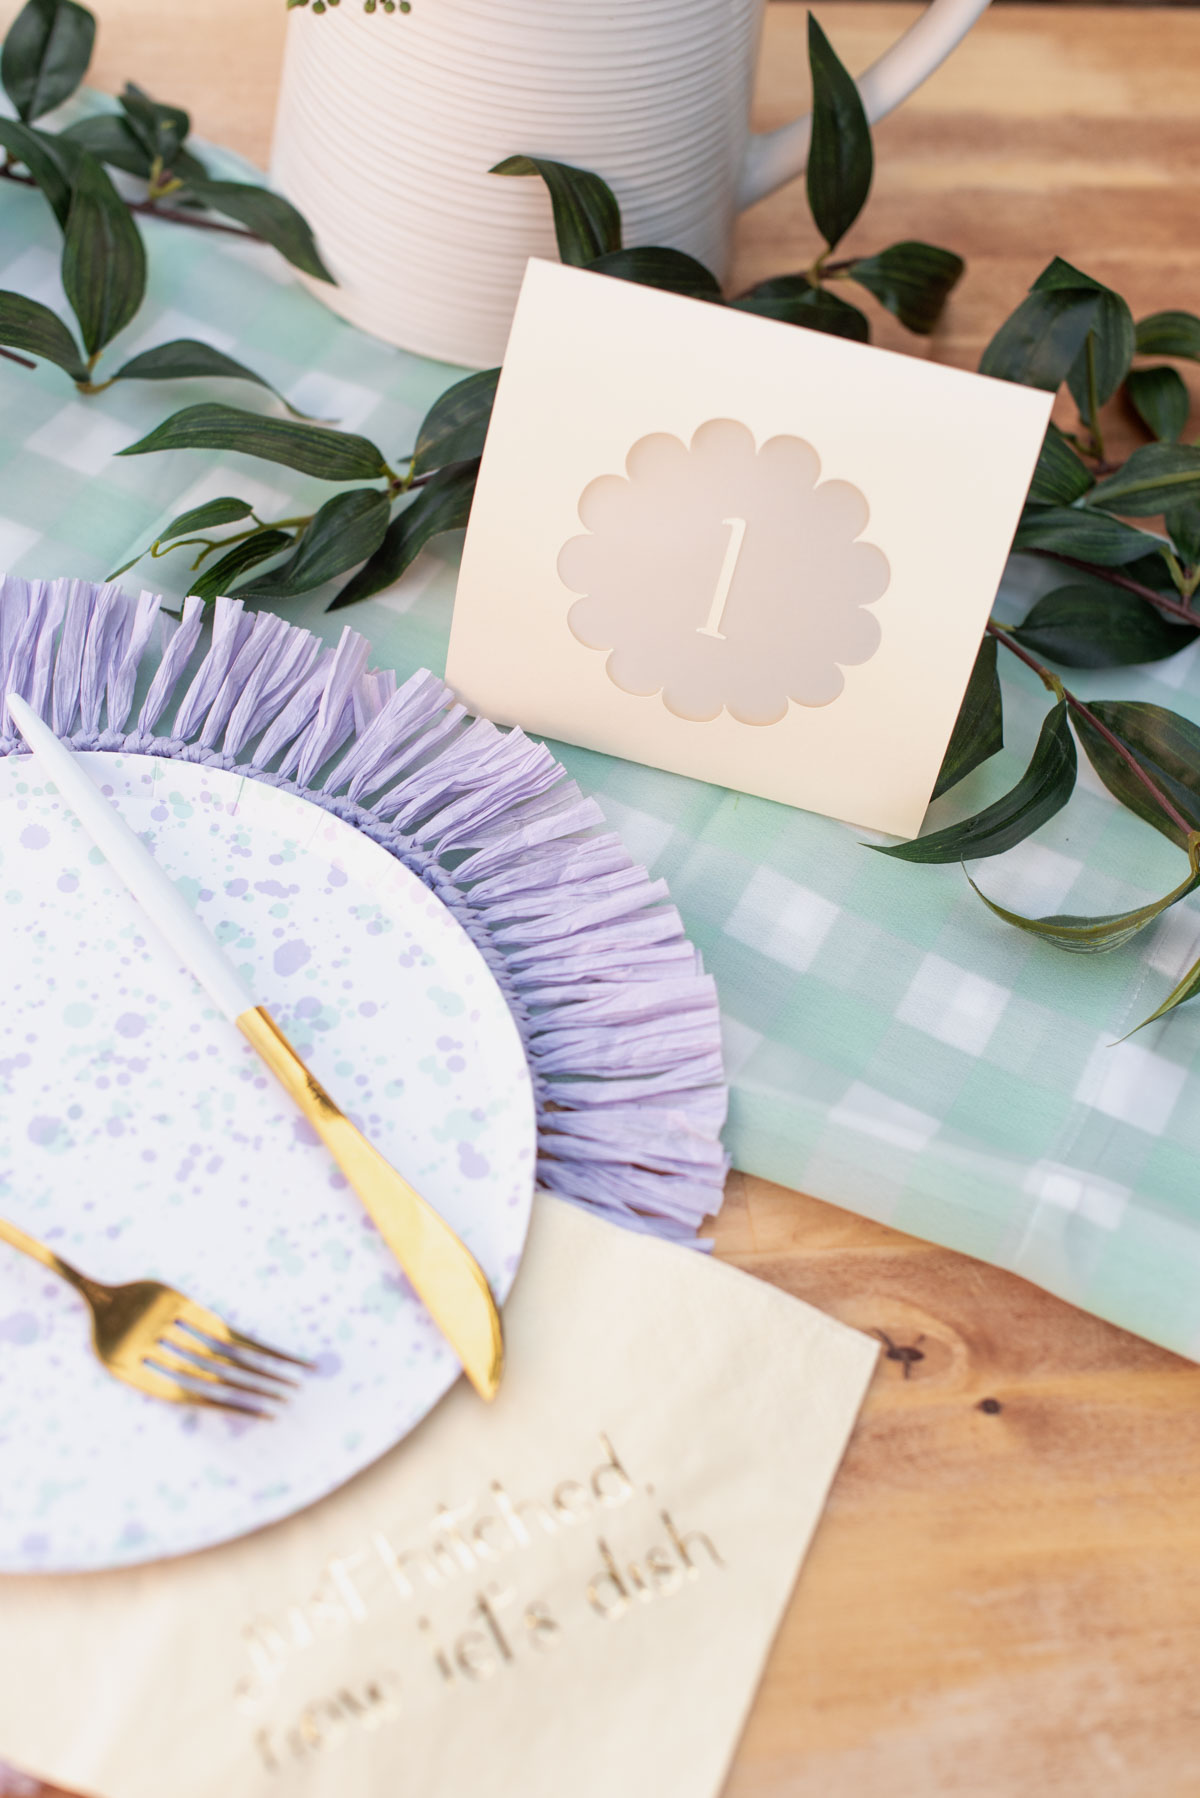
Cheerful Paper Table Number Luminary
Materials used with Cricut: Cardstock, vellum paperPlayful and charming, this butter yellow cardstock table number luminary with a scalloped central design was made by us for casual chic celebrations. Cut easily using your favorite colored paper, it's a budget-friendly and eco-friendly option that brings sunny personality to any backyard or picnic-style wedding. Just place an LED tealight inside for the most beautiful glowy effect at night. The best part? You can download the SVG file from our shop to make your very own! You'll also need the scoring tool for this one, but you can read all the steps in our DIY tutorial.
Photography: Chelsea Barton // see our DIY tutorial
Silver Foil Table Number
Materials used with Cricut: Heat transfer vinyl, thick cardstockFor the metallic lovers, you have so many options with this timeless shimmery design! This silver foiled table number could be made with adhesive vinyl (+ transfer tape) or heat transfer vinyl (+ heat press), but we especially love foil HTV as it sometimes weeds better for smaller letters that utilize a serif font. If you prefer adhesive vinyl (or the no-heat-needed idea), look for "chrome" silver for that ultimate foiled look.
Photography: Molly Lichten Photography // see the wedding
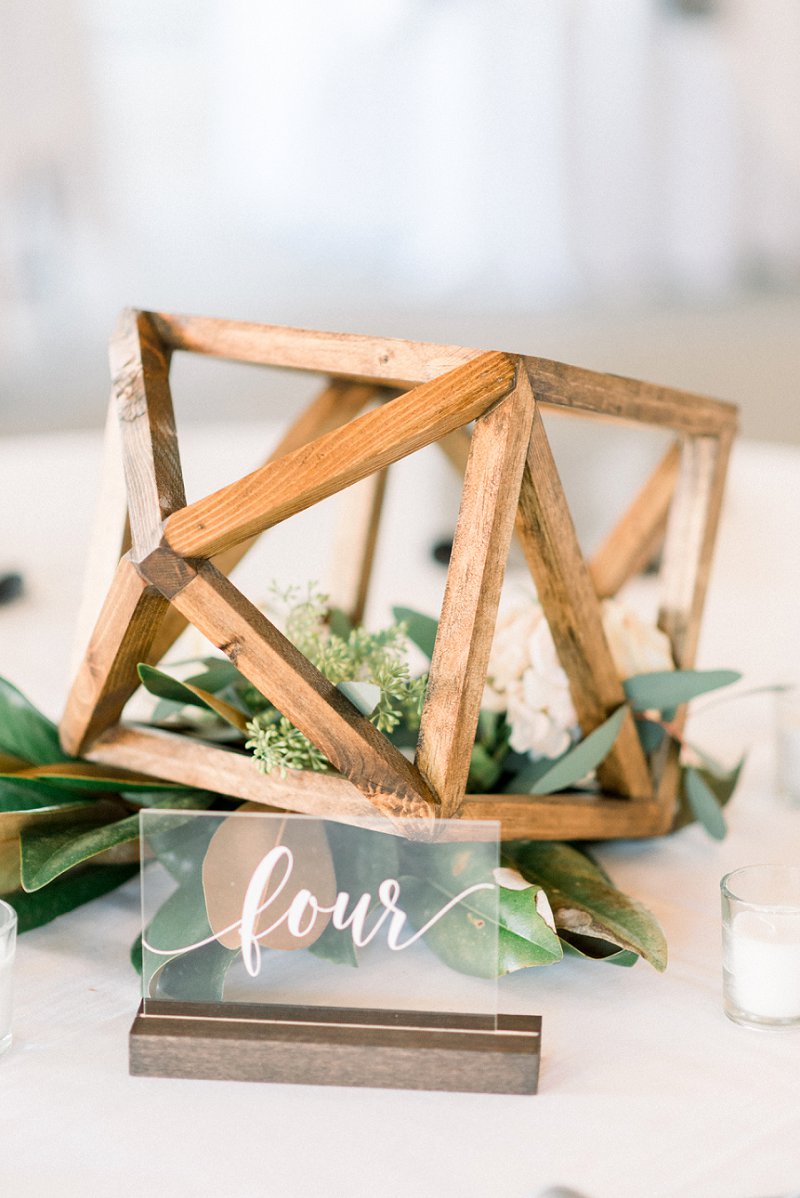
Modern Rustic Table Number
Materials used with Cricut: Adhesive vinyl, transfer tapeBlending modern polish with rustic charm, this clear horizontal acrylic table number features crisp white adhesive vinyl in an easy-to-read cursive font. It's a beautiful fit for barn, vineyard, or countryside celebrations! And if you're wondering how to pick the right script style for projects like this, don't miss our guide on choosing the best Cricut wedding fonts.
Photography: Brittany Lowe Photography // see the wedding

Textured Copper Vase Table Number
Materials used with Cricut: Textured metallic adhesive vinyl, white adhesive vinyl, and transfer tapeWe adore wedding details that do double duty! This chic boho-inspired table number also acts as centerpiece décor, making it both practical and pretty. Textured copper is a firm personal favorite, and when paired with white vinyl and a simple glass cylinder vase, it gives instant earthy-meets-elegance. Bonus: this textured metallic vinyl comes in a range of hues, so you can pick the one that best suits your wedding theme.
(And if you want complementary place cards, we have a beautiful selenite crystal place card holders DIY tutorial that matches this table number perfectly.)
Photography: Dani White Photography for Tidewater and Tulle // see our DIY tutorial

Simple Wooden Table Number
Materials used with Cricut: Adhesive vinyl, transfer tapeBudget-friendly and sustainable, simple wood table numbers are definitely one to consider for rustic and outdoor weddings! You can either buy the wood blank pre-cut or cut yourself from a large plank if you're looking for ways to maximize your budget. After the big day, either upcycle them or use as kindling so there's no waste. Just peel off the vinyl, give it a sand if any adhesive is left behind, and use elsewhere as you wish.
Photography: Turtle and Hare Photography // see the wedding

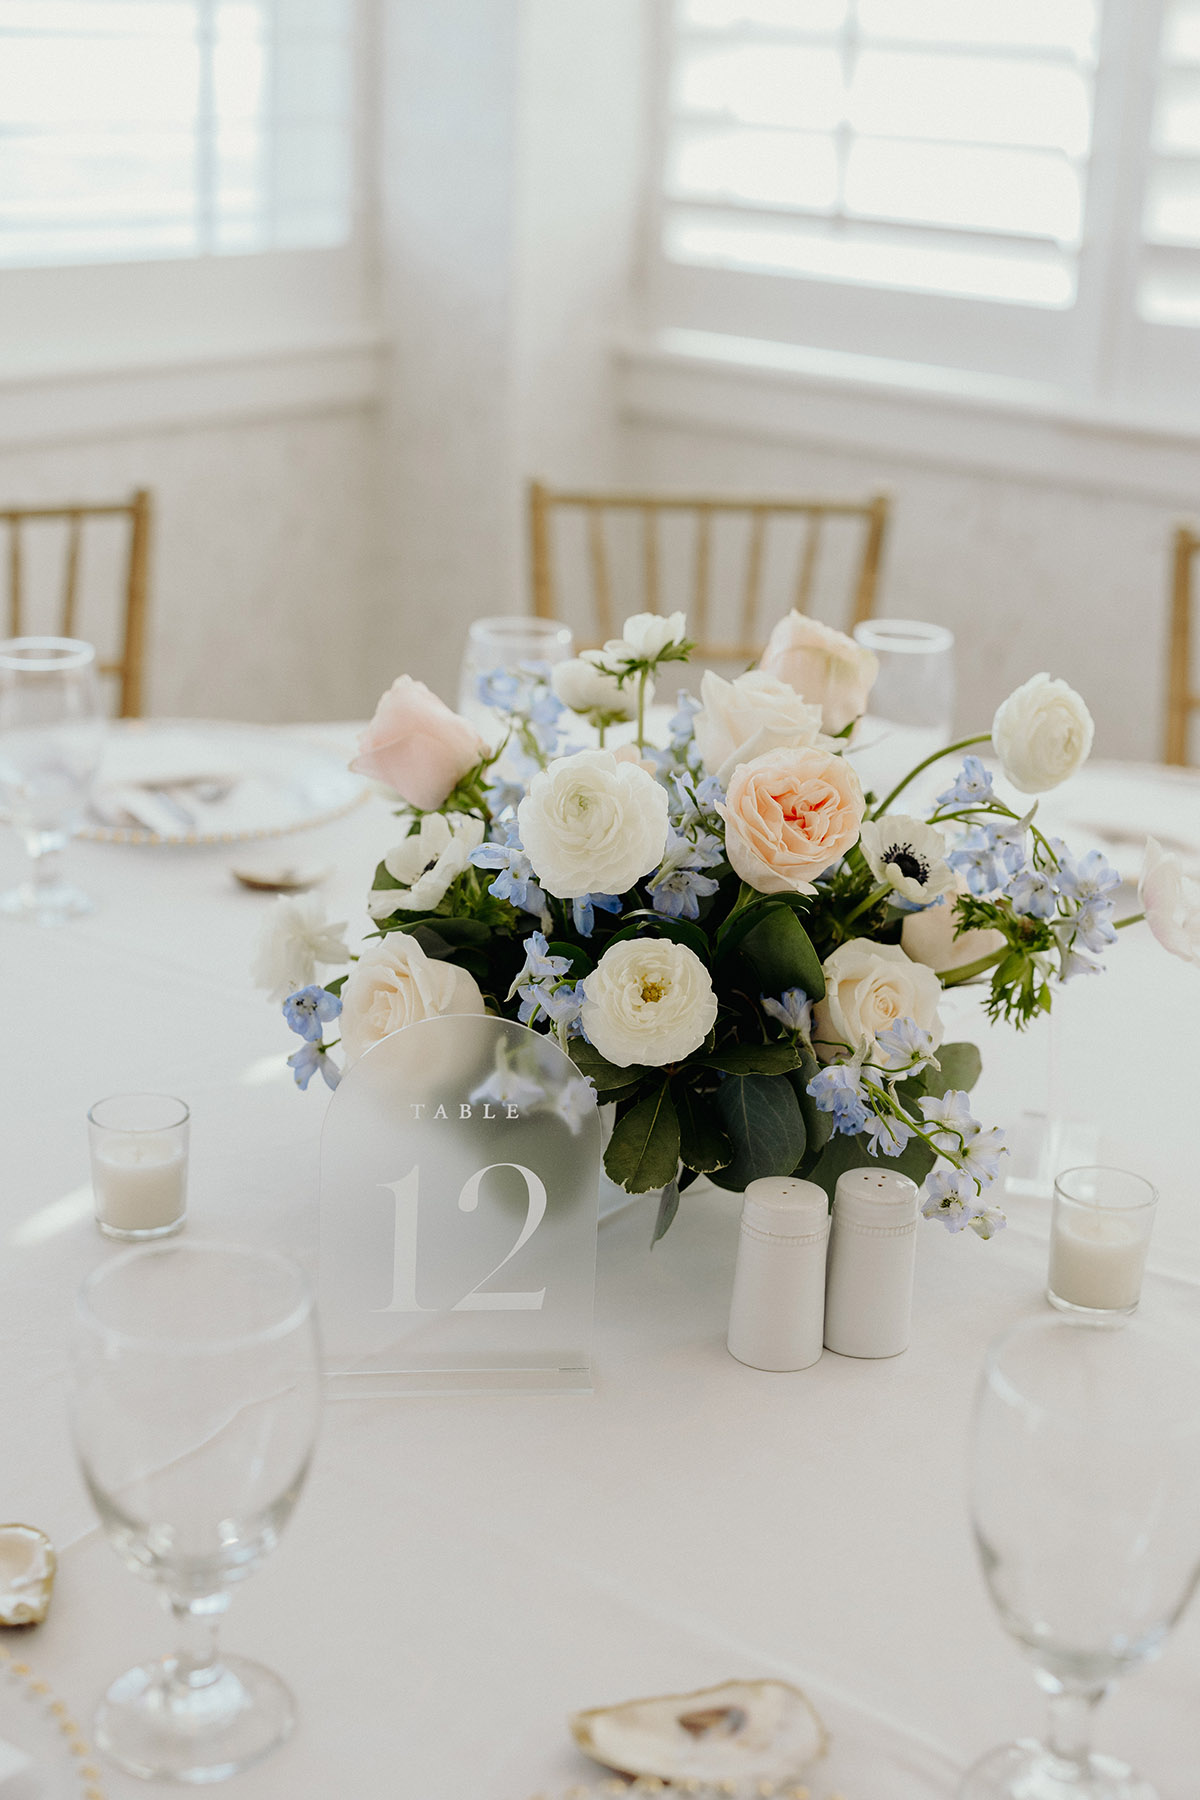
Frosted Half Moon Arch Table Number
Materials used with Cricut: Adhesive vinyl, transfer tapeThis frosted half moon arch design brings a modern boho vibe to your wedding reception, perfectly complementing neutral color palettes and breezy beach settings. We especially love this one when displayed next to smaller or lower reception centerpieces. Little in height, but big on effortless style!
Photography: Kasey Powell Weddings // see the wedding

Groovy Faux Leather Table Number
Materials used with Cricut: Pebbled faux leather (in two colors)Bring tropical beach vibes and a modern groovy feel to your reception with these easy faux pebbled leather table numbers. Jewel-toned and customizable, they're quick to make as you don't need any special machine blades for this one. It only uses a standard fine-point blade! Consider your playful, personalized touch to any wedding table sorted.
Photography: Chelsea Barton // see our DIY tutorial

Simple Modern Table Number with Initials
Materials used with Cricut: Adhesive vinyl, transfer tapeWant to personalize your table numbers with a bit more 'you'? Give it the monogram or initial treatment! We love how this wedding couple kept the number large for their guests to see, but then added their initials in a small size to give nod to their wedding brand. By keeping it all in a single black vinyl color, it gave a cohesive design while still keeping the focus on the signage's purpose.
Photography: J St. Clair Photography // see the wedding

Mini Serving Board Table Number
Materials used with Cricut: Adhesive vinyl (+ transfer tape) OR heat transfer vinyl (+ heat press)These mini wooden serving boards double as rustic chic table numbers — perfect for a foodie wedding or garden party celebration. With adhesive vinyl numbers that peel off after the big day, they're an easy Cricut wedding project that can be upcycled into everyday entertaining boards at home. And if your serving boards have a waxy or oily finish on it, heat transfer vinyl will be your best bet as it's easier to apply and keep on the wood with some heat pressing!
Photography: Chelsea Barton // see our DIY tutorial

Arch Floral Centerpiece Table Number
Materials used with Cricut: Adhesive vinyl (in two colors), transfer tapeBoho arches meet modern minimalism with these chic glass vase table numbers, and they can be styled with candles, pebbles, or flowers in your wedding color palette. Best of all, glass vases are affordable and easy to source in sets from IKEA, thrift shops, or online, making this a stylish and eco-friendly choice for larger celebrations.
Photography: Chelsea Barton // see our DIY tutorial

Glass Carafe Etched Table Number
Materials used with Cricut: Stencil vinyl, transfer tapeBring a rustic harvest touch to your reception with some etching cream and stencil vinyl! Inspired by vintage farm crates and organic textures, these glass bottles double as décor and table water containers. You can grab the complete supply list and a tutorial reel in the link above because you'll absolutely love making these once you see the process! And after the big day, they make great water vessels for entertaining, hosting gifts, or flower vases around the home.
Photography: Chelsea Barton // see our DIY tutorial

Simple Acrylic Table Number
Materials used with Cricut: Adhesive vinyl, transfer tapeFor UK or intimate reception tables, clear acrylic table numbers are a clever choice. They visually open up the space by blending seamlessly with your florals or backdrop. When table width is limited, a minimalist vinyl design keeps the look airy, modern, and effortlessly chic.
Photography: Elizabeth Cecil // see the wedding

Agate Sweetheart Table Number
Materials used with Cricut: Adhesive vinyl, transfer tapeWho says table numbers have to be traditional? Even agate bookends can make a stunning base for your design. Vinyl adheres beautifully to smooth, hard surfaces like polished stone or glass making it easy to customize unique pieces. Think beyond the usual — crystal slabs, ceramic tiles, or even sleek coasters can all transform into one-of-a-kind table numbers that double as décor.
Photography: Fresh Look Photography // see the inspiration

Frosted Arch Table Number
Materials used with Cricut: Adhesive vinyl, transfer tapeElegant yet modern, these frosted arch table numbers bring timeless style to your reception. The stacked serif font format in crisp white vinyl adds a refined, editorial feel which is perfect for couples who love a classic but contemporary aesthetic.
Photography: Sarah D'Ambra Photography // see the wedding

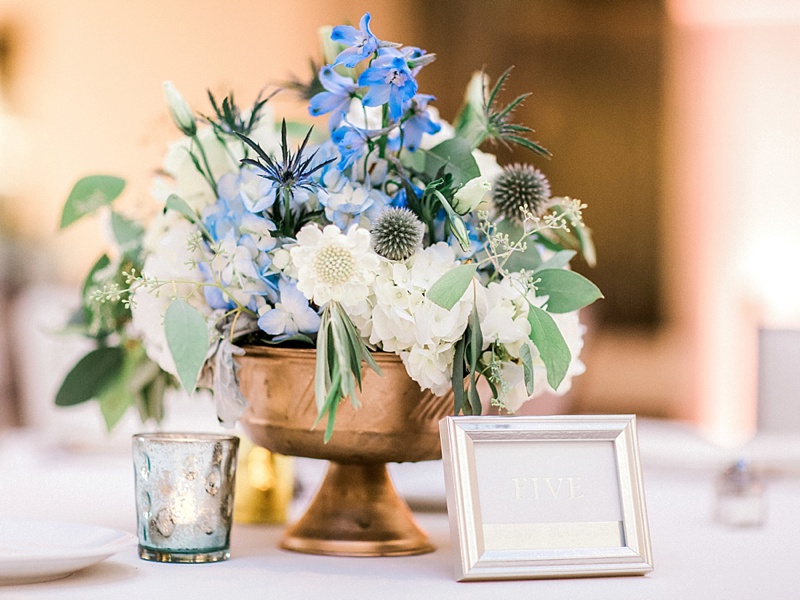
Acrylic Photo Frame Table Number
Materials used with Cricut: Adhesive vinylSimple, stylish, and budget-friendly, these clear acrylic 4x6 photo frames with gold edges make versatile table numbers. They're readily available to buy in bulk, so they're an ideal Cricut project for beginners while still adding a polished touch to your reception tables. You wouldn't need transfer tape for this vinyl idea if you're not adding any other text beyond the large numbers. You can just peel off the carrier sheet and stick!
Photography: Caitlin Wilcox Photography // see the wedding

White Arch Table Number
Materials used with Cricut: Adhesive vinyl, transfer tapeHaving your celebration in a ballroom or historic venue? Consider incorporating the popular arch shape with a white acrylic table number and a font that speaks to the style. You can either stand your table number up next to your centerpiece or place it on a small gold tabletop easel for the ultimate classic look. We especially love the gold vinyl which you can source in matte, shimmer, foil, or even glitter, so you have a lot of lovely options to use with your Cricut machine!
Photography: Gari-Ann Photography for Tidewater and Tulle // see our DIY tutorial

Frosted Window Cling Table Number Bottles
Materials used with Cricut: Frosted window cling OR frosted adhesive vinylRemember the etched glass carafe idea from above? This is the removable version! Instead of making permanent designs on your carafe which you may or may not want after the wedding, you can also cut frosted window cling or frosted vinyl material for your table numbers instead! You can find these glass bottles in bulk and then just personalize as you wish. Perfect to reuse after the wedding, too, like most of the wedding DIY projects we share!
Photography: Chelsea Barton // see our DIY tutorial

WRITTEN BY
Chelsea Barton
Founder & Wedding DIY Expert
A former wedding photographer, the founder of Tidewater and Tulle, and author of Cricut Weddings, Chelsea Barton has been helping couples bring their dream weddings to life through creative, approachable ideas since 2009. Her insight and work have been featured in Martha Stewart Weddings, Southern Living, and other top publications around the world. She combines editorial expertise and real-world insight to inspire meaningful celebrations.
Get Inspired by other Cricut Wedding Ideas on Tidewater and Tulle
• Ultimate Guide to Cricut Wedding Signs
• How to Make Your Own Cricut Wedding Invitations
• Ultimate Guide to the Best Wedding Fonts for Cricut Machines
• 20 Even More Wedding Ideas To Make With Your Cricut

