
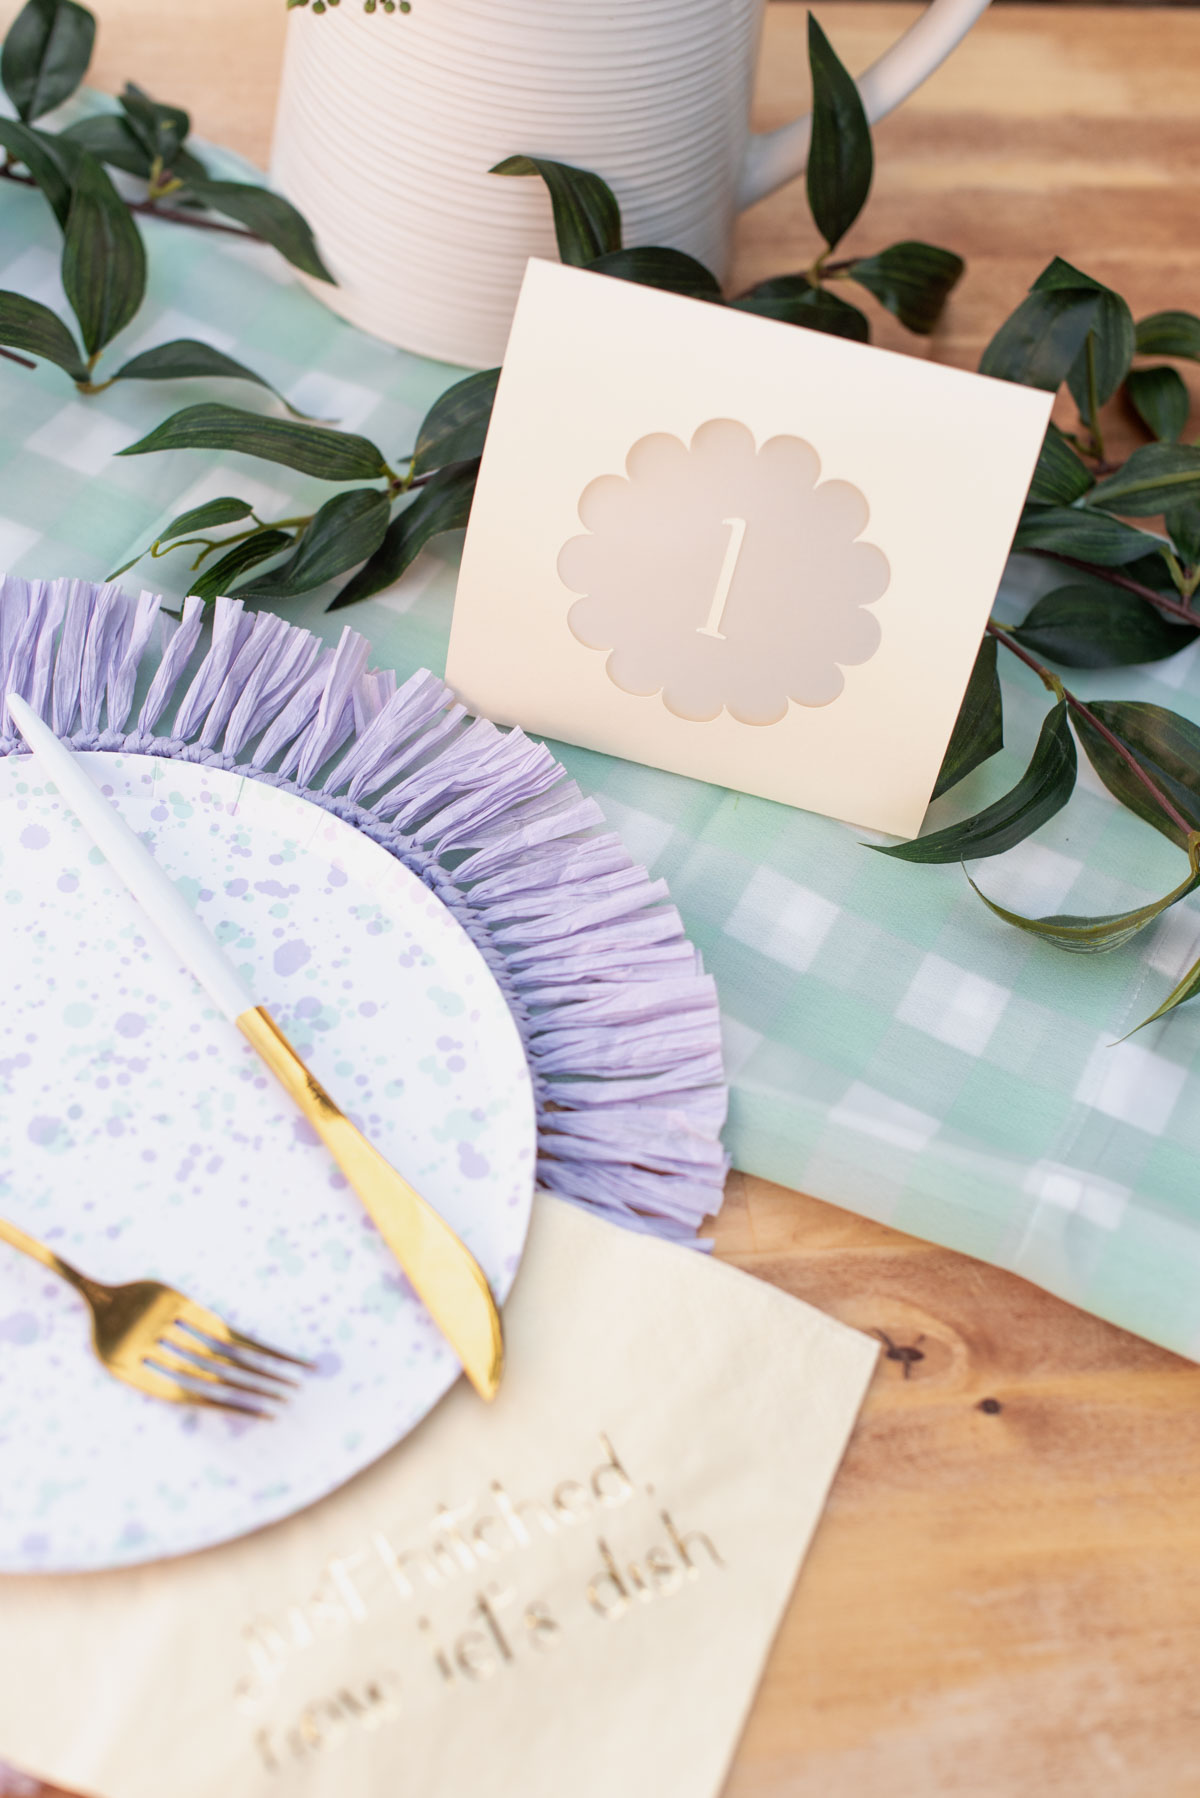
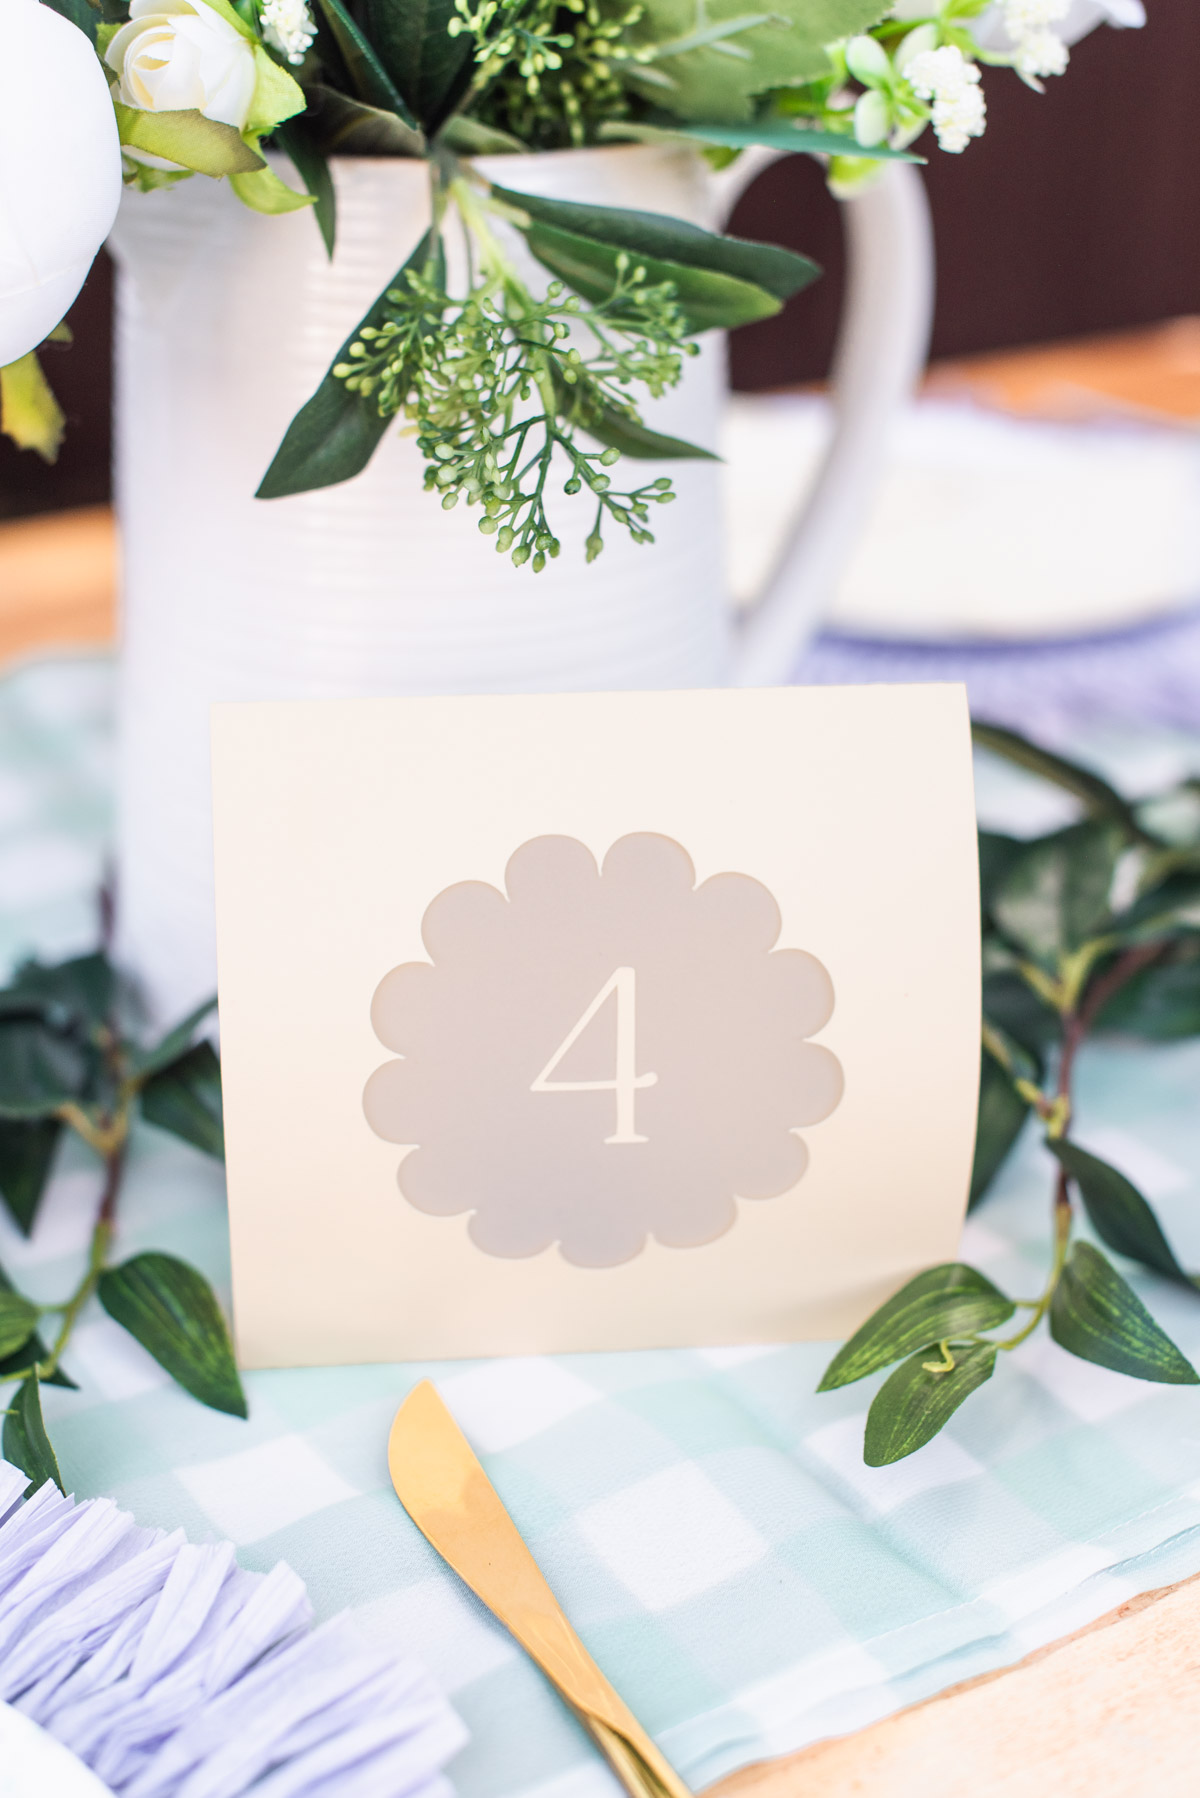
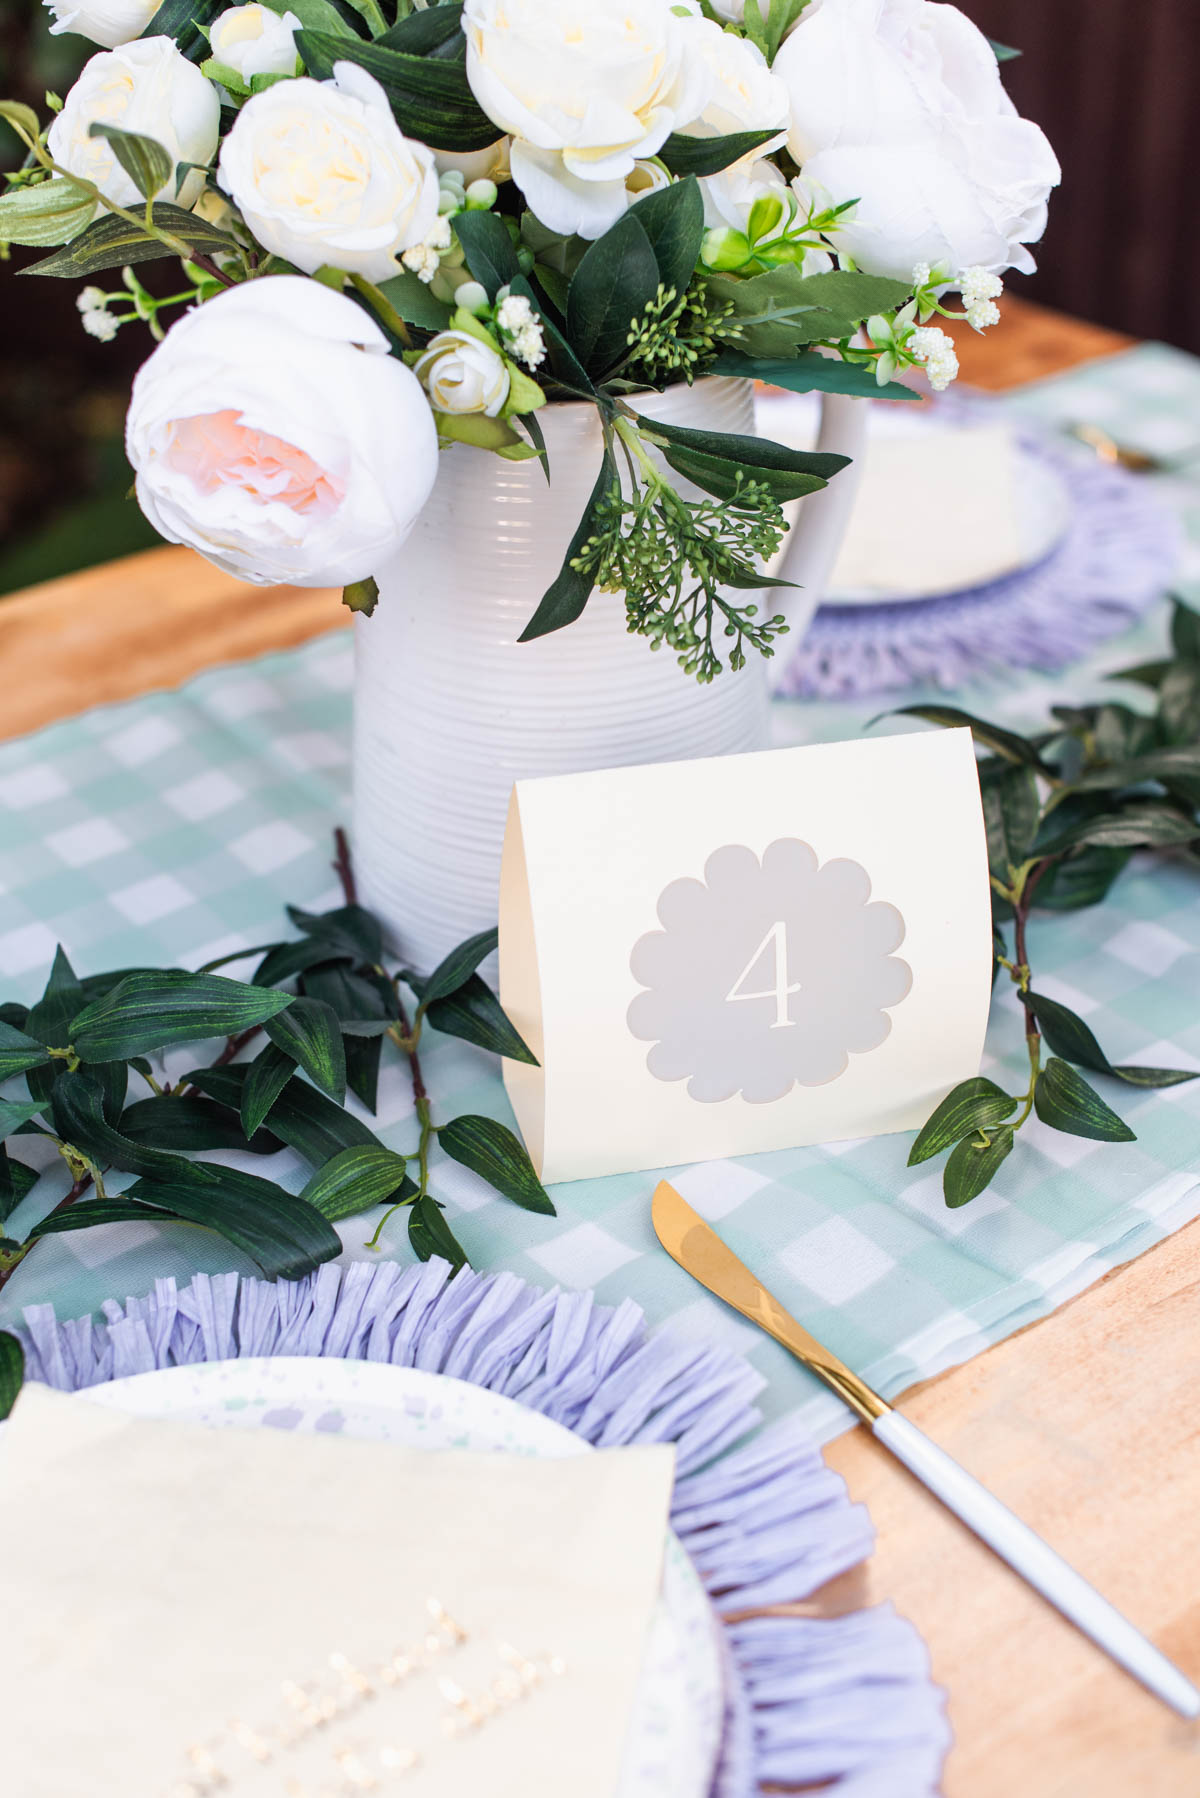
Soft candlelight and recyclable table numbers in one? Yes, please! These DIY table number luminaries are the kind of stylish, functional, and oh-so-cheerful décor that makes any handmade wedding feel extra personal — especially when you can make them yourself using your Cricut cutting machine, cardstock, and translucent vellum paper.
If you’ve been a longtime reader, you already know we love a good wedding table number project, so it was only a matter of time before we created a paper-crafted one! This design is extra special because it was created by our wedding DIY expert Chelsea herself — and it's also the very first SVG launching in Tidewater and Tulle's new wedding digital file shop coming this autumn, but this one is available now for its soft launch as we prepare things behind the scenes!
While we were personally inspired by a lilac and butter yellow color palette and casual chic backyard wedding aesthetic for this design, this easy Cricut project can add a warm, glowing touch to any tablescape. And with our exclusive SVG file, it's simple to personalize the design to match your wedding style. (Bonus: it's versatile enough for engagement parties, wedding showers, and even non-wedding events, too!)
FAQs About This Project
What's the best cardstock weight for luminaries?
For beginner crafters, paper weight can be really confusing since the U.S. uses pounds (lb) while the UK and much of the world use grams per square meter (gsm). What's trickier is that the pound rating in the U.S. changes depending on the paper type and sheet size used during manufacturing — so 80lb cardstock isn't the same as 80lb printer paper! Our brains hurt over this, too. So for Cricut crafts like this one, 65lb to 80lb cardstock (or 175gsm to 250gsm) is ideal. It's sturdy enough to stand up as a luminary but still cuts cleanly and folds easily. The cardstock we've used is 225gsm and the vellum is 140gsm.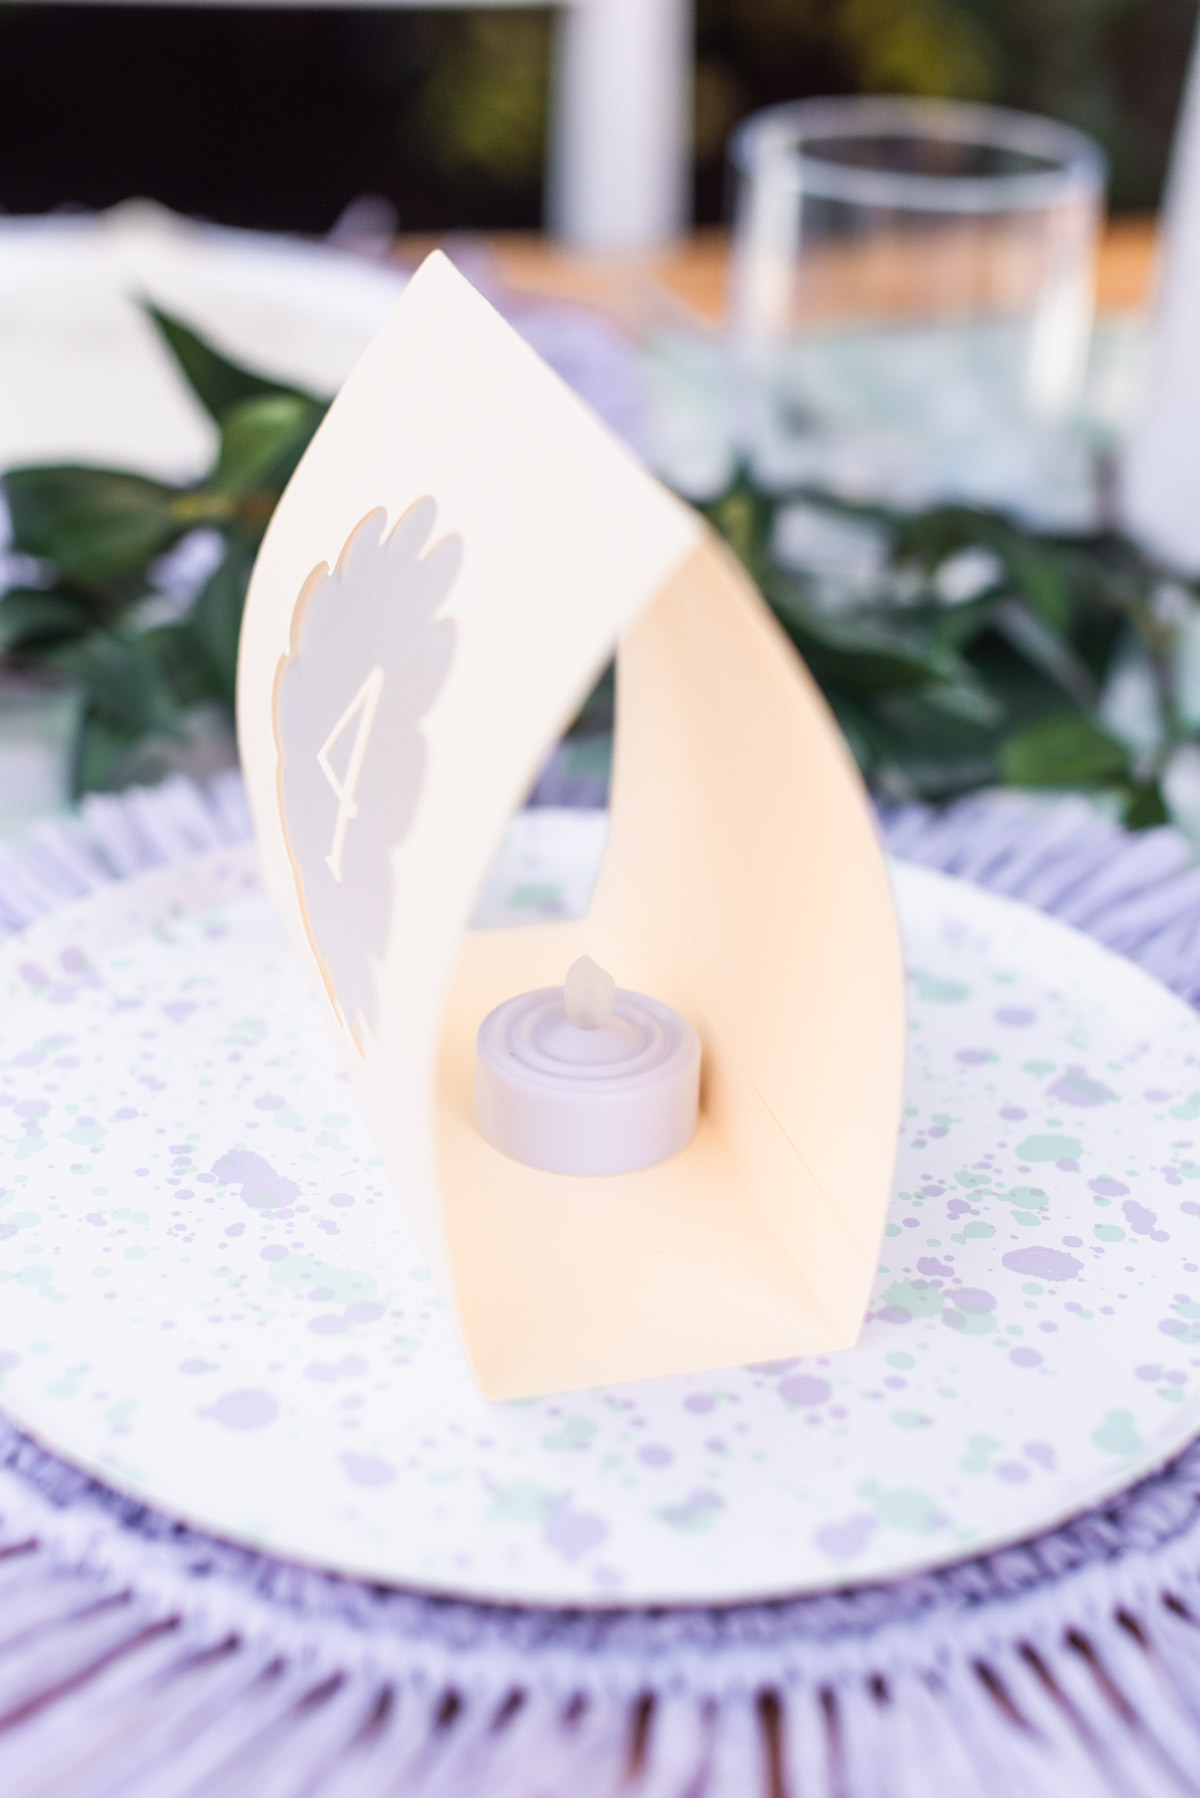
Can I use real candles in these luminaries?
Okay, we know this is silly to even say, but just in case! No, this is made of a tented paper and definitely will not bring your wedding joy if you've got an open flame. Always use battery-operated LED tealight candles. Ours are 1.5" (3.8cm) wide.Can I customize the numbers or font in the SVG file?
Absolutely! If you're familiar with Design Space, you can delete all of the number layers and just use the blank luminary tent layer in the SVG to add your own numbers or initials! This luminary was designed to be intentionally simple so you can adapt it to any theme or style. Be sure to change the color of your new numbers on your Canvas screen to match the tent if you'd like your Cricut machine to cut them all at the same time.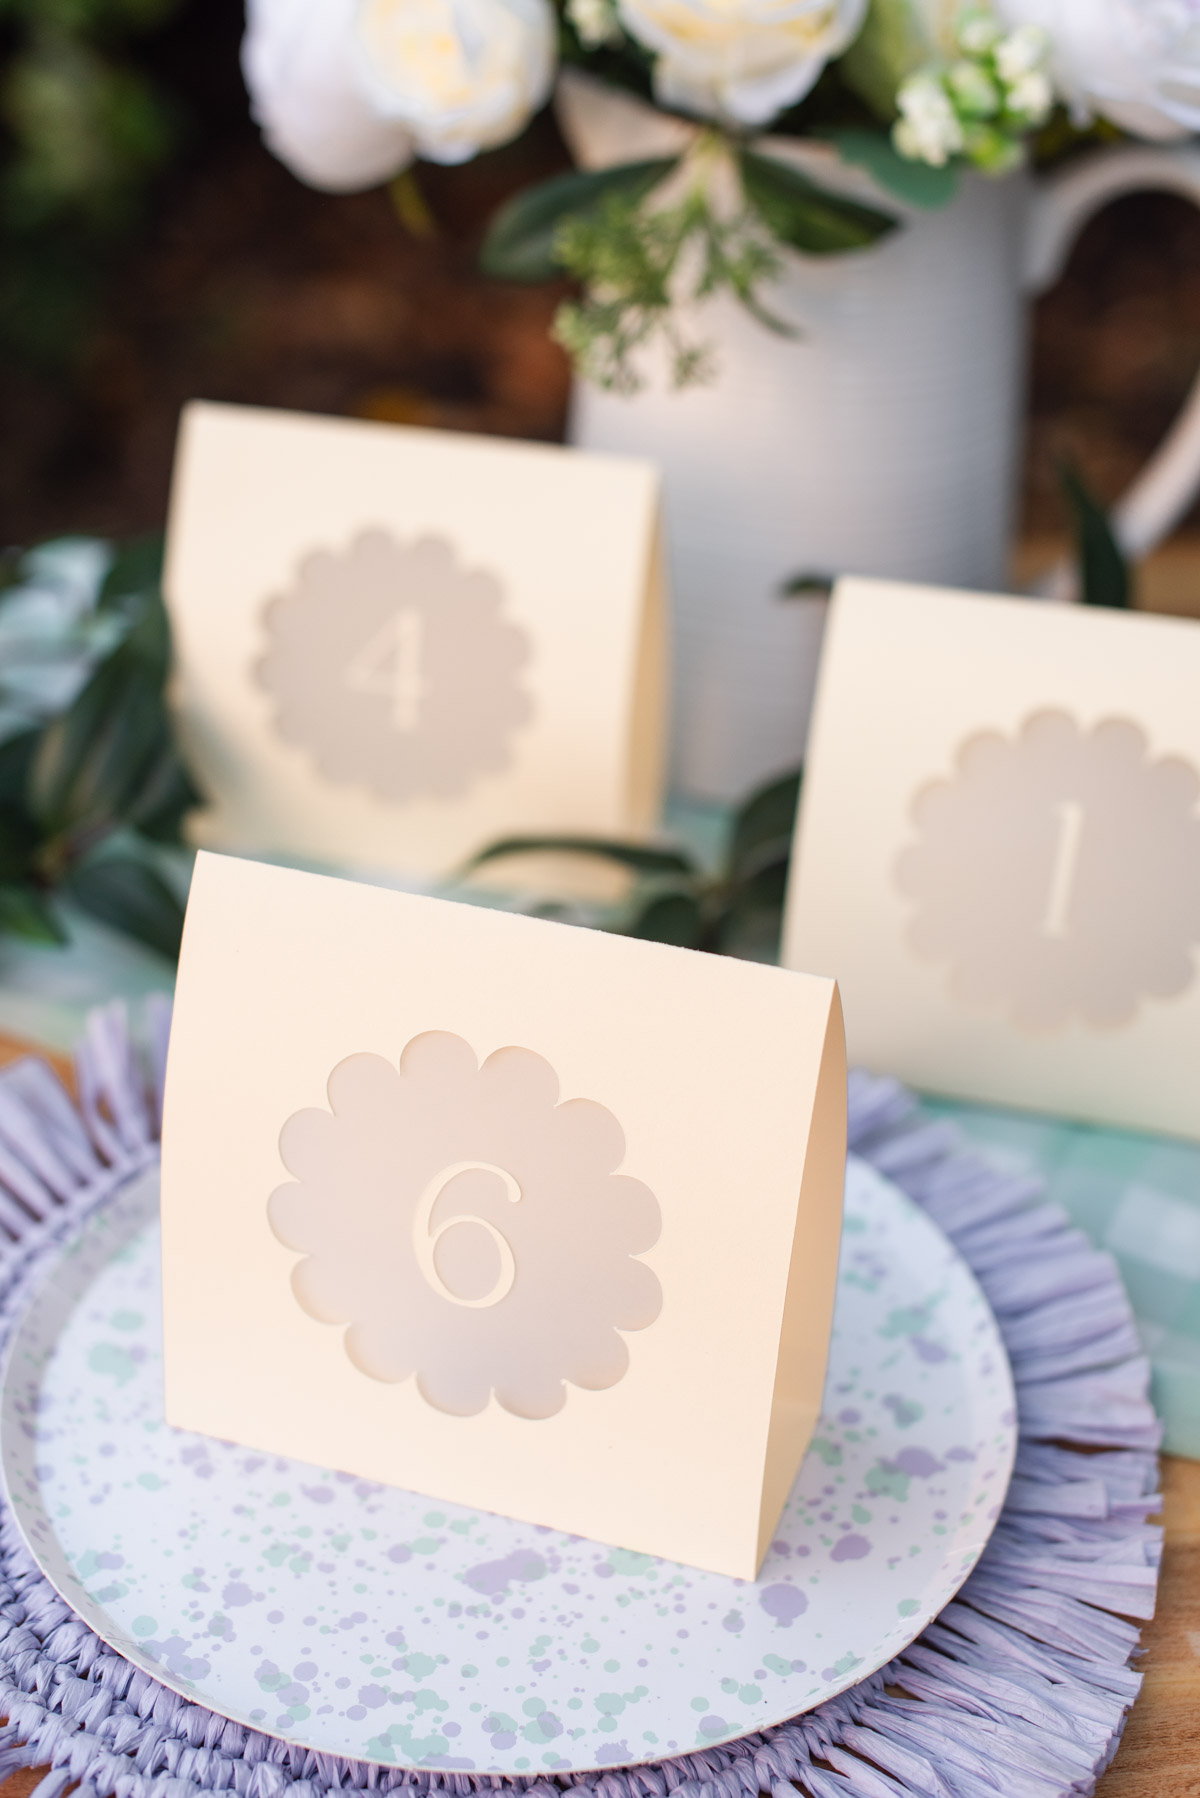
Create Gorgeous Glowing Table Numbers for Your Wedding
Skill Level: BeginnerSupplies Needed
• Our exclusively designed Wedding Table Number Luminary SVG File• Digital cutting machine (we've used a Cricut Explore)
• Medium weight cardstock (at least 11x17in or A3 size)
• Vellum paper (at least 5 x 5in / 12.7 x 12.7cm)
• 12x24 LightGrip cutting mat (for the luminary)
• LightGrip cutting mat (for the vellum, if wanting to use a smaller mat)
• Fine-point blade
• Scoring stylus
• Brayer (optional)
• Scraper tool
• Quick-drying craft glue in precision tip bottle
• Battery-powered LED tealight candles
Project Size Note: This project's assembled size is 5 x 5 x 2.5in (12.7 x 12.7 x 6.35cm).
Compatible Cricut Machines
• Explore family• Maker family
Base Material Setting for Table Numbers
For the luminary tent and number, select Medium Cardstock (unless using a different weight paper).For the vellum layer, select Vellum.

Step-by-Step Instructions: How to Make Table Number Luminaries
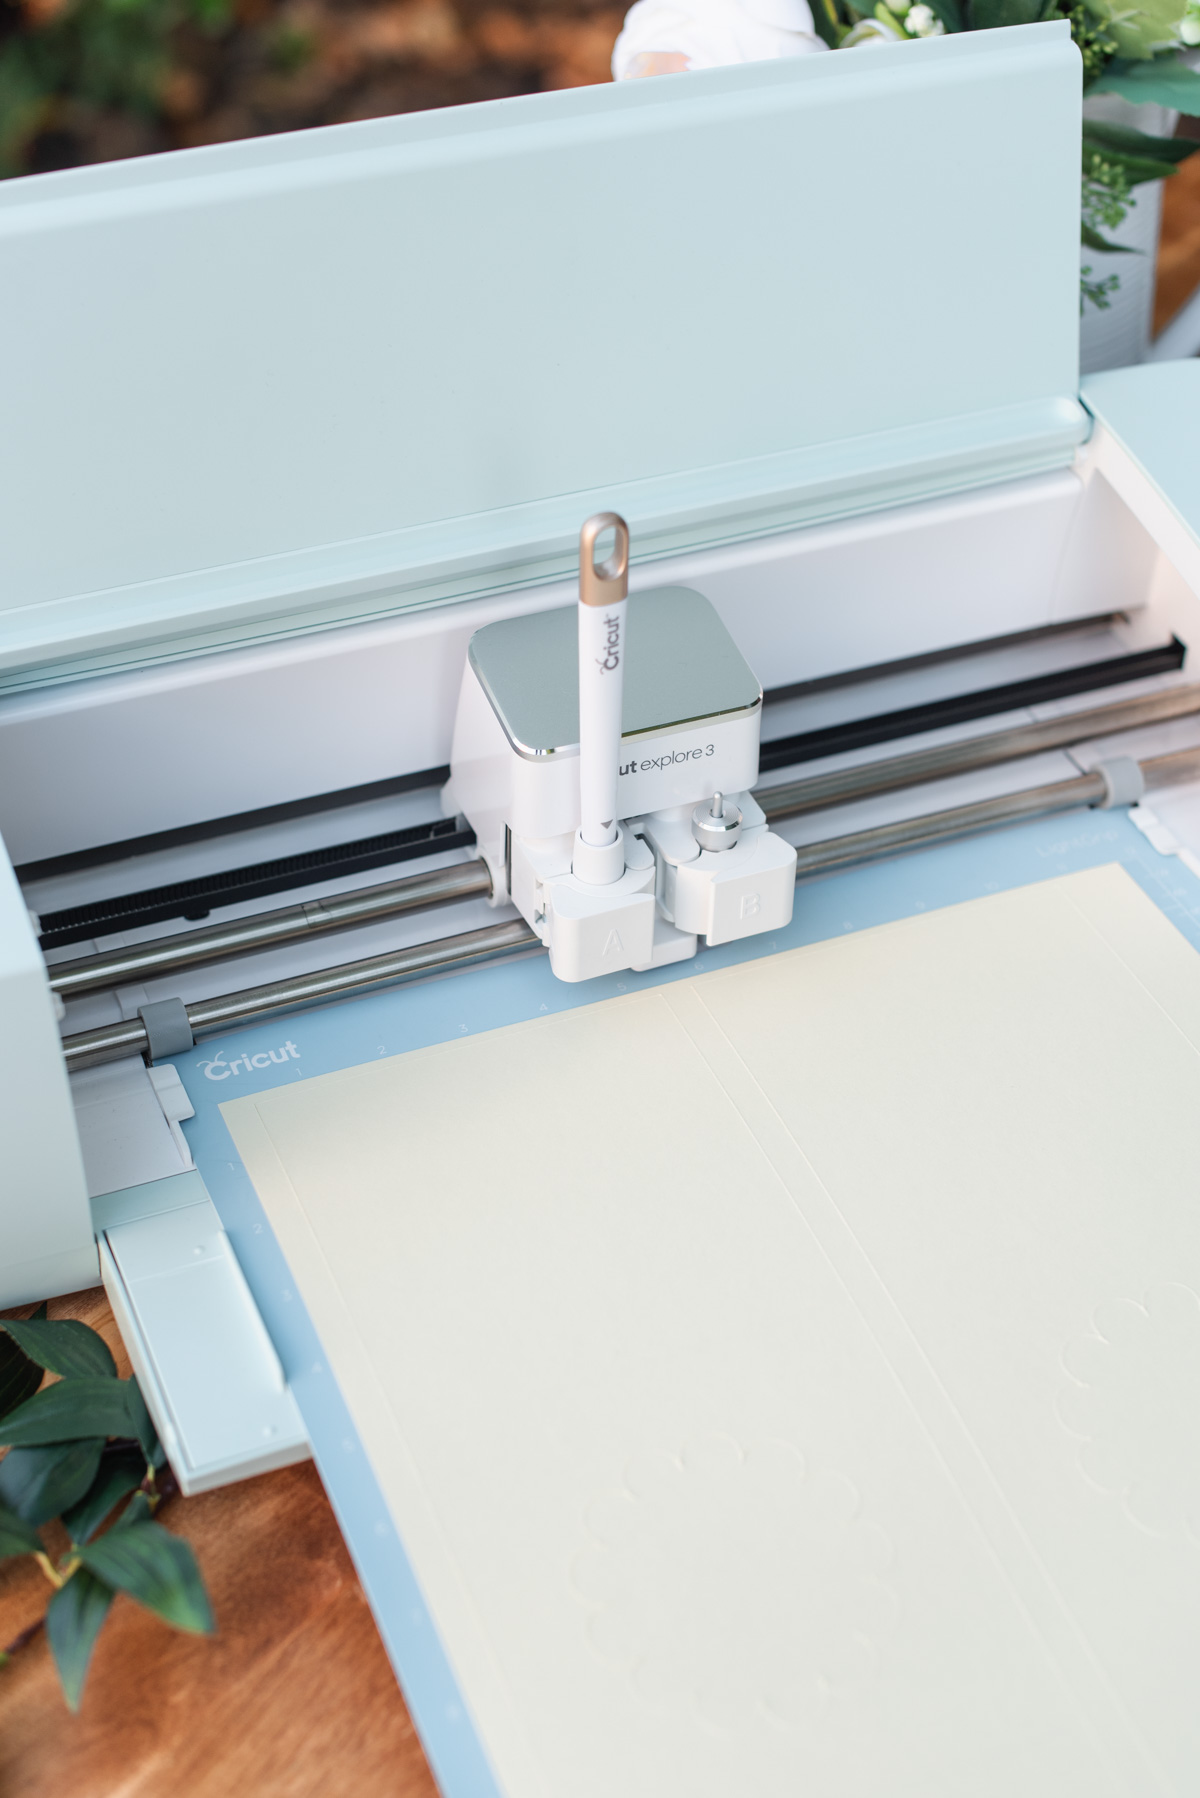
1. Purchase the SVG file and prep your project. Buy and download our exclusive SVG table number design that includes the luminary tent, numbers, and vellum layers. Unzip the file and upload the SVG file to Cricut Design Space (or your cutting machine's relevant software). Organize all of your materials.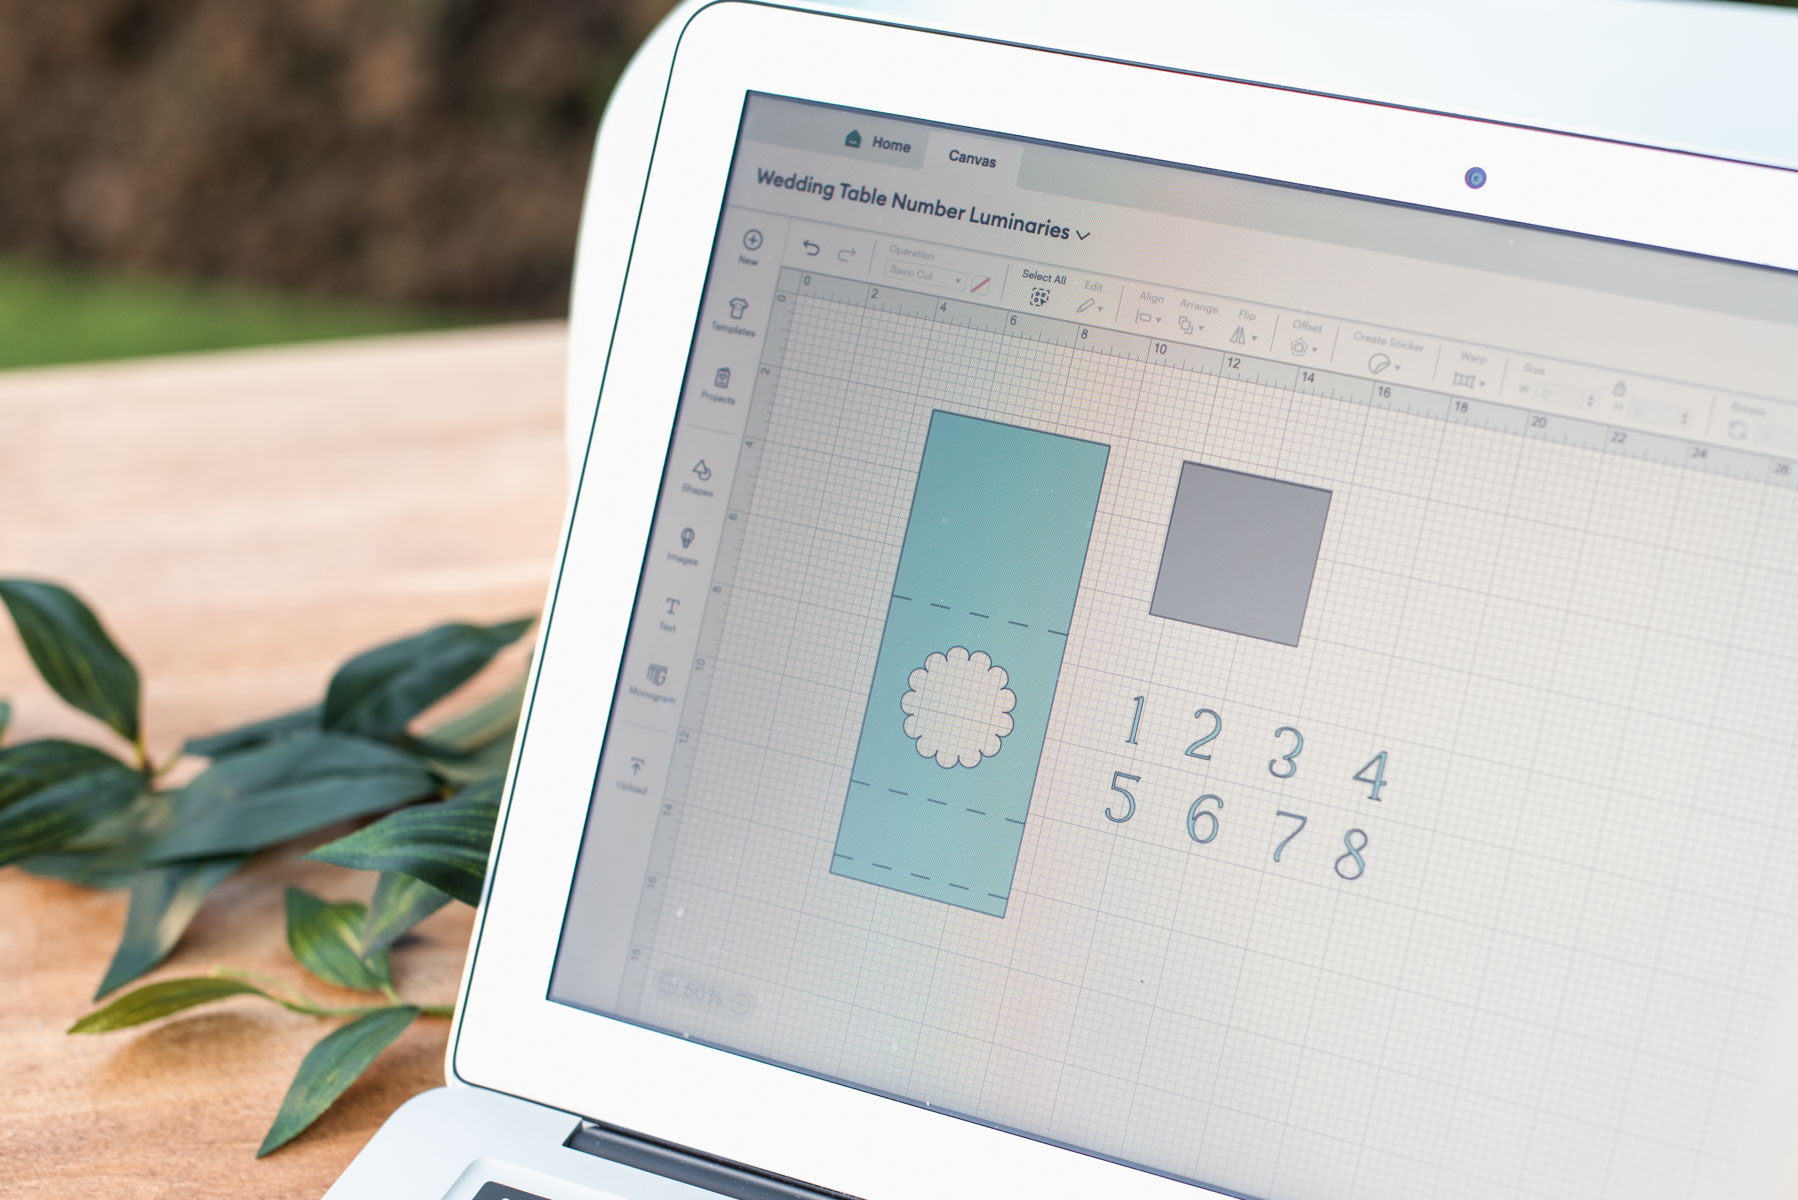
2. Ungroup and change the fold lines layer to Score operation. Once the SVG is added onto your Canvas screen, Ungroup your layers to make moving things around easier, then find the layer that looks like three horizontal lines. Highlight this layer and update the operation to Score. This layer then should appear with dotted lines. Once this is done, click and highlight the Score layer and the tent layer, then click Attach.
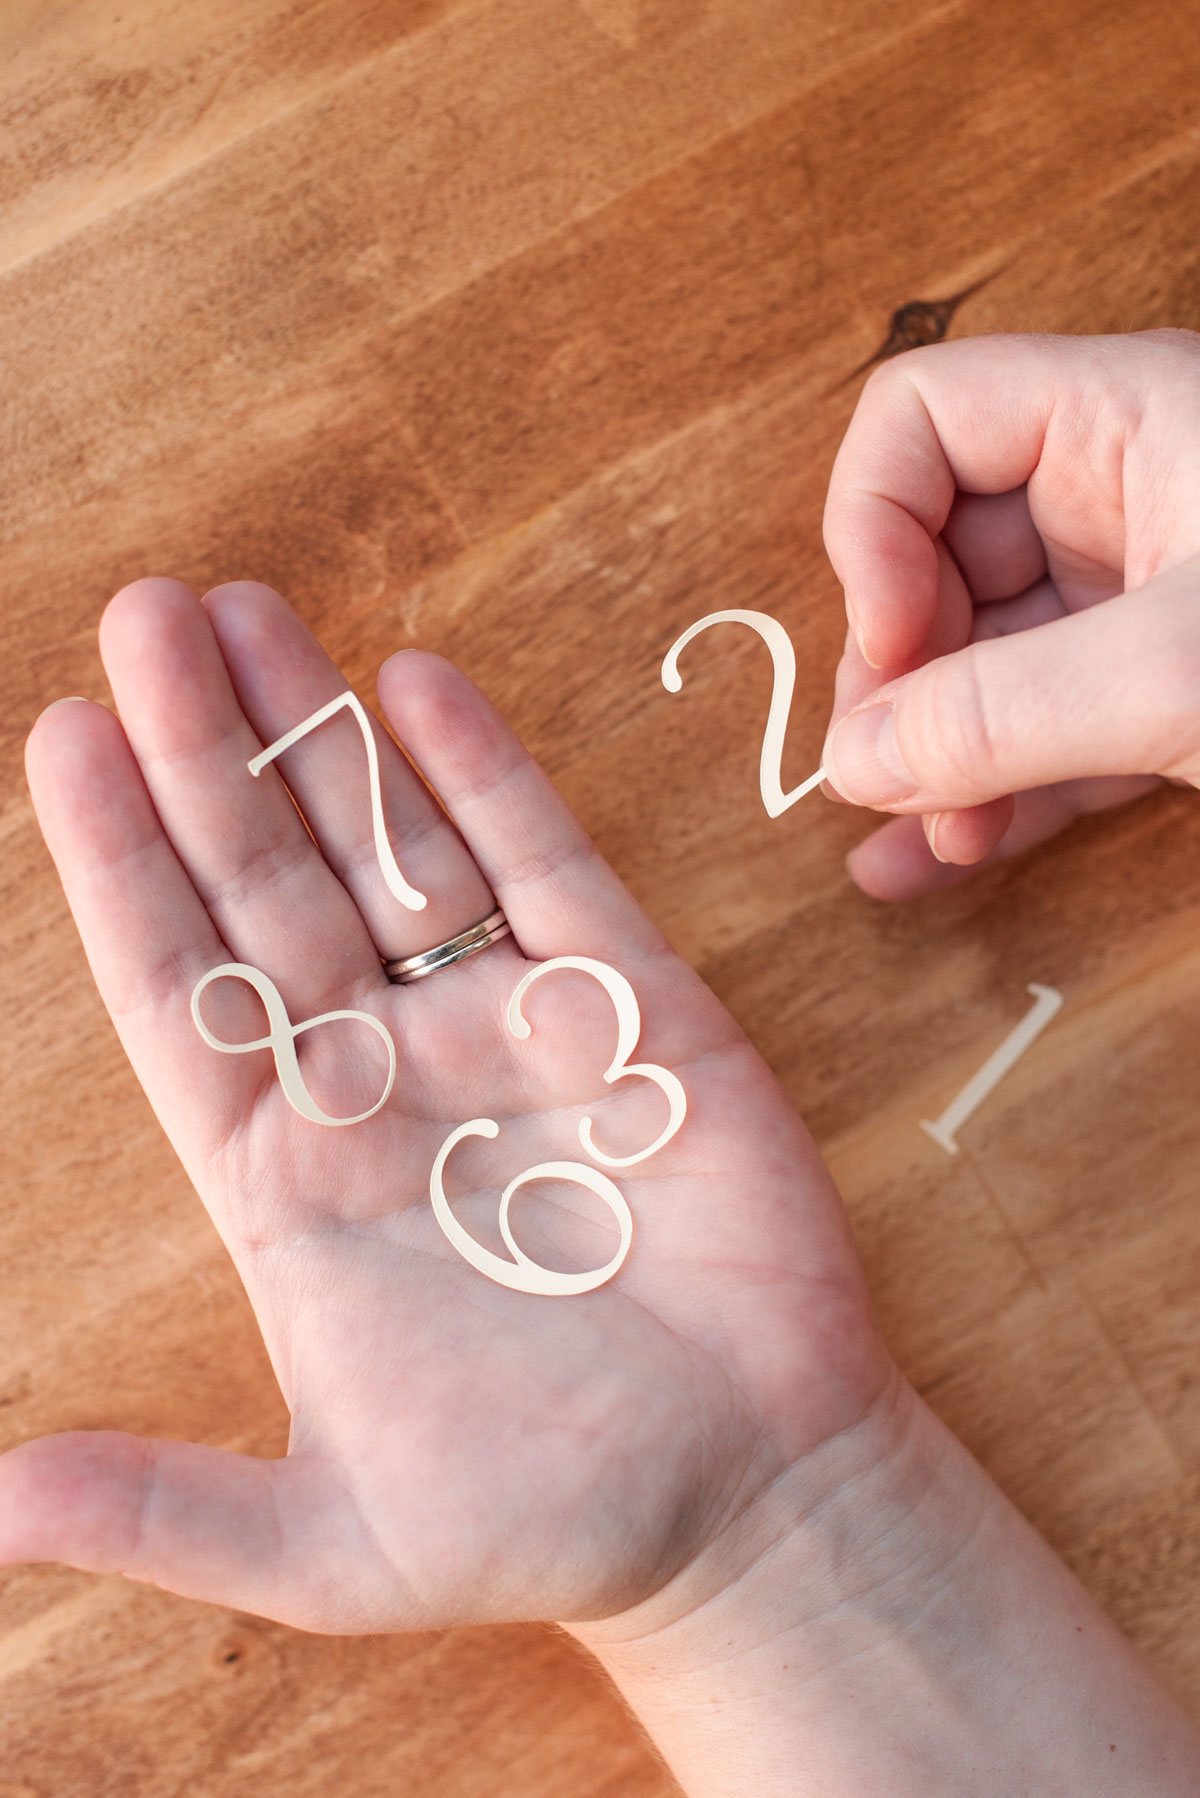
3. Customize your SVG layers. Delete the numbers that aren't relevant to your wedding. Move and hover the numbers into the scalloped circle shape cut-out, and resize to your style preferences. Your luminary tent and square layers are already pre-sized, so no need to do anything with those unless you'd like to change the size.
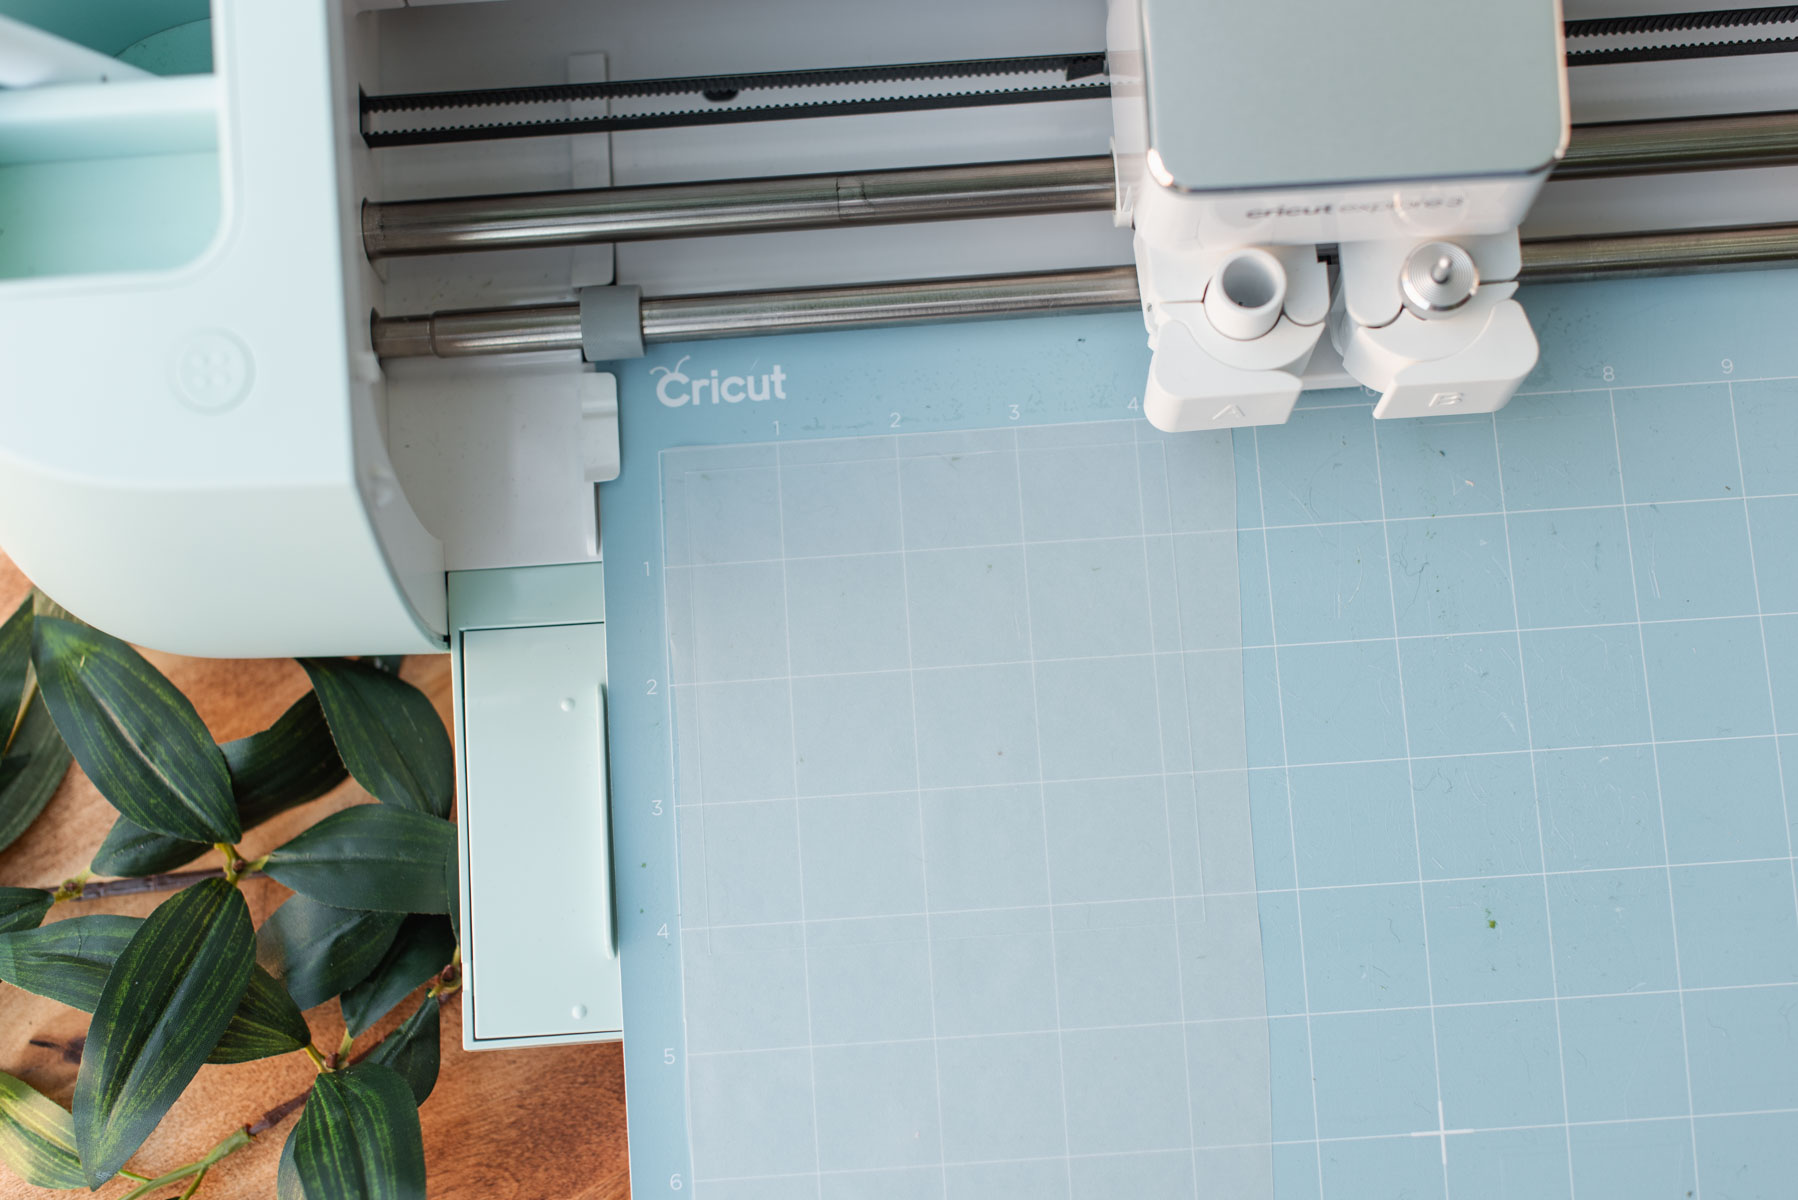
4. Prepare and cut. Once you're happy with everything, click Make. Position your materials on your cutting mats so it matches what's on your screen. Ready your scoring stylus as Design Space will prompt you when to insert. Click Continue and follow the on-screen instructions. After your machine has done its job, carefully bend back your cutting mat to remove your materials. Repeat all of these steps as many times as needed to match your table number count.
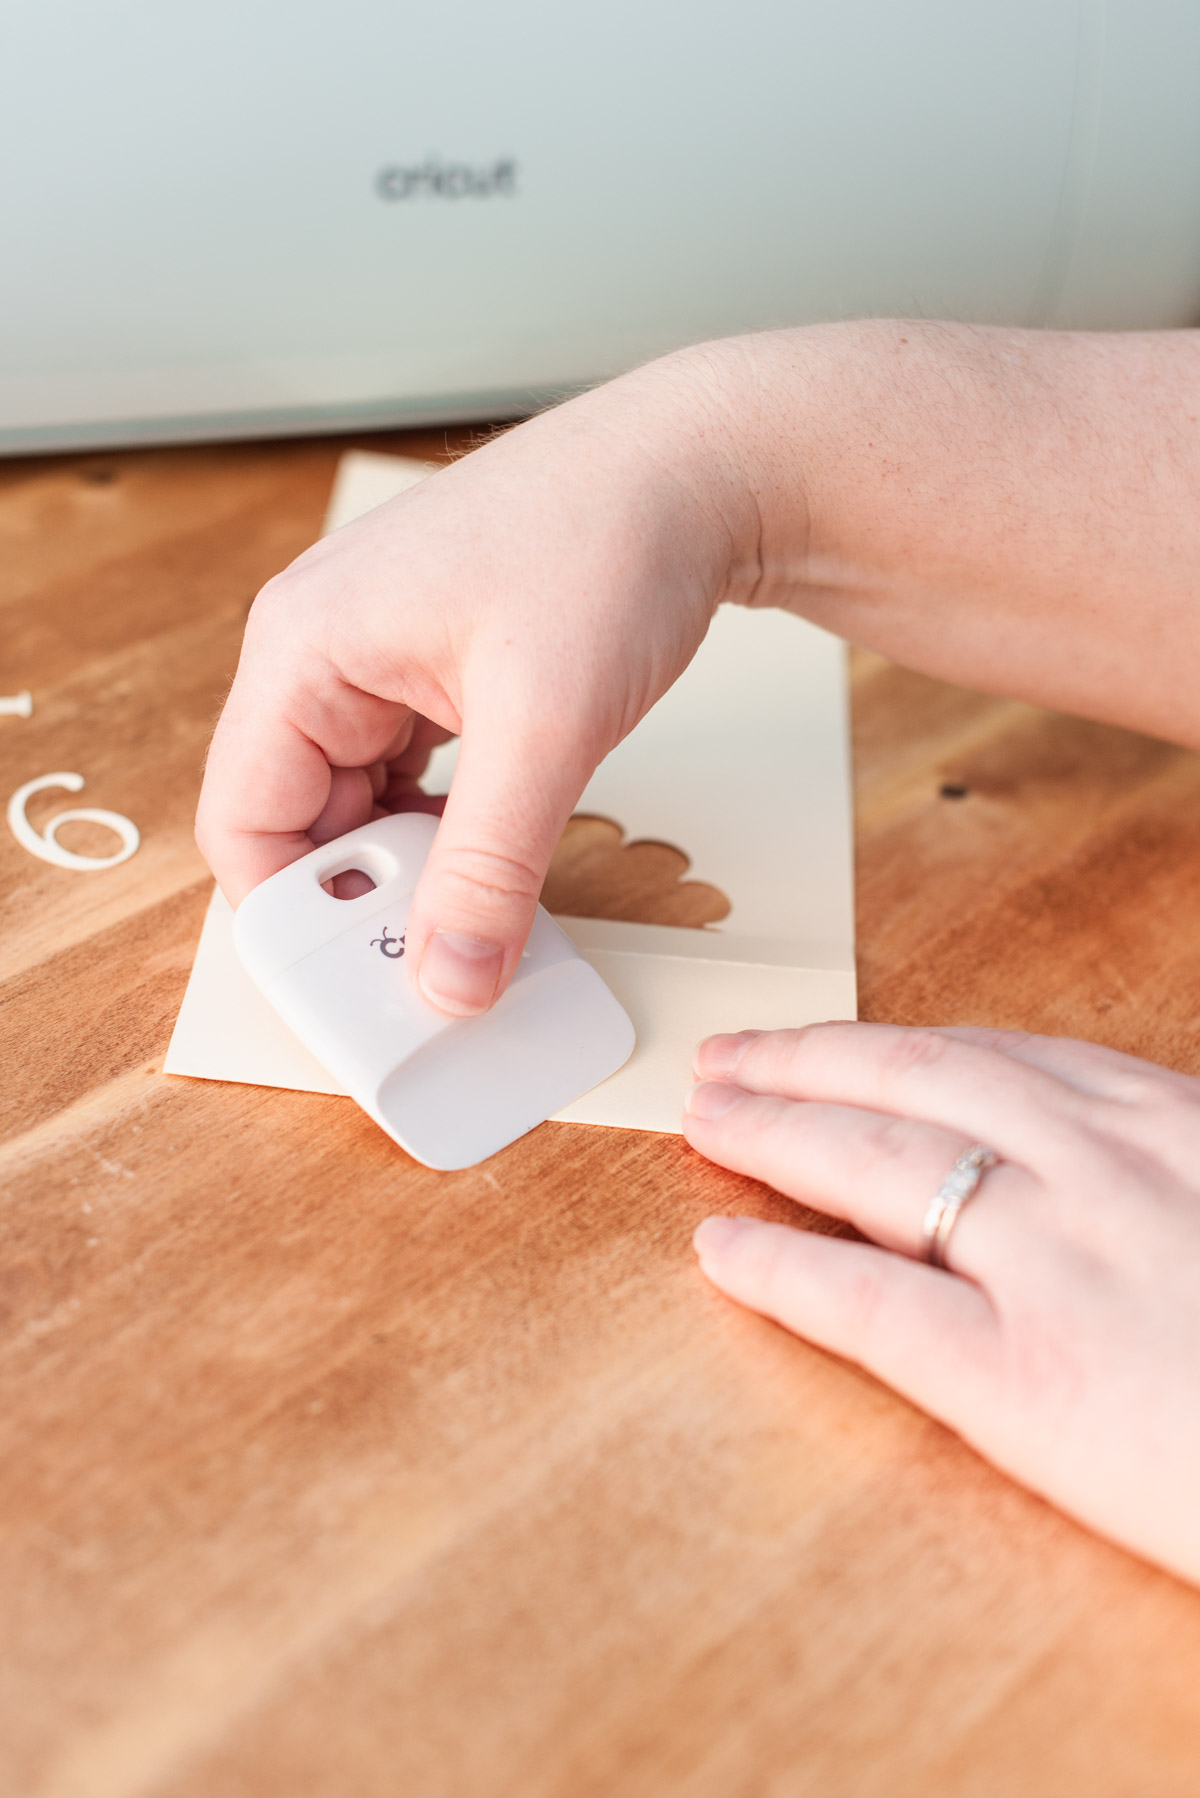
5. Crease your fold lines. Using your scraper tool, crease and give a good fold to all of the pre-scored lines on your cardstock.
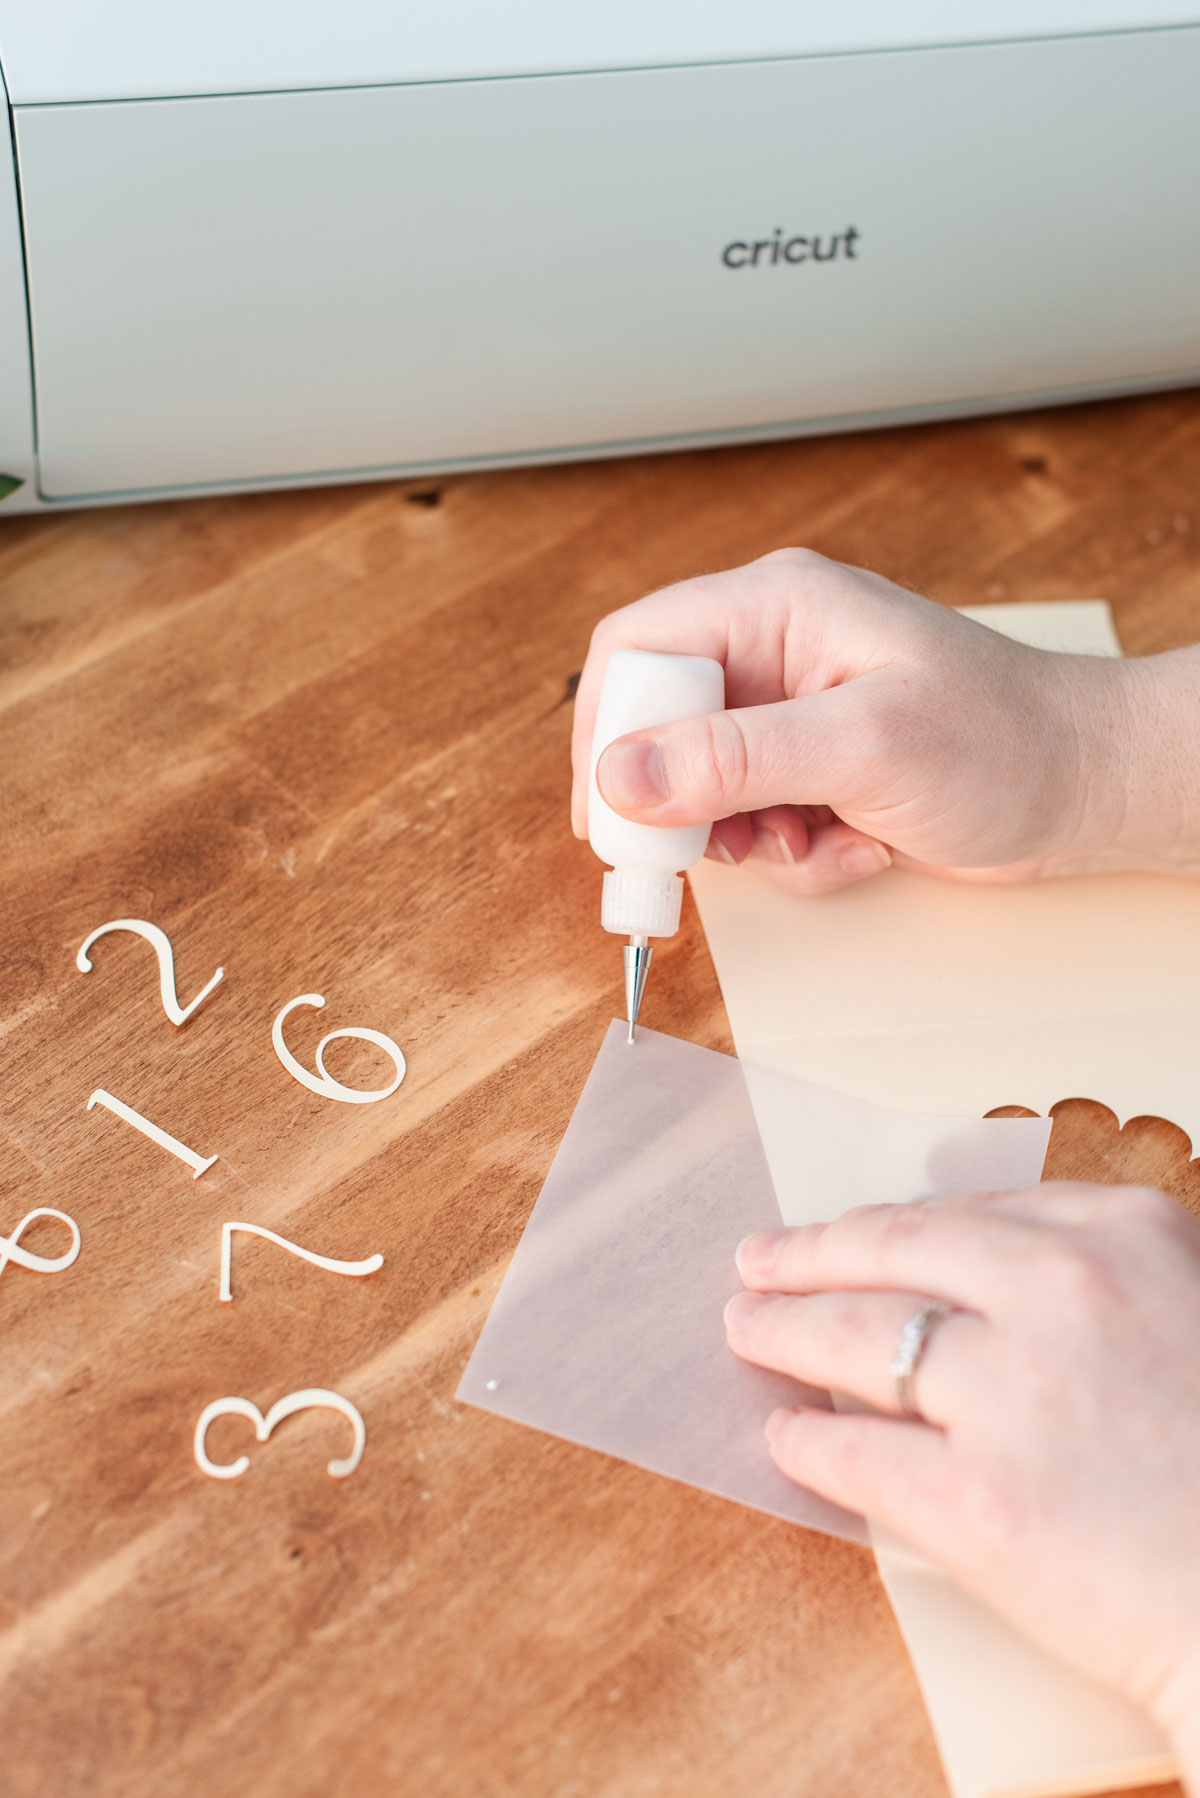
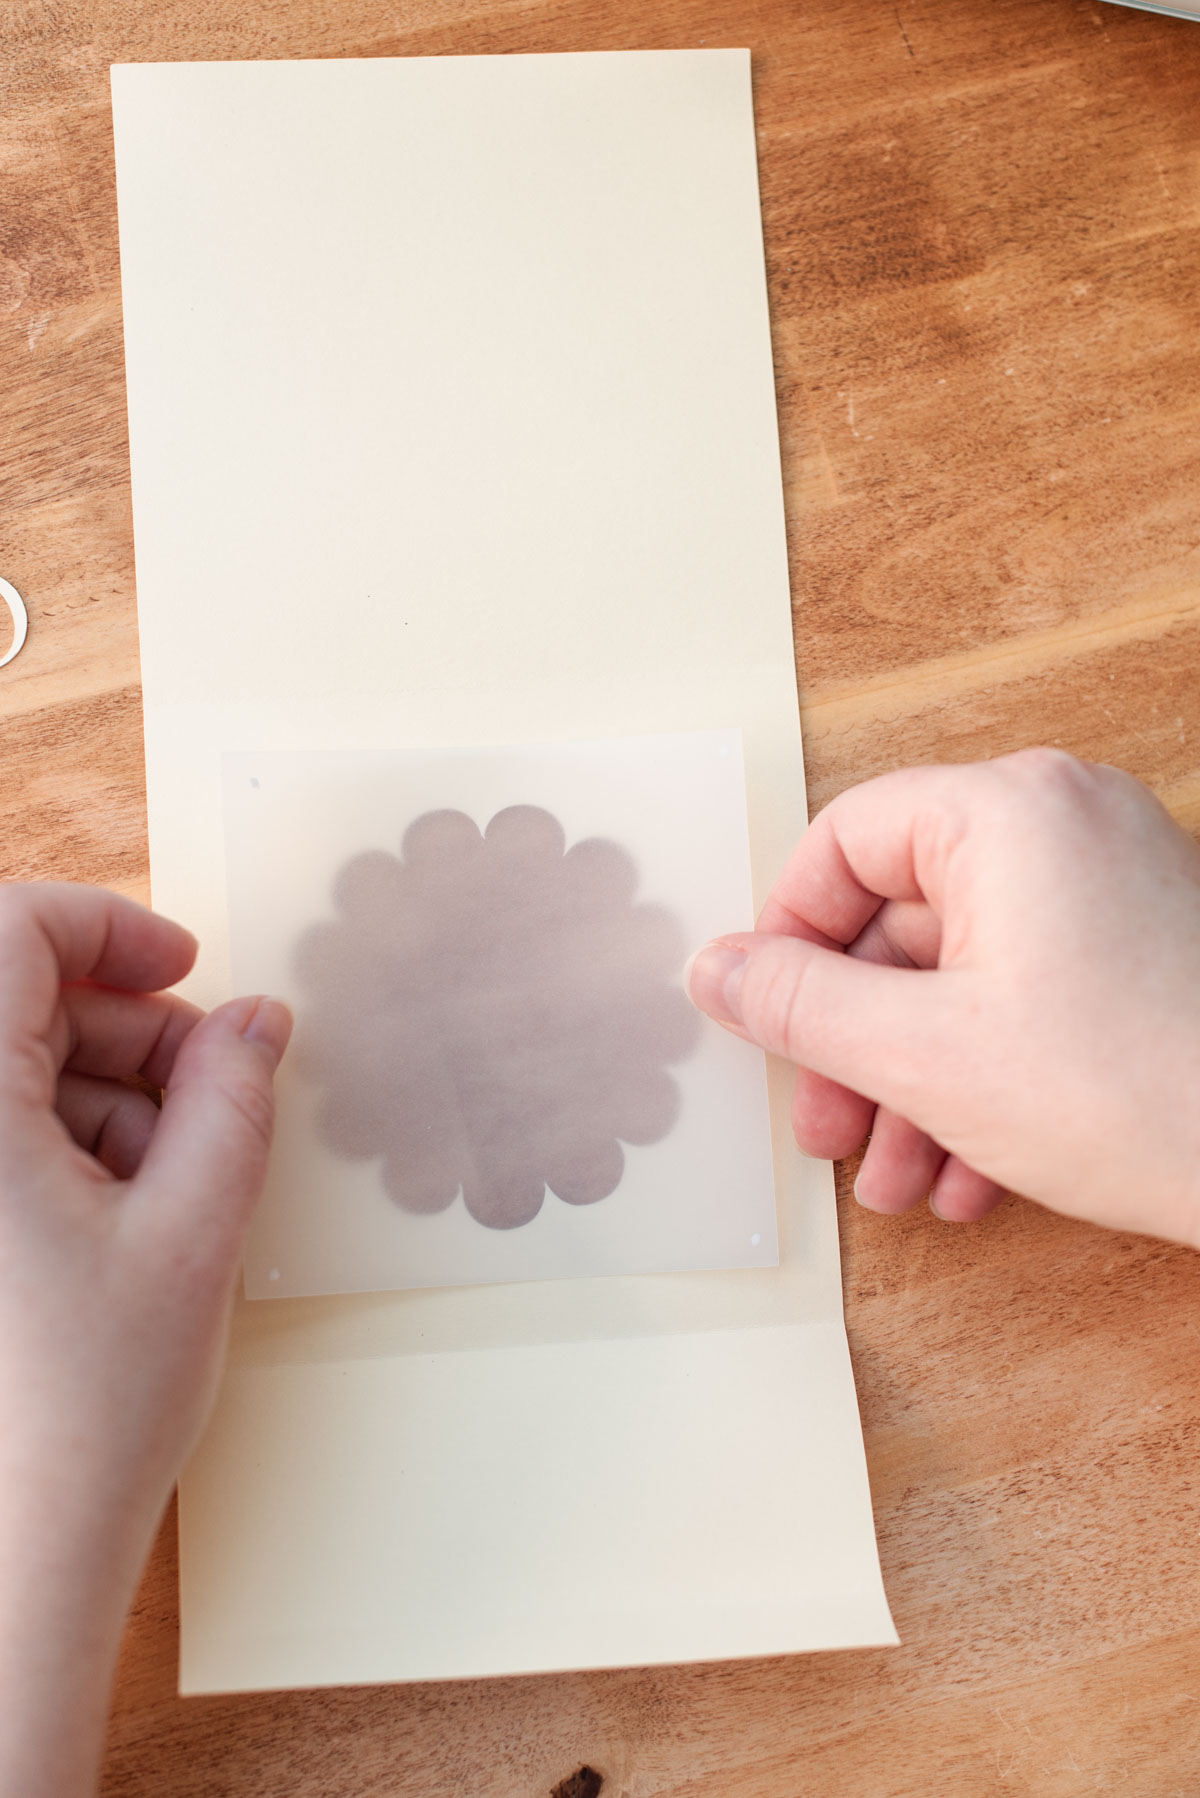
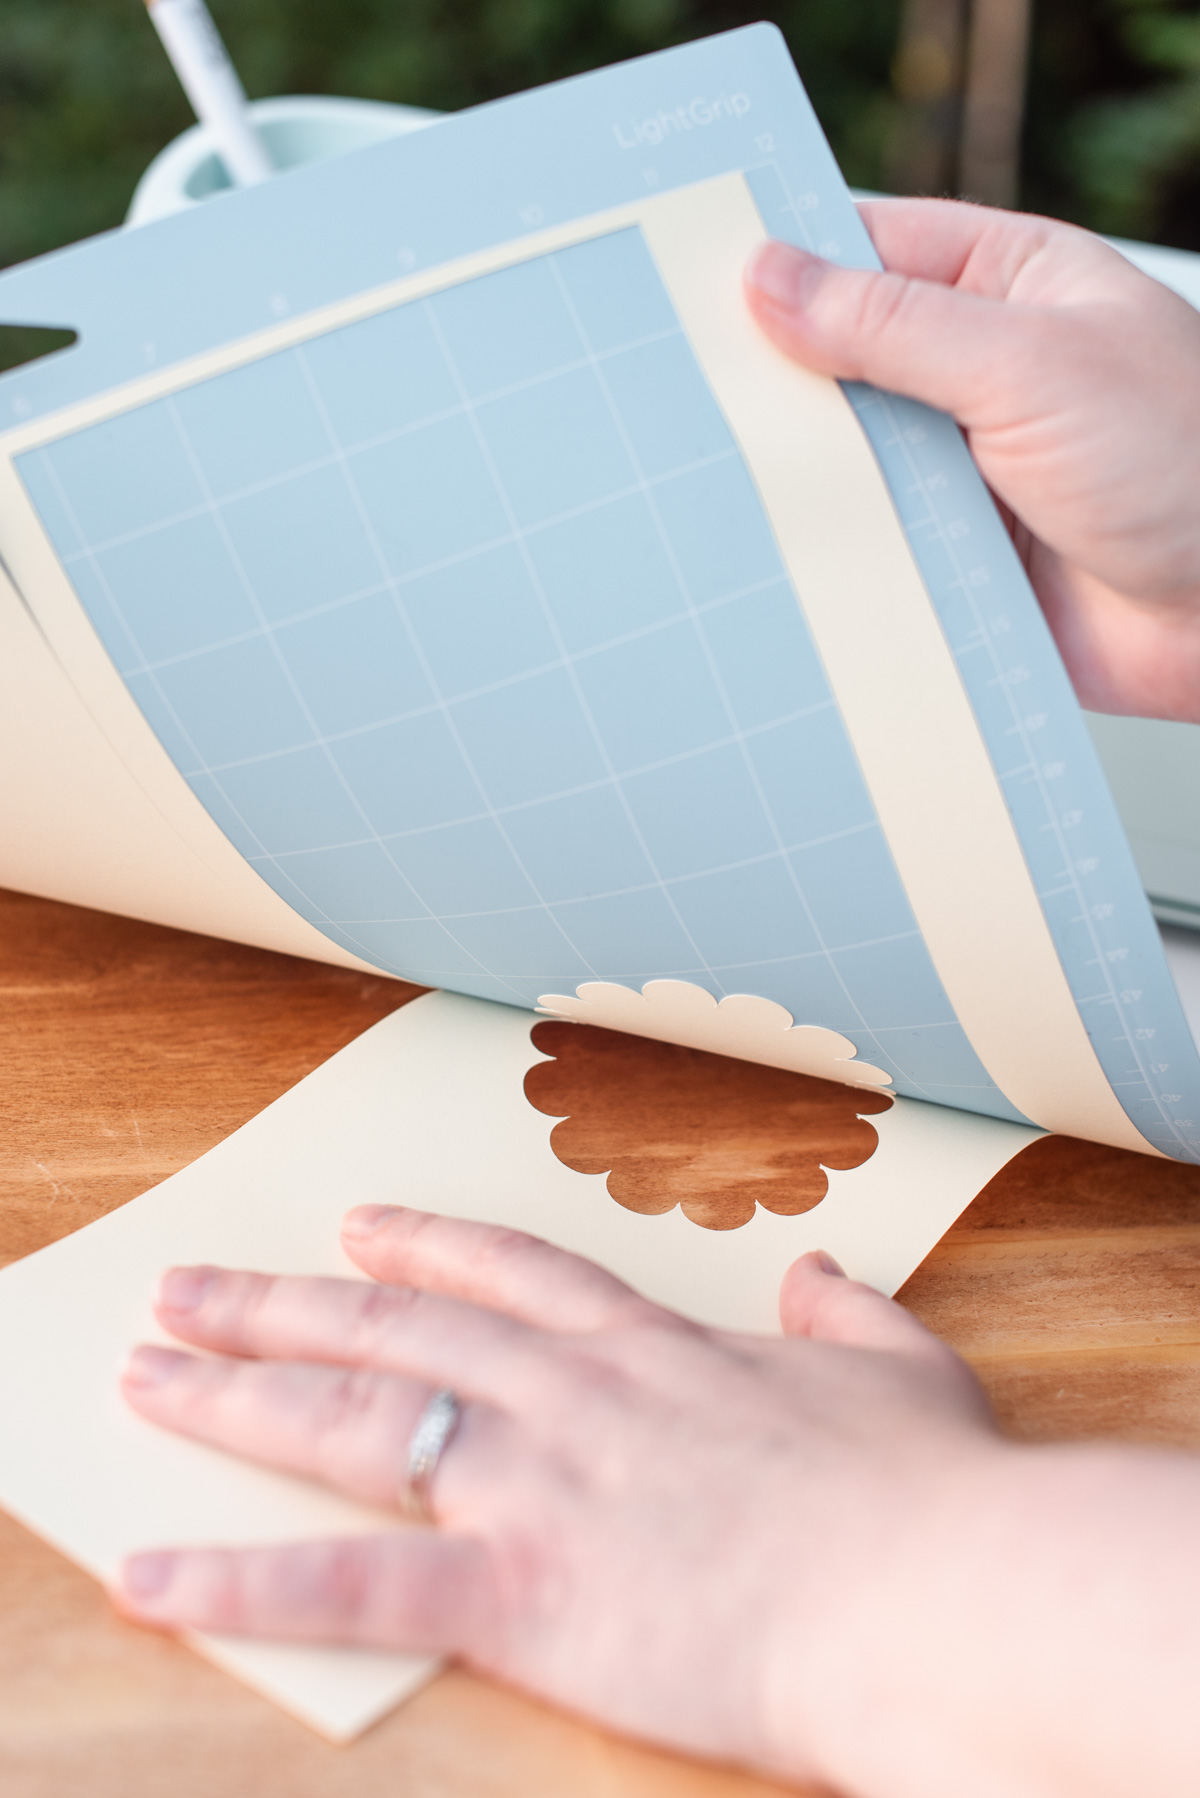
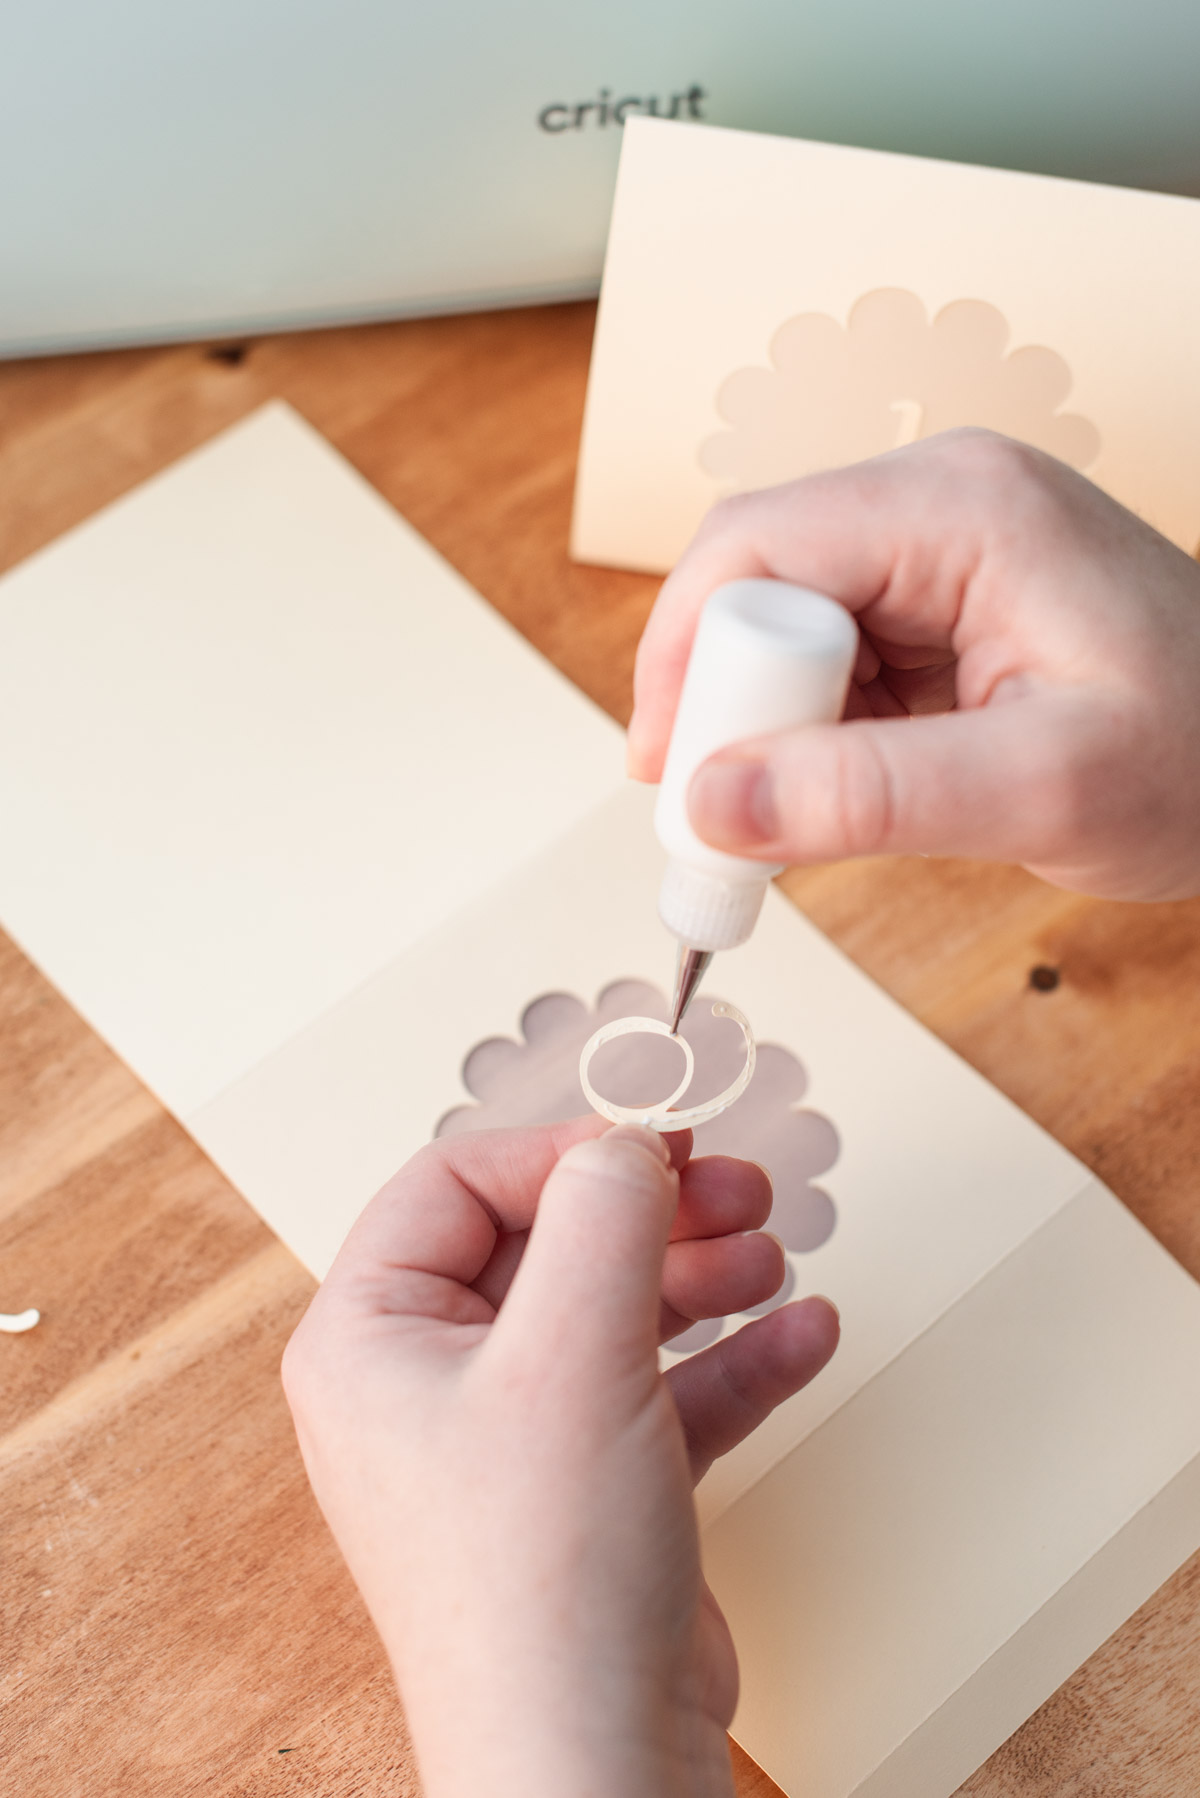
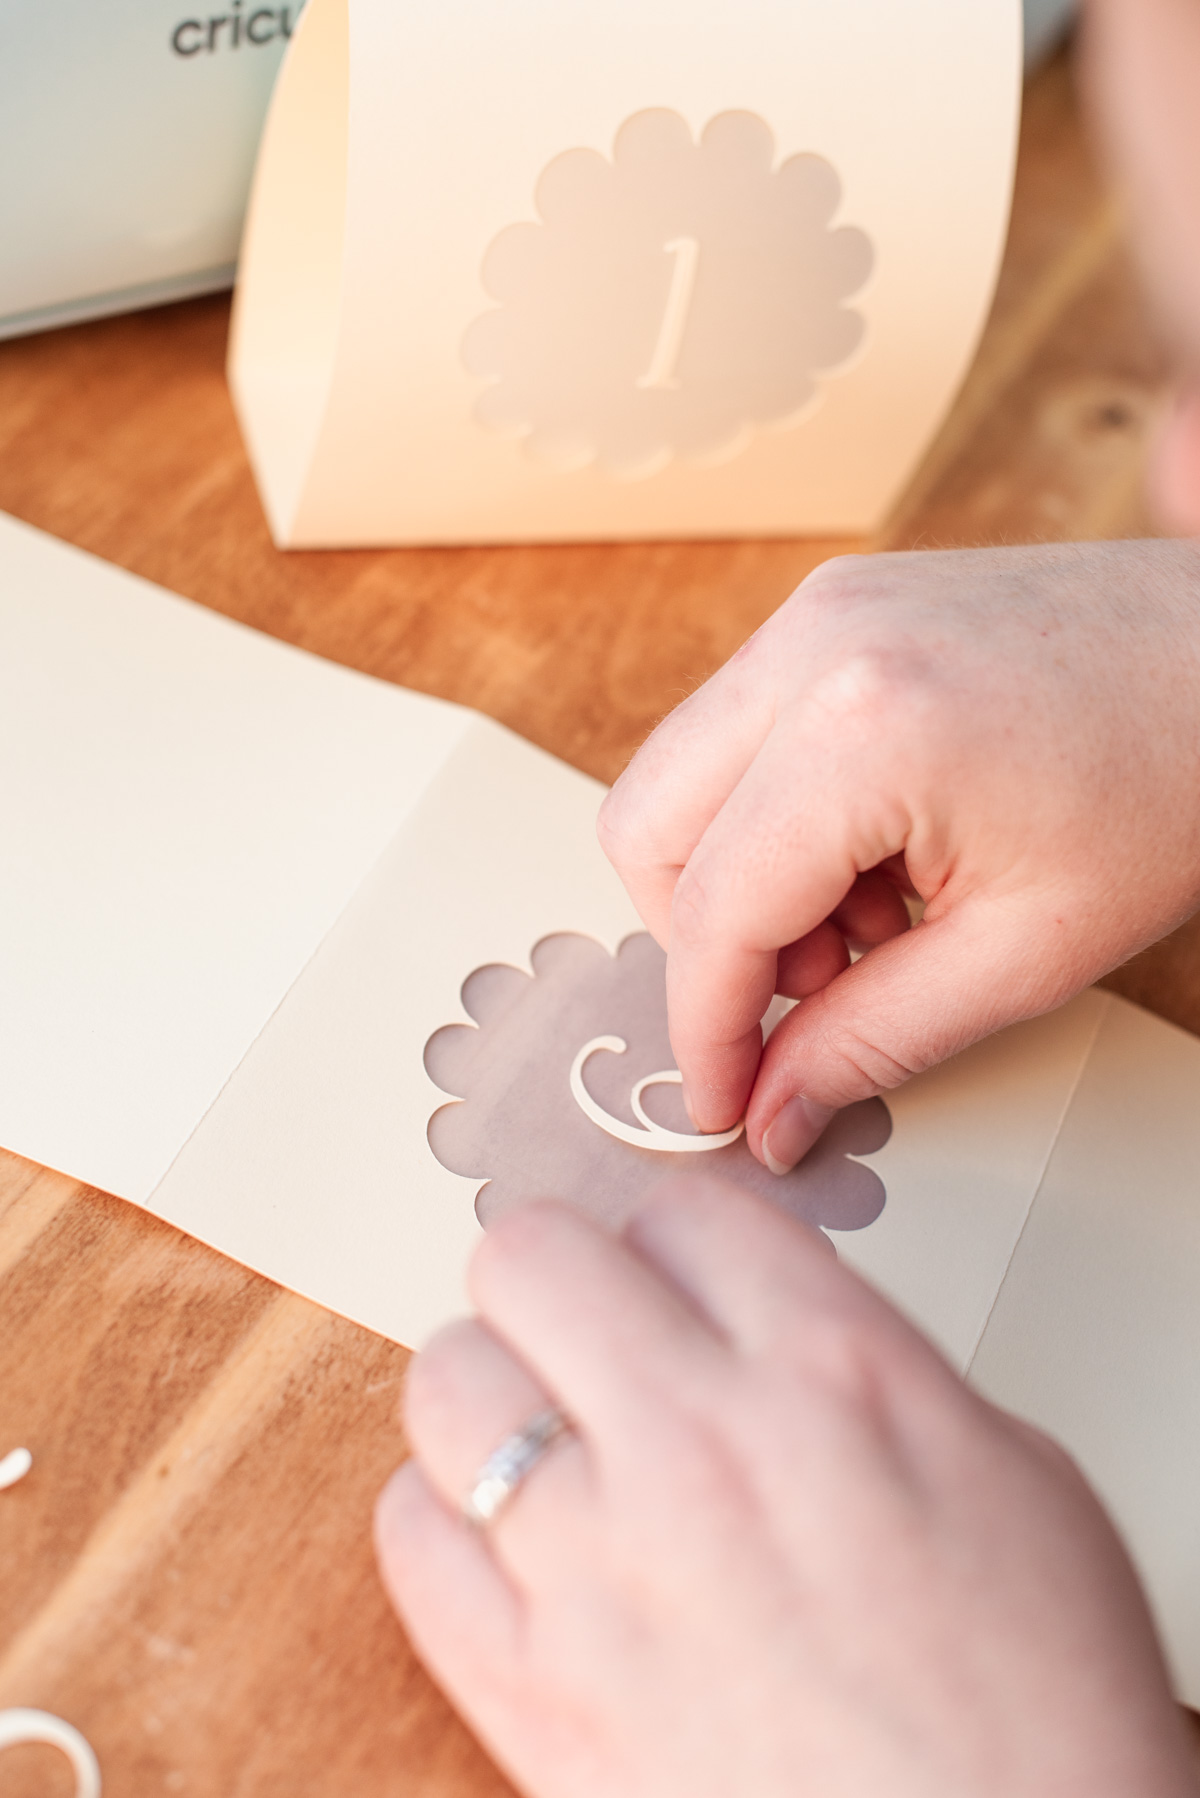
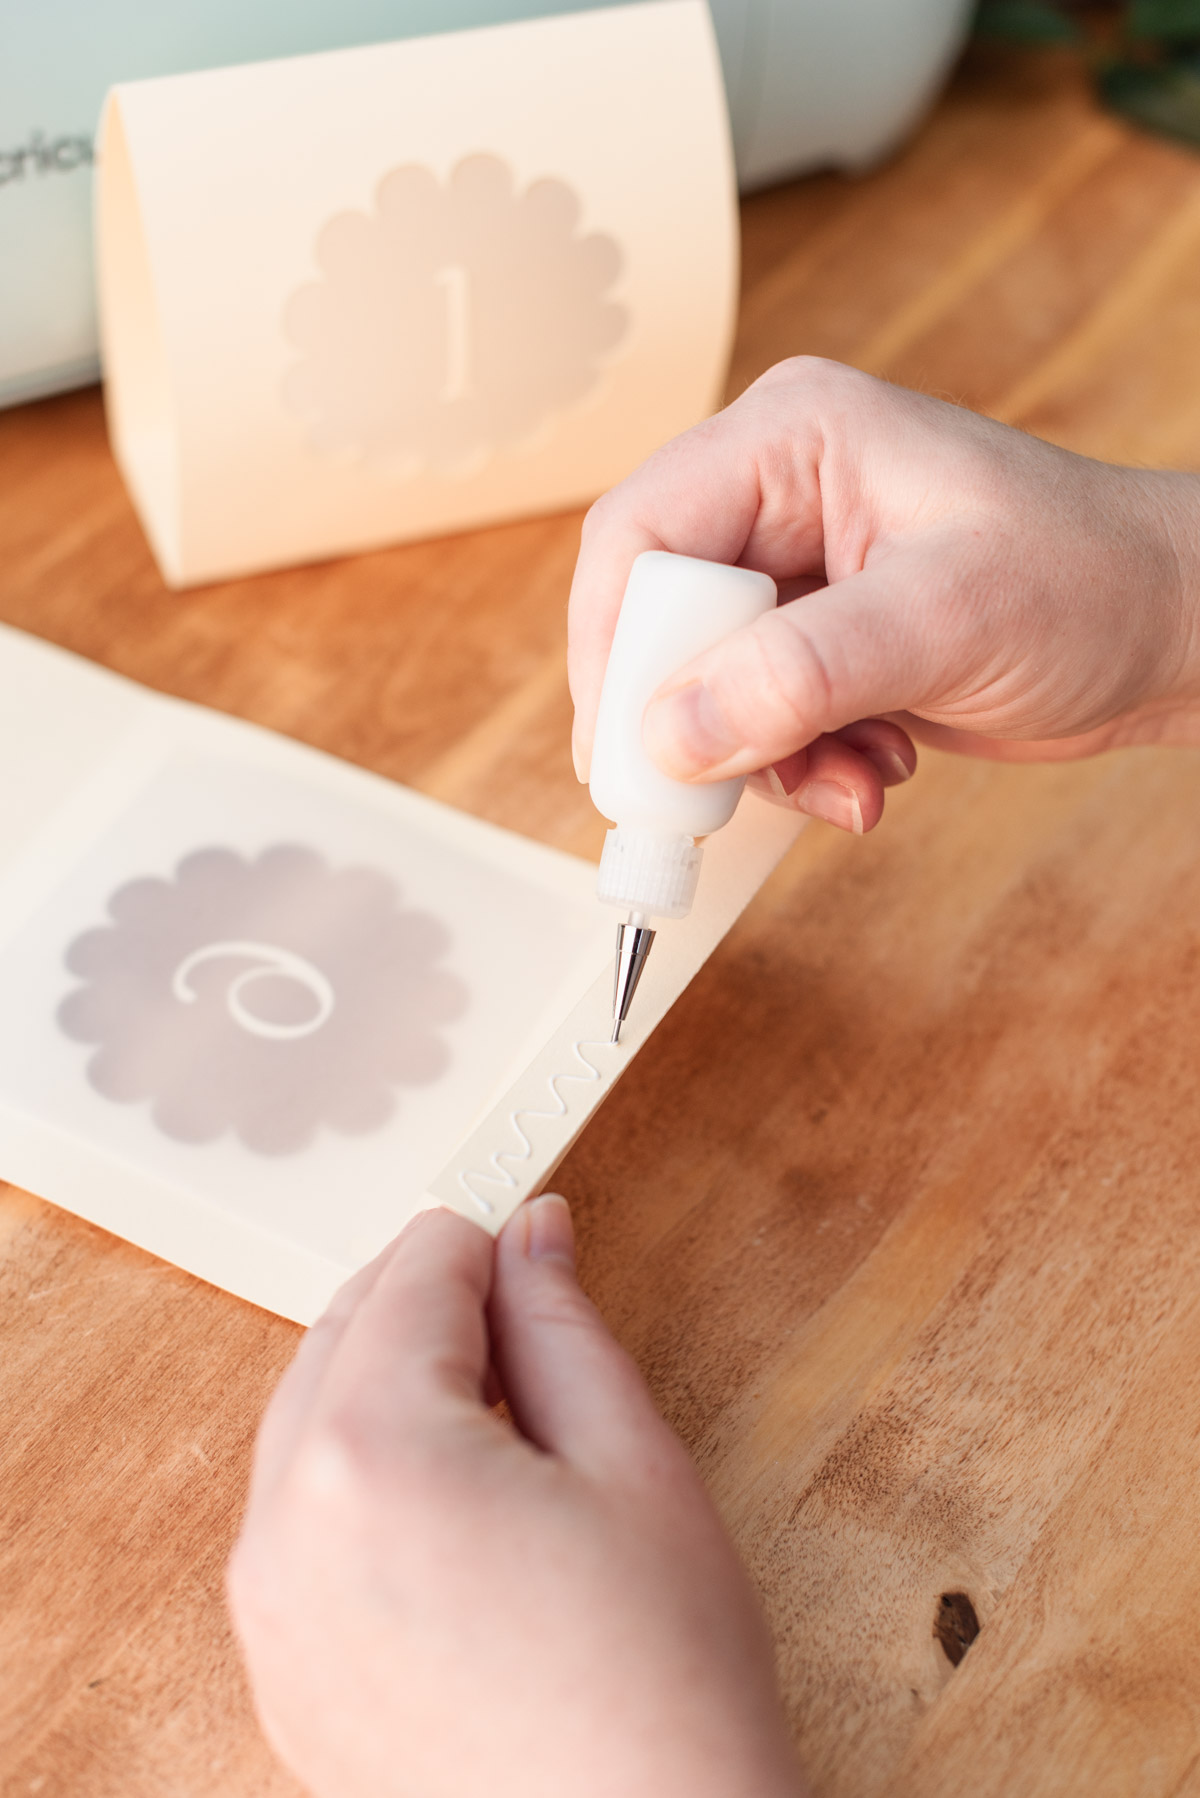
6. Assemble your luminary. Apply a thin, small dot of craft glue on each corner of your vellum square and adhere to the back (or what will be the inside) of your luminary, so it completely covers the scalloped circle cut-out area. Allow to dry. Now flip the luminary over to the front and glue down your numbers. Allow to dry again before folding everything so nothing gets bumped in the process.
On the bottom thin flap of the luminary, apply a thin line of craft glue across its width, and press the luminary tent closed. Allow to dry.
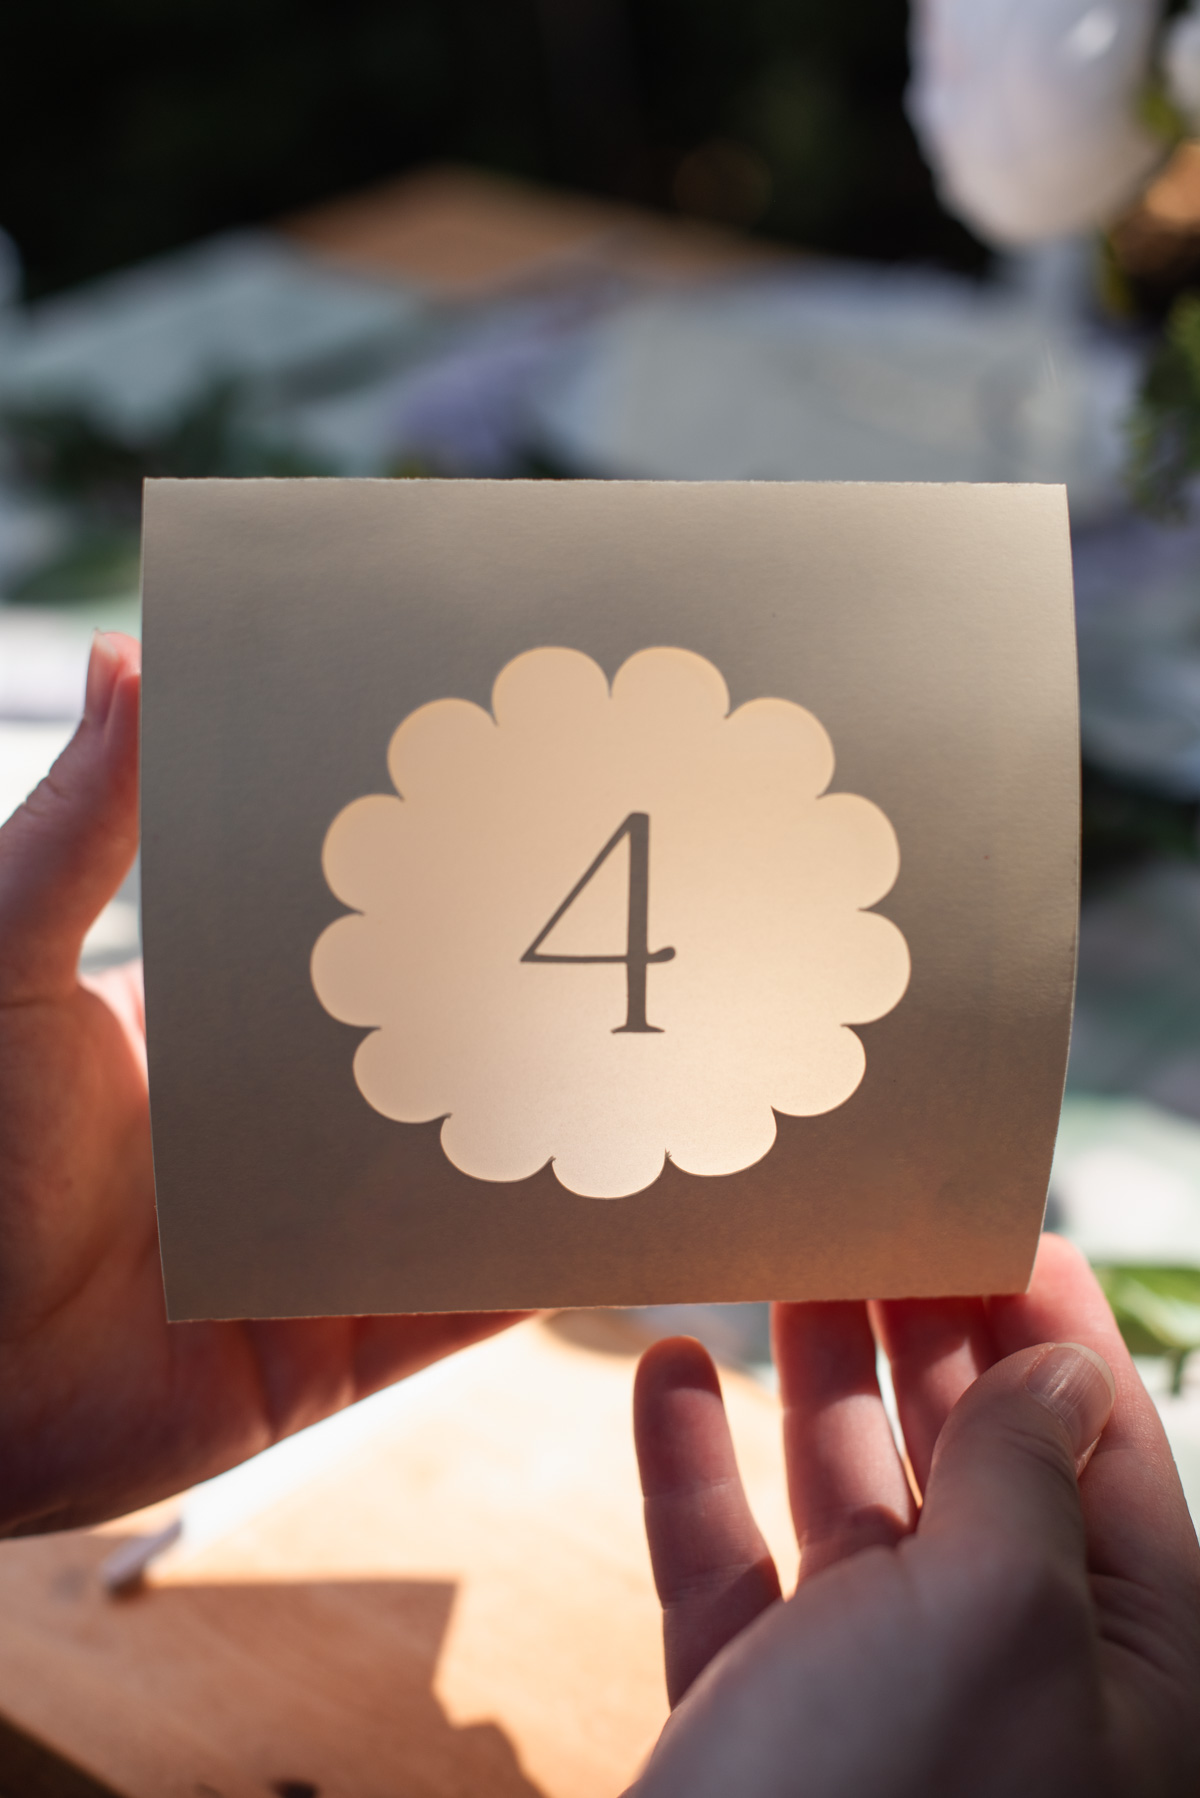
6. Now illuminate! Add LED tealights inside of the tent, and let it glow! After the big day, you can pass along your table numbers to a friend or recycle.
Troubleshooting Fixes
• If your vellum rips while cutting, check these things first: Is your fine-point blade a relatively new one? As worn out, less tacky mats can affect cuts, is your material securely adhered to your cutting mat? If yes to these questions, then you may need to change the blade pressure to see if that fixes it. Try selecting "Less" or "More" pressure depending on your paper's weights.• If your vellum is curling on a relatively fresh, new cutting mat, use painter's tape to secure the edges or corners of the vellum. If any tape is hanging over the edge of your mat, trim off tape so it doesn't interfere with your Cricut machine's rollers.
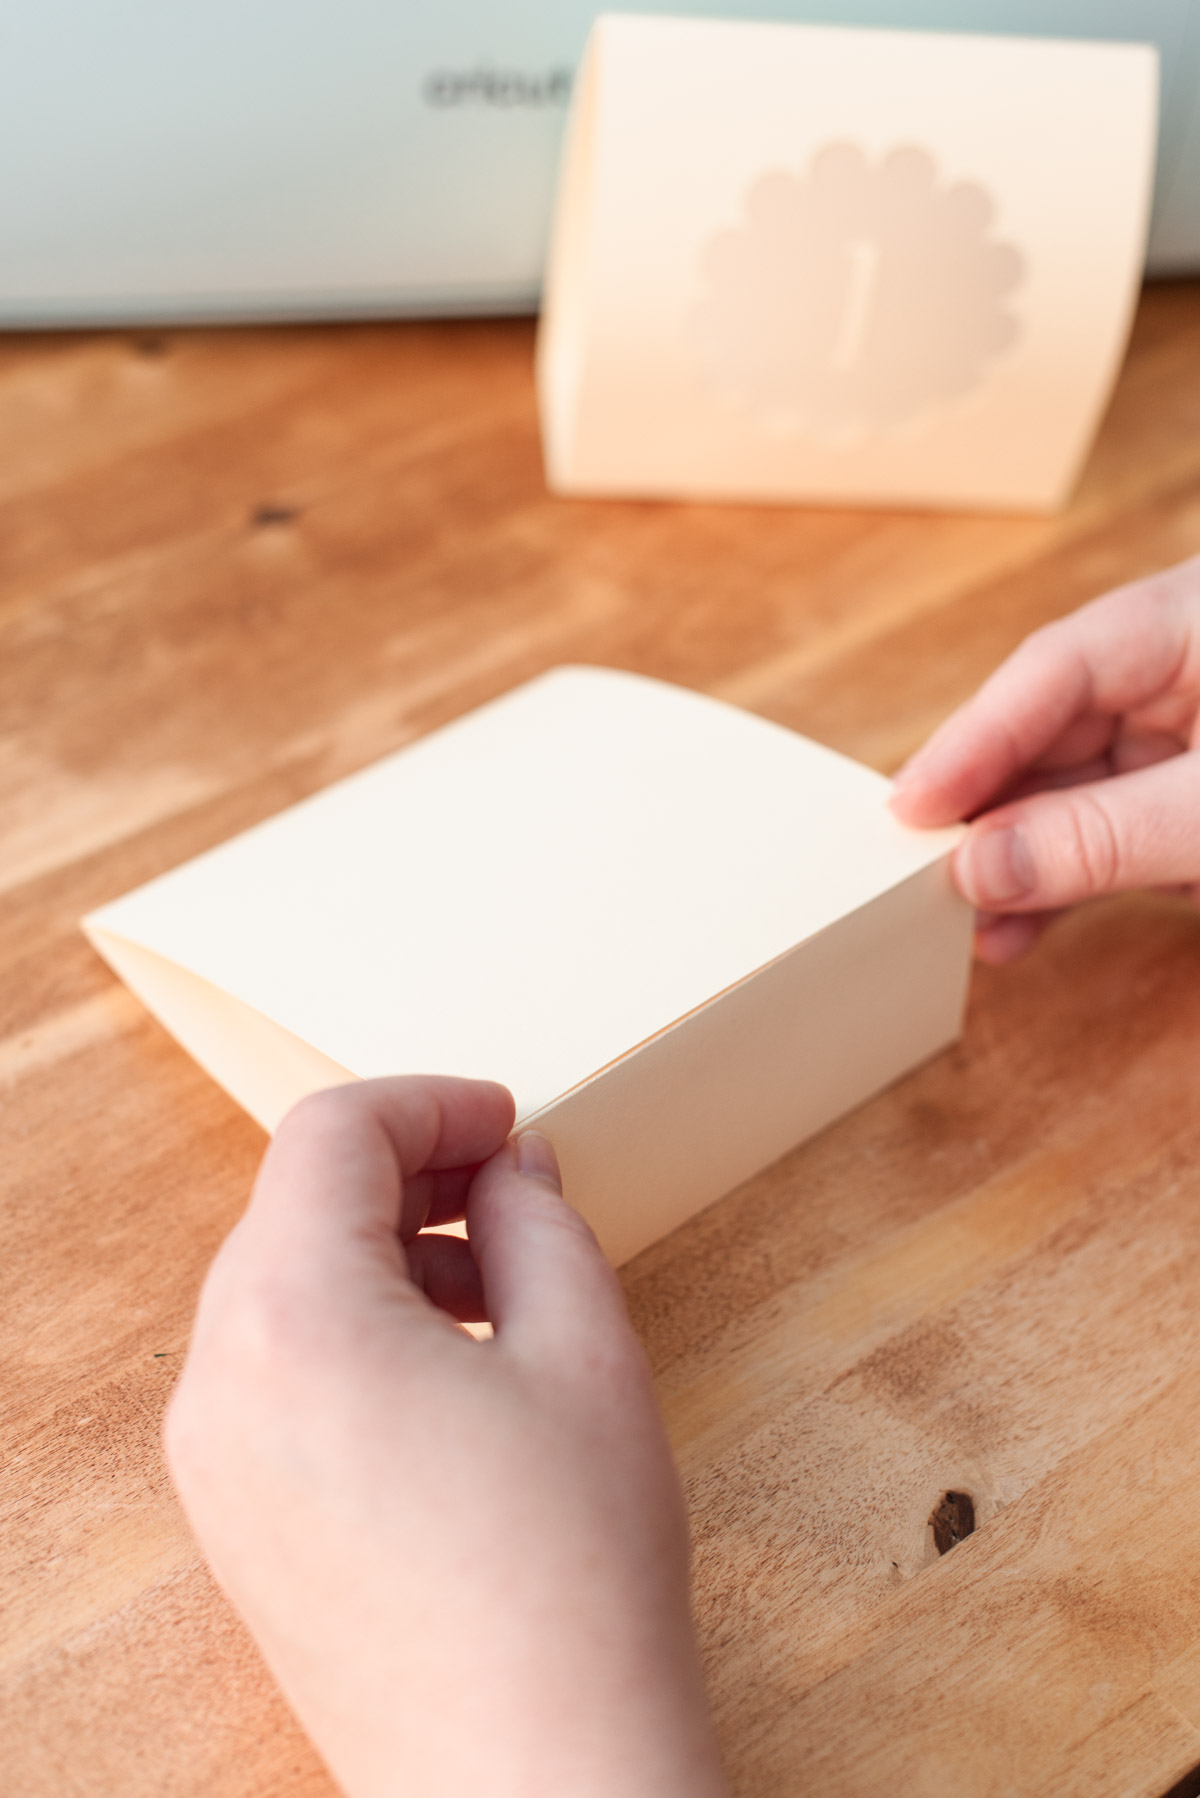
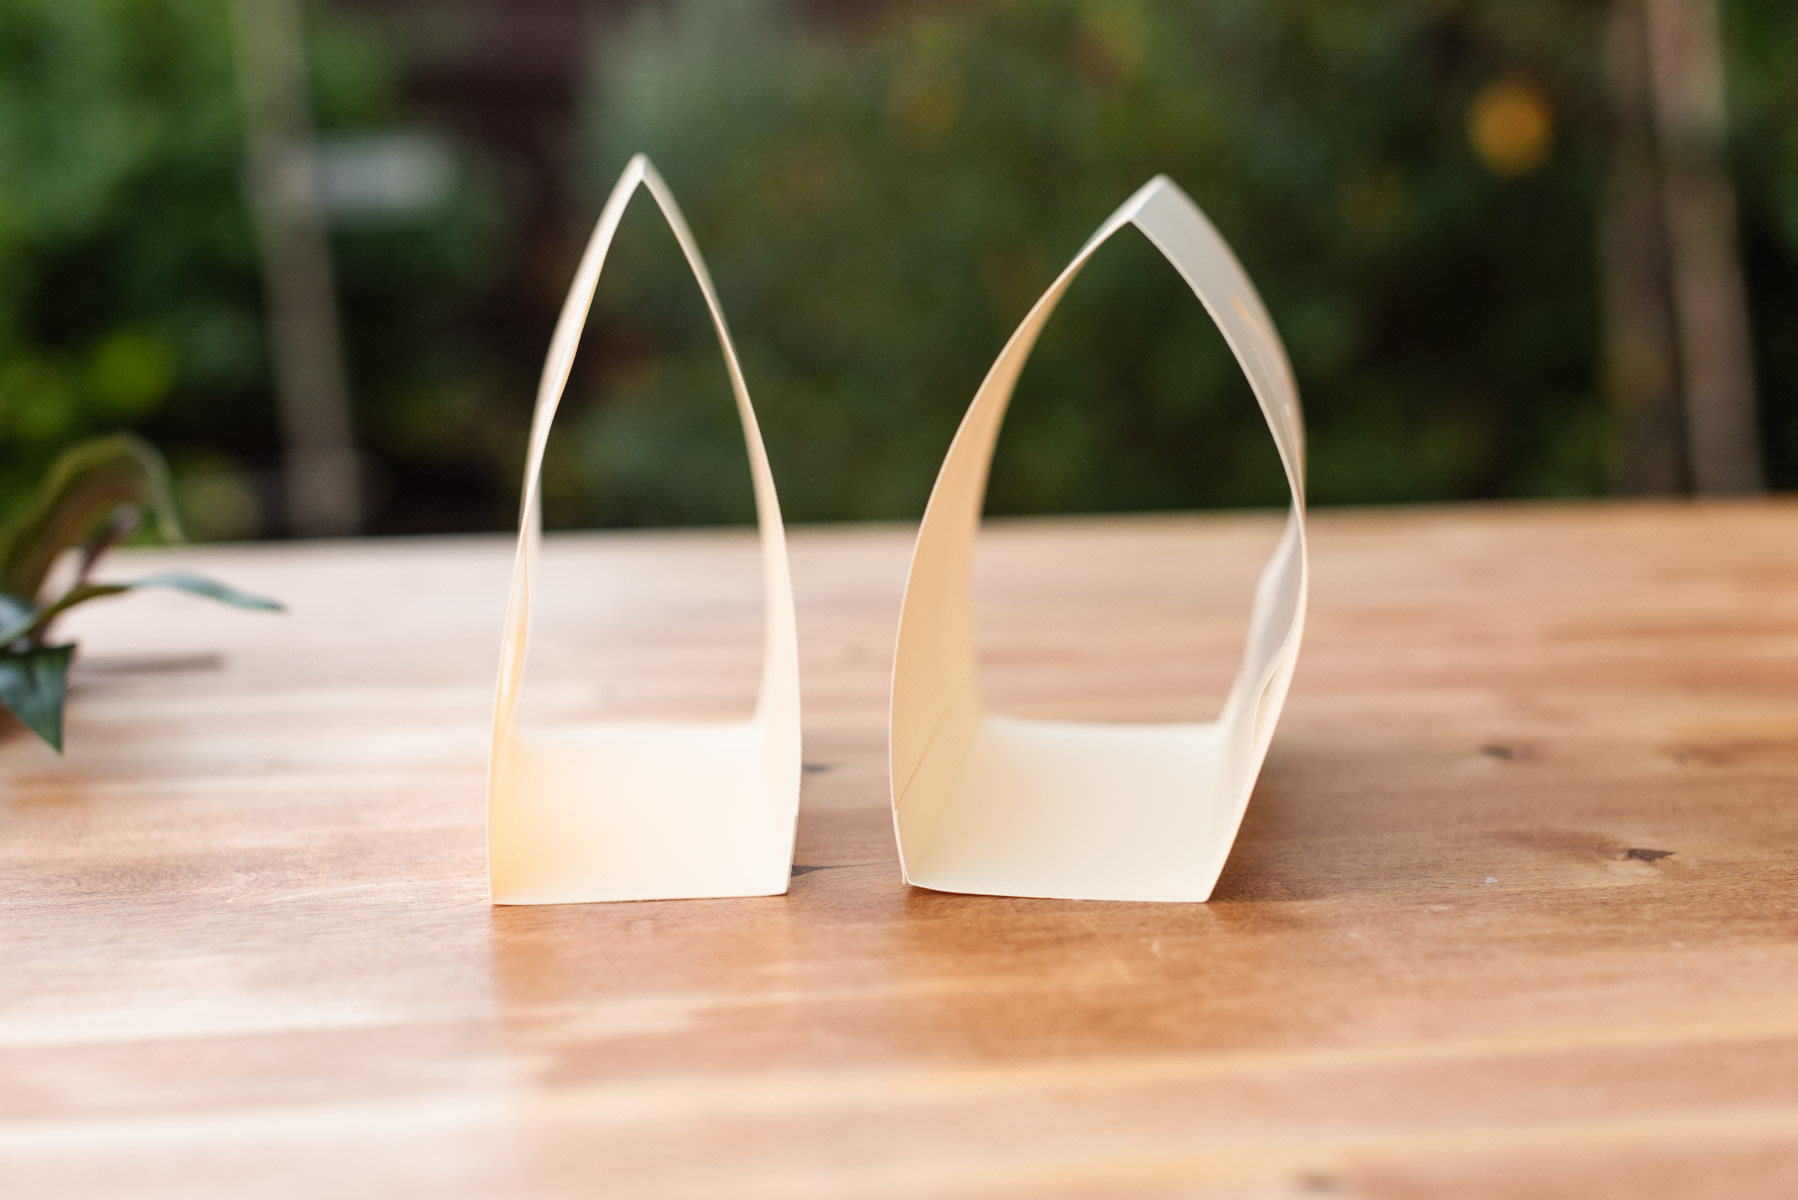
• Your luminary is round, not straight. After gluing, be sure to assemble when the front of the table number is face down on your table (as seen above). This helps create a more stable, flat look. If you hold the luminary in your hands while assembling (and don't use the table), you will get a bubblier shape. See our photo below for the two different looks. We personally love both, so it'll depend on your personal preference.
READY TO MAKE? OUR EASY SHOPPABLE SUPPLY LISTS
🇺🇸 If you're in the U.S., find the full shoppable supply list here.
🇬🇧 And if you're in the U.K., your supply list is here.
🌍 For every other country, click whichever one is most helpful to you!
Shopping through our product links means we may get a small commission from brands that helps support this website and keep offering free DIY tutorials. Thank you for your support!
Get Inspired by other Wedding DIY Paper Projects on Tidewater and Tulle
• DIY Fiesta Food Flags• Add Some Fun to Your Kids' Table with Wedding Coloring Pages
• DIY Selenite Crystal Place Cards
Editor's Note: Specially curated by us, some of the above product links may be partner-connected and shopping through these links means we may get a small commission from those brands that helps support this website. You can find our full affiliate disclosure policy here on Tidewater and Tulle.

