
If you’re wondering how to make a wedding QR code (and actually make it look good!), the process is much simpler than you might think. You don’t need complicated software or fiddly vinyl cuts, and it’ll take less than 5 minutes!
By using Canva’s free QR code generator to design and Cricut Design Space’s Print Then Cut feature to sometimes execute, you can create professional, fully scannable QR codes for your wedding invitations, signage, and more.

Why Every 2026 Wedding Needs a QR Code
Weddings in 2026 are all about creating a thoughtful guest-friendly experience, and QR codes are one of the simplest, free ways to make that happen. Most guests bring their phones with them to weddings, so a well-placed scan answers questions instantly while also sometimes connecting and personalizing moments when things get busy on the big day.A thoughtfully used QR code can:
✦ Boost RSVP rates. No more lost mail or long forms! Guests can literally respond in seconds from their phone, whether they’re at home or on the go.
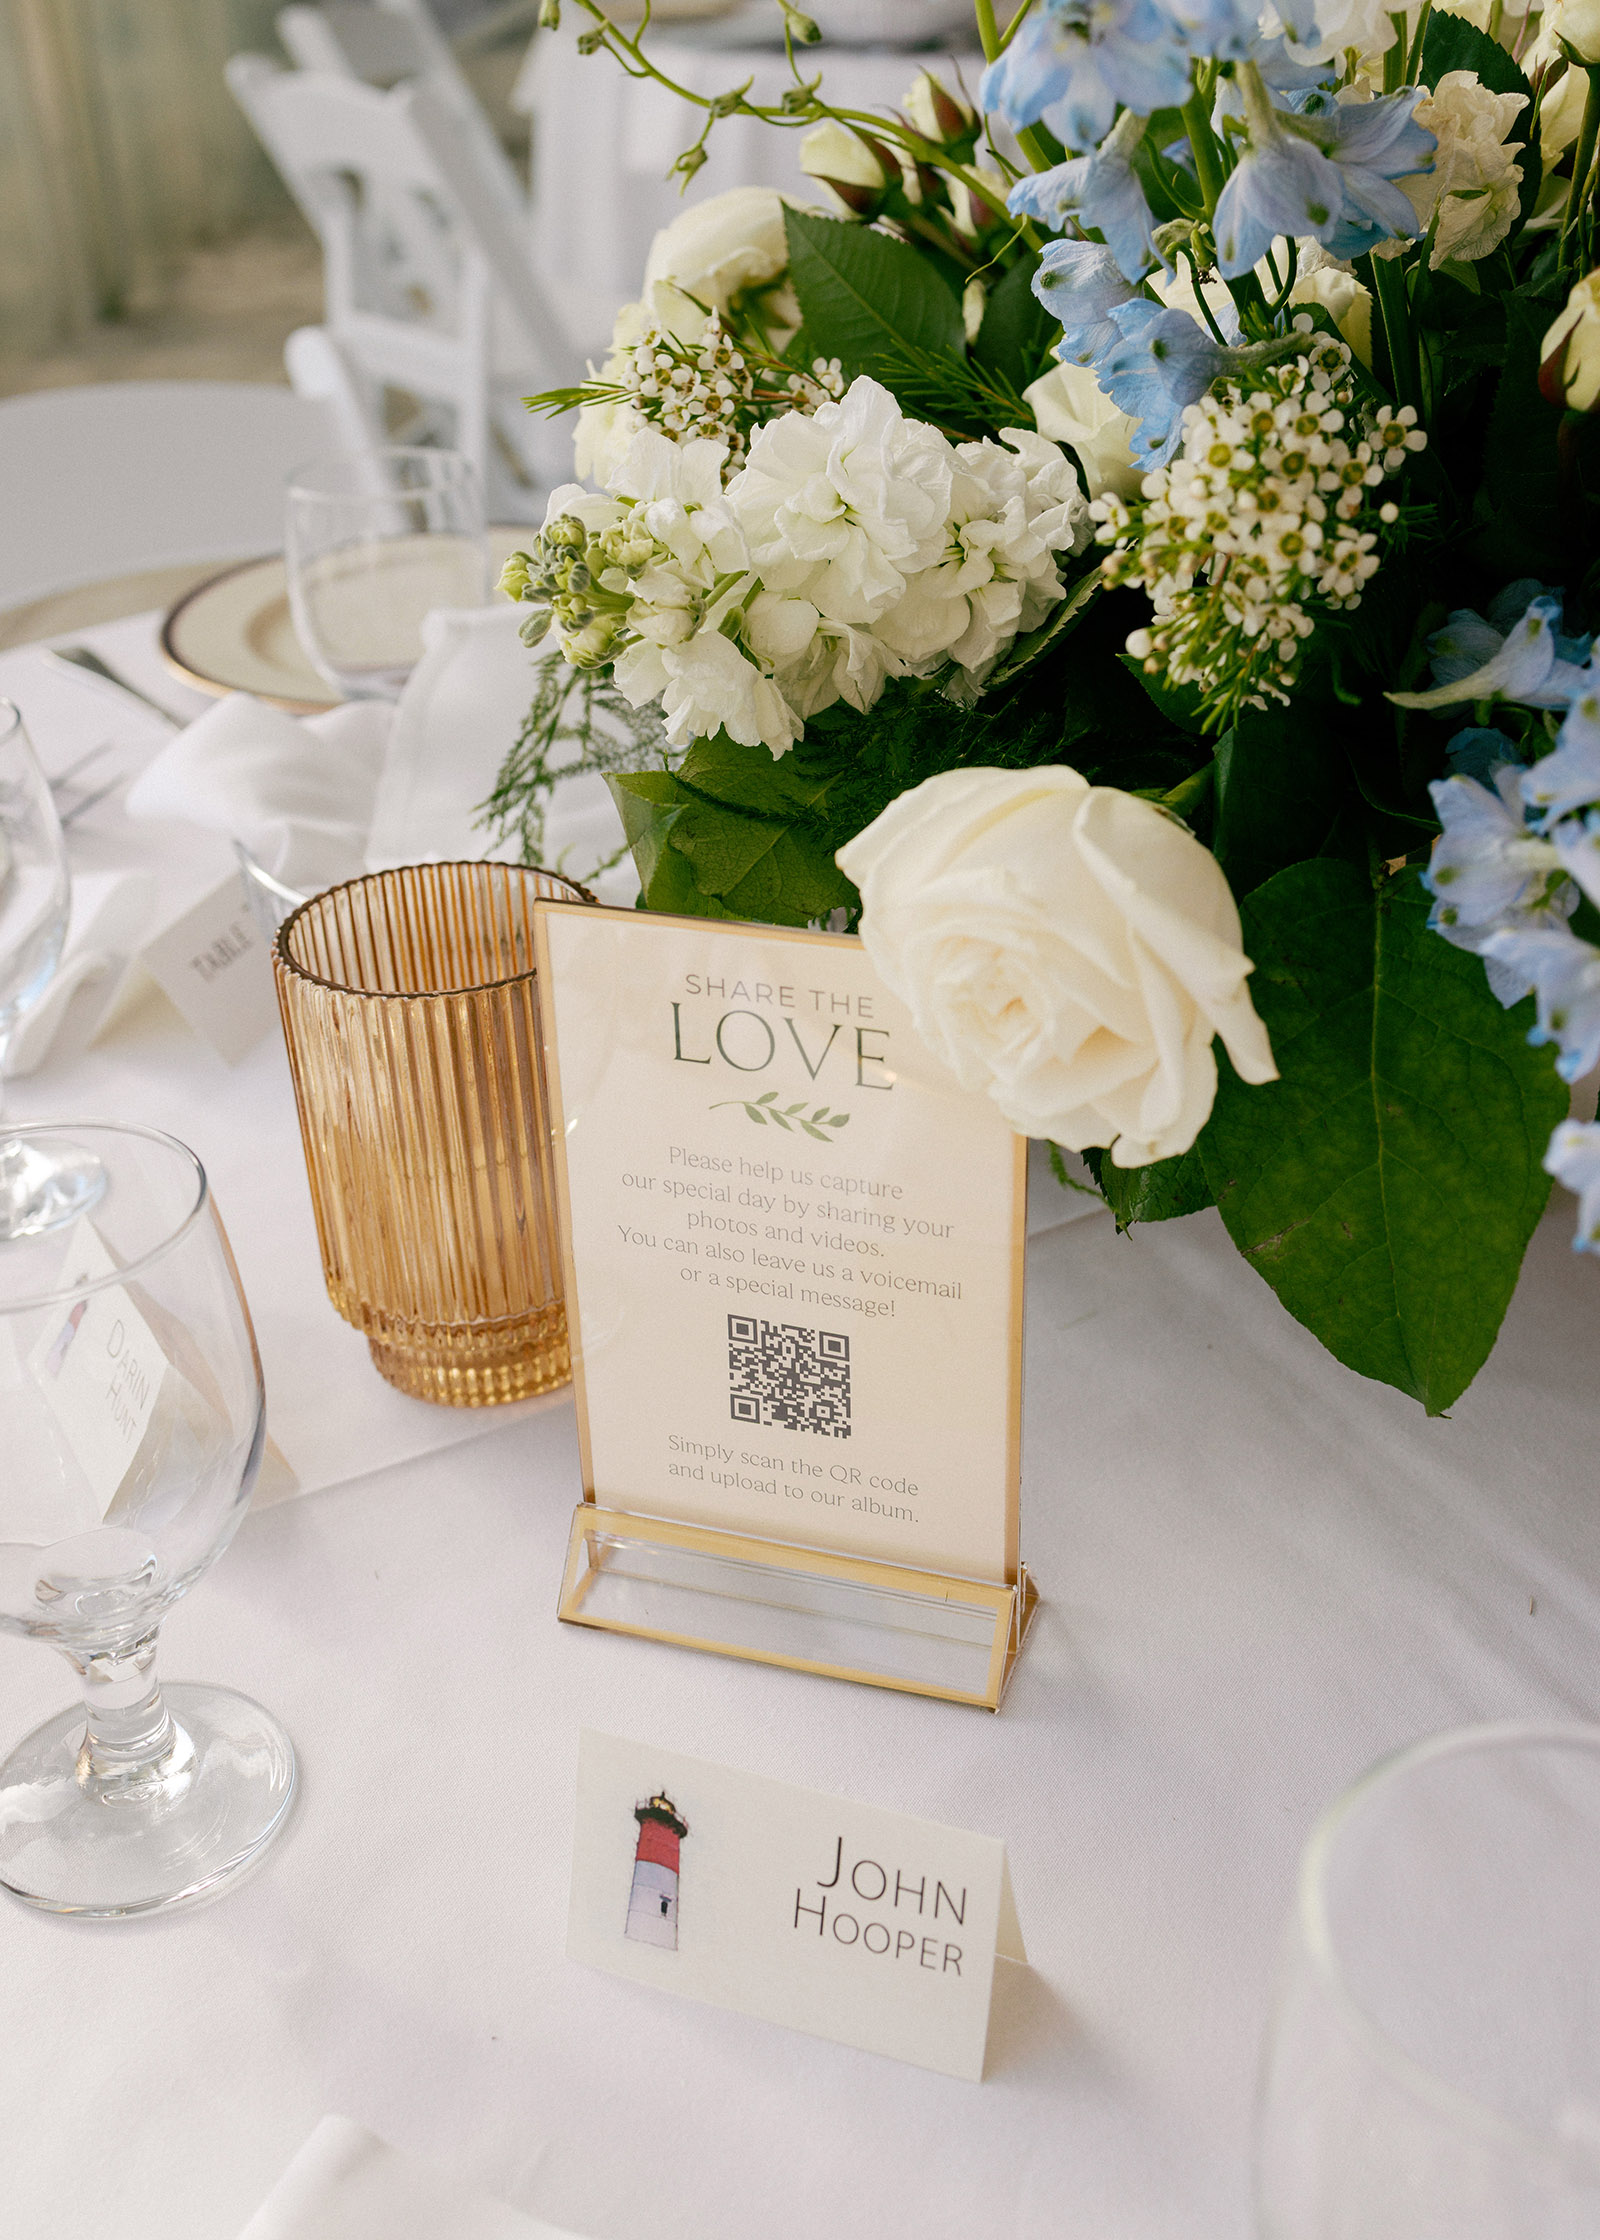
✦ Gather guest photos. Instead of chasing images after the wedding, link directly to a shared folder or an app like Wedibox so guests can upload throughout the day.
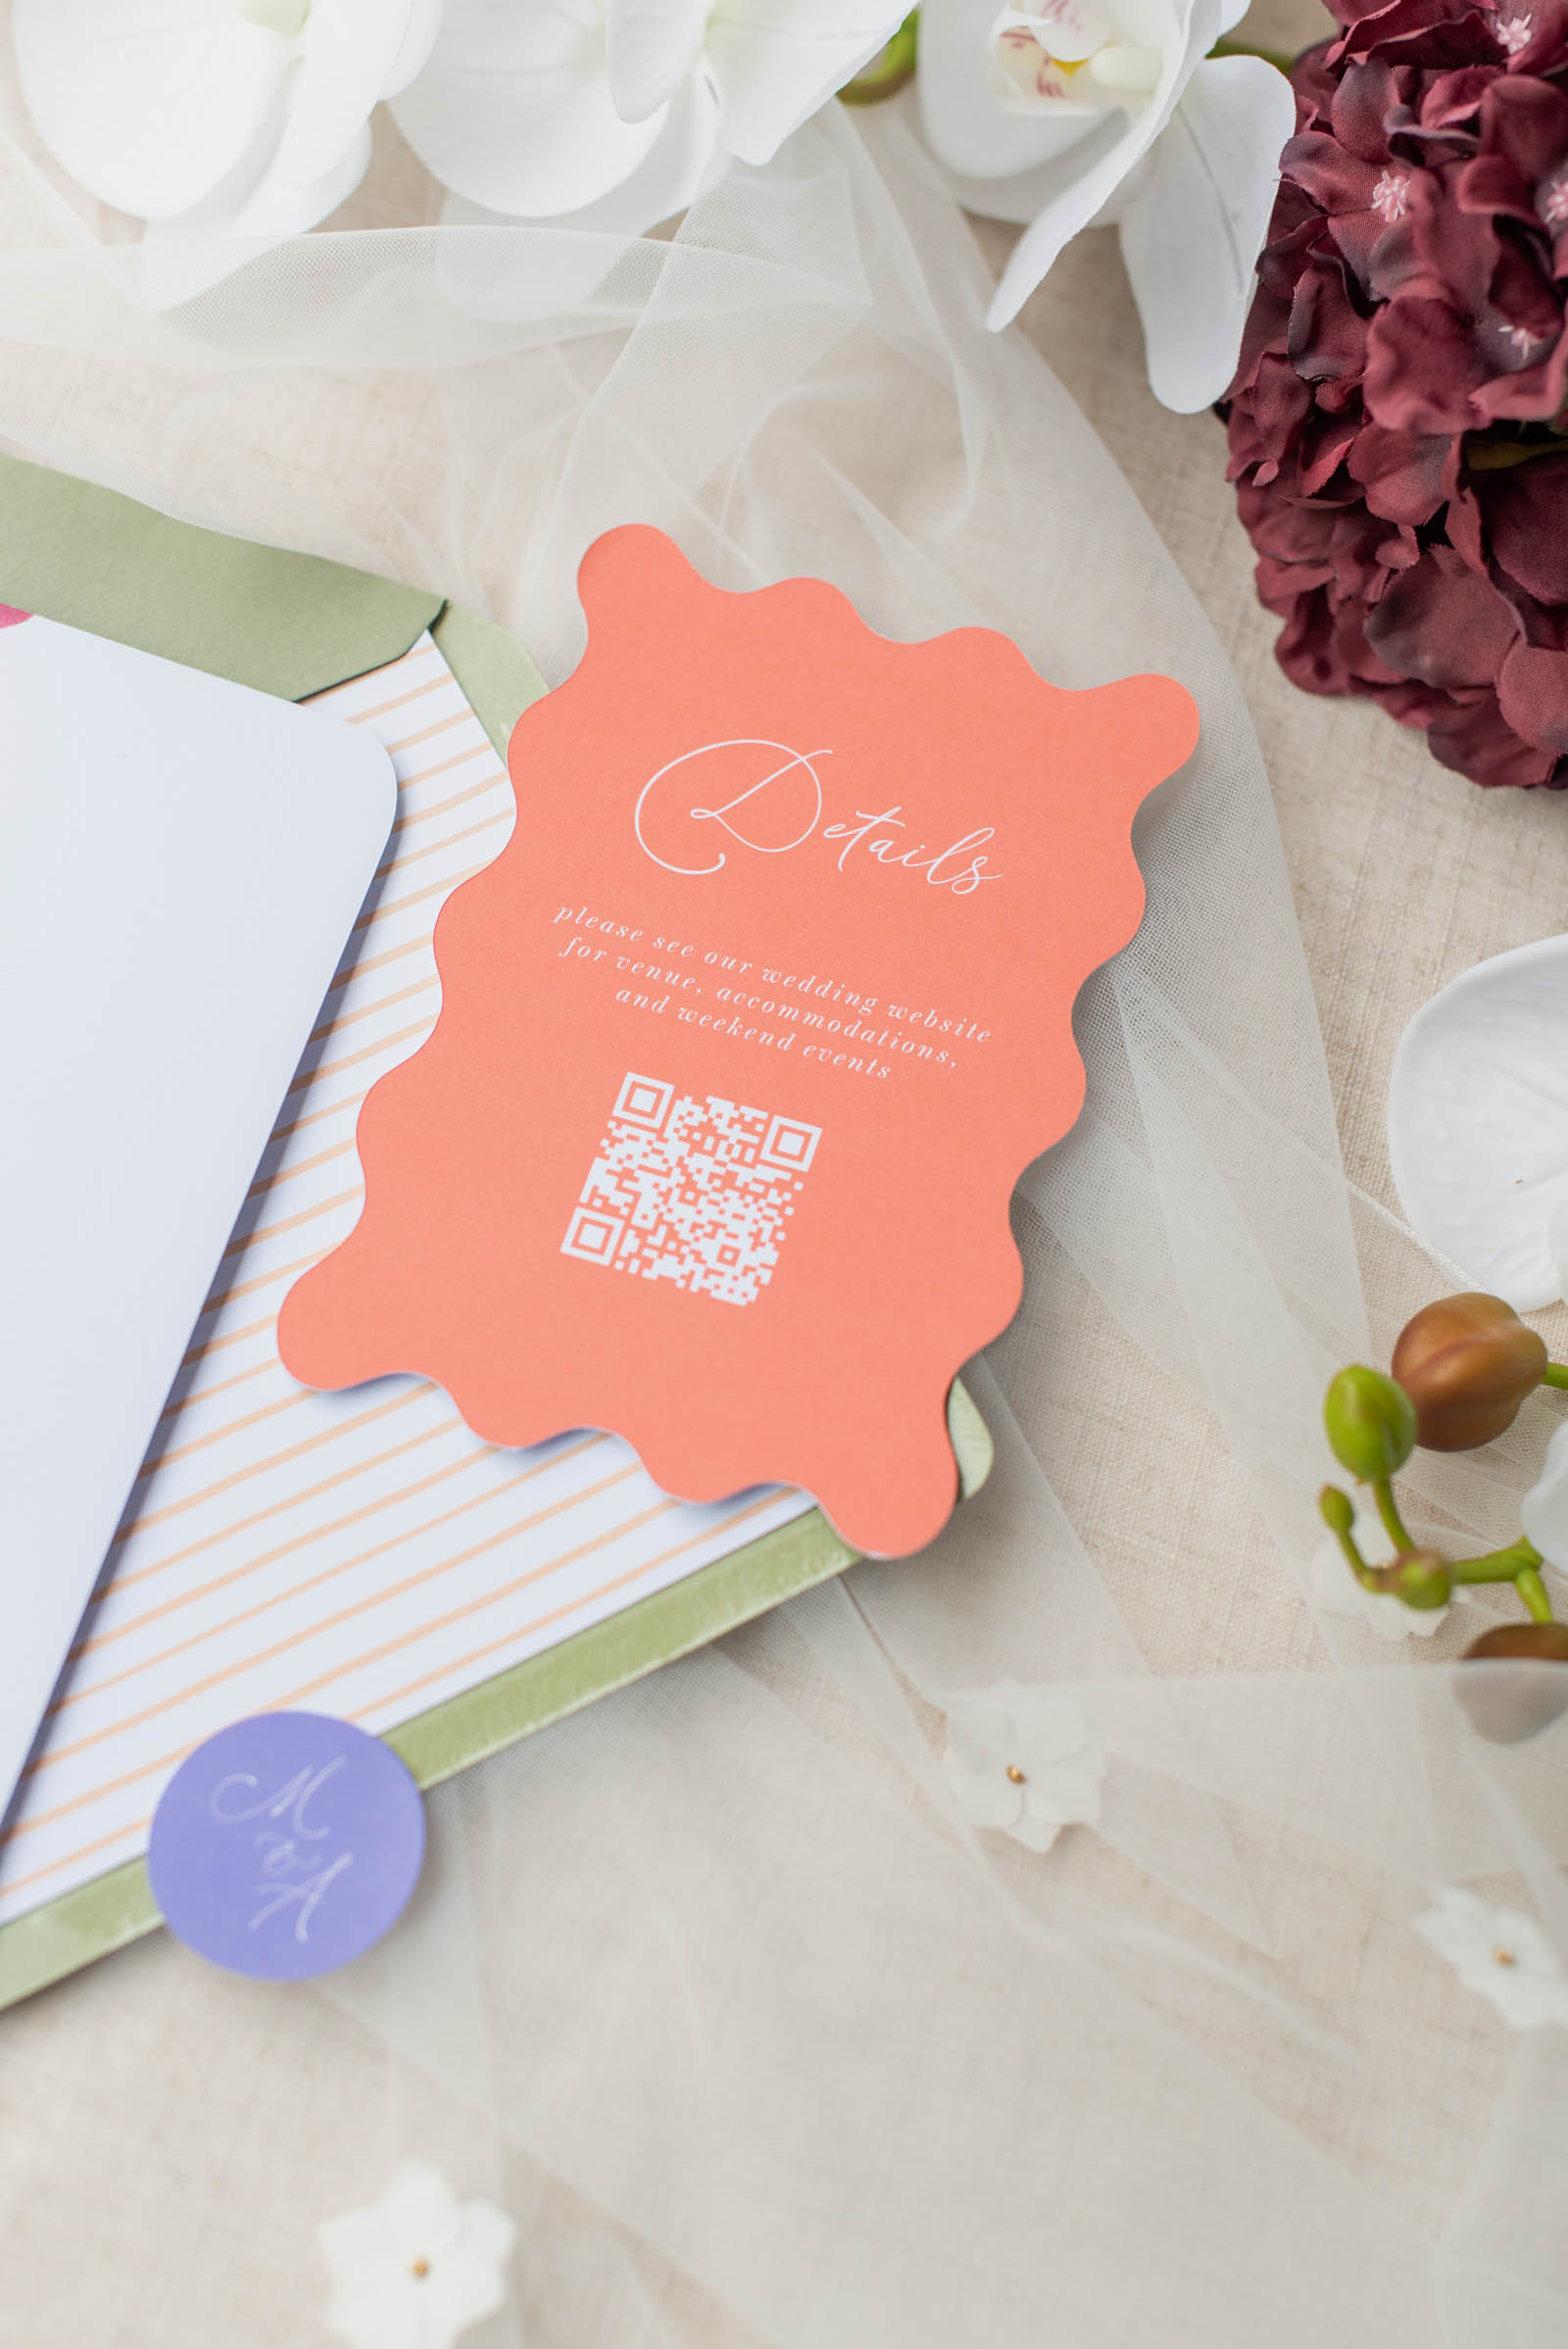
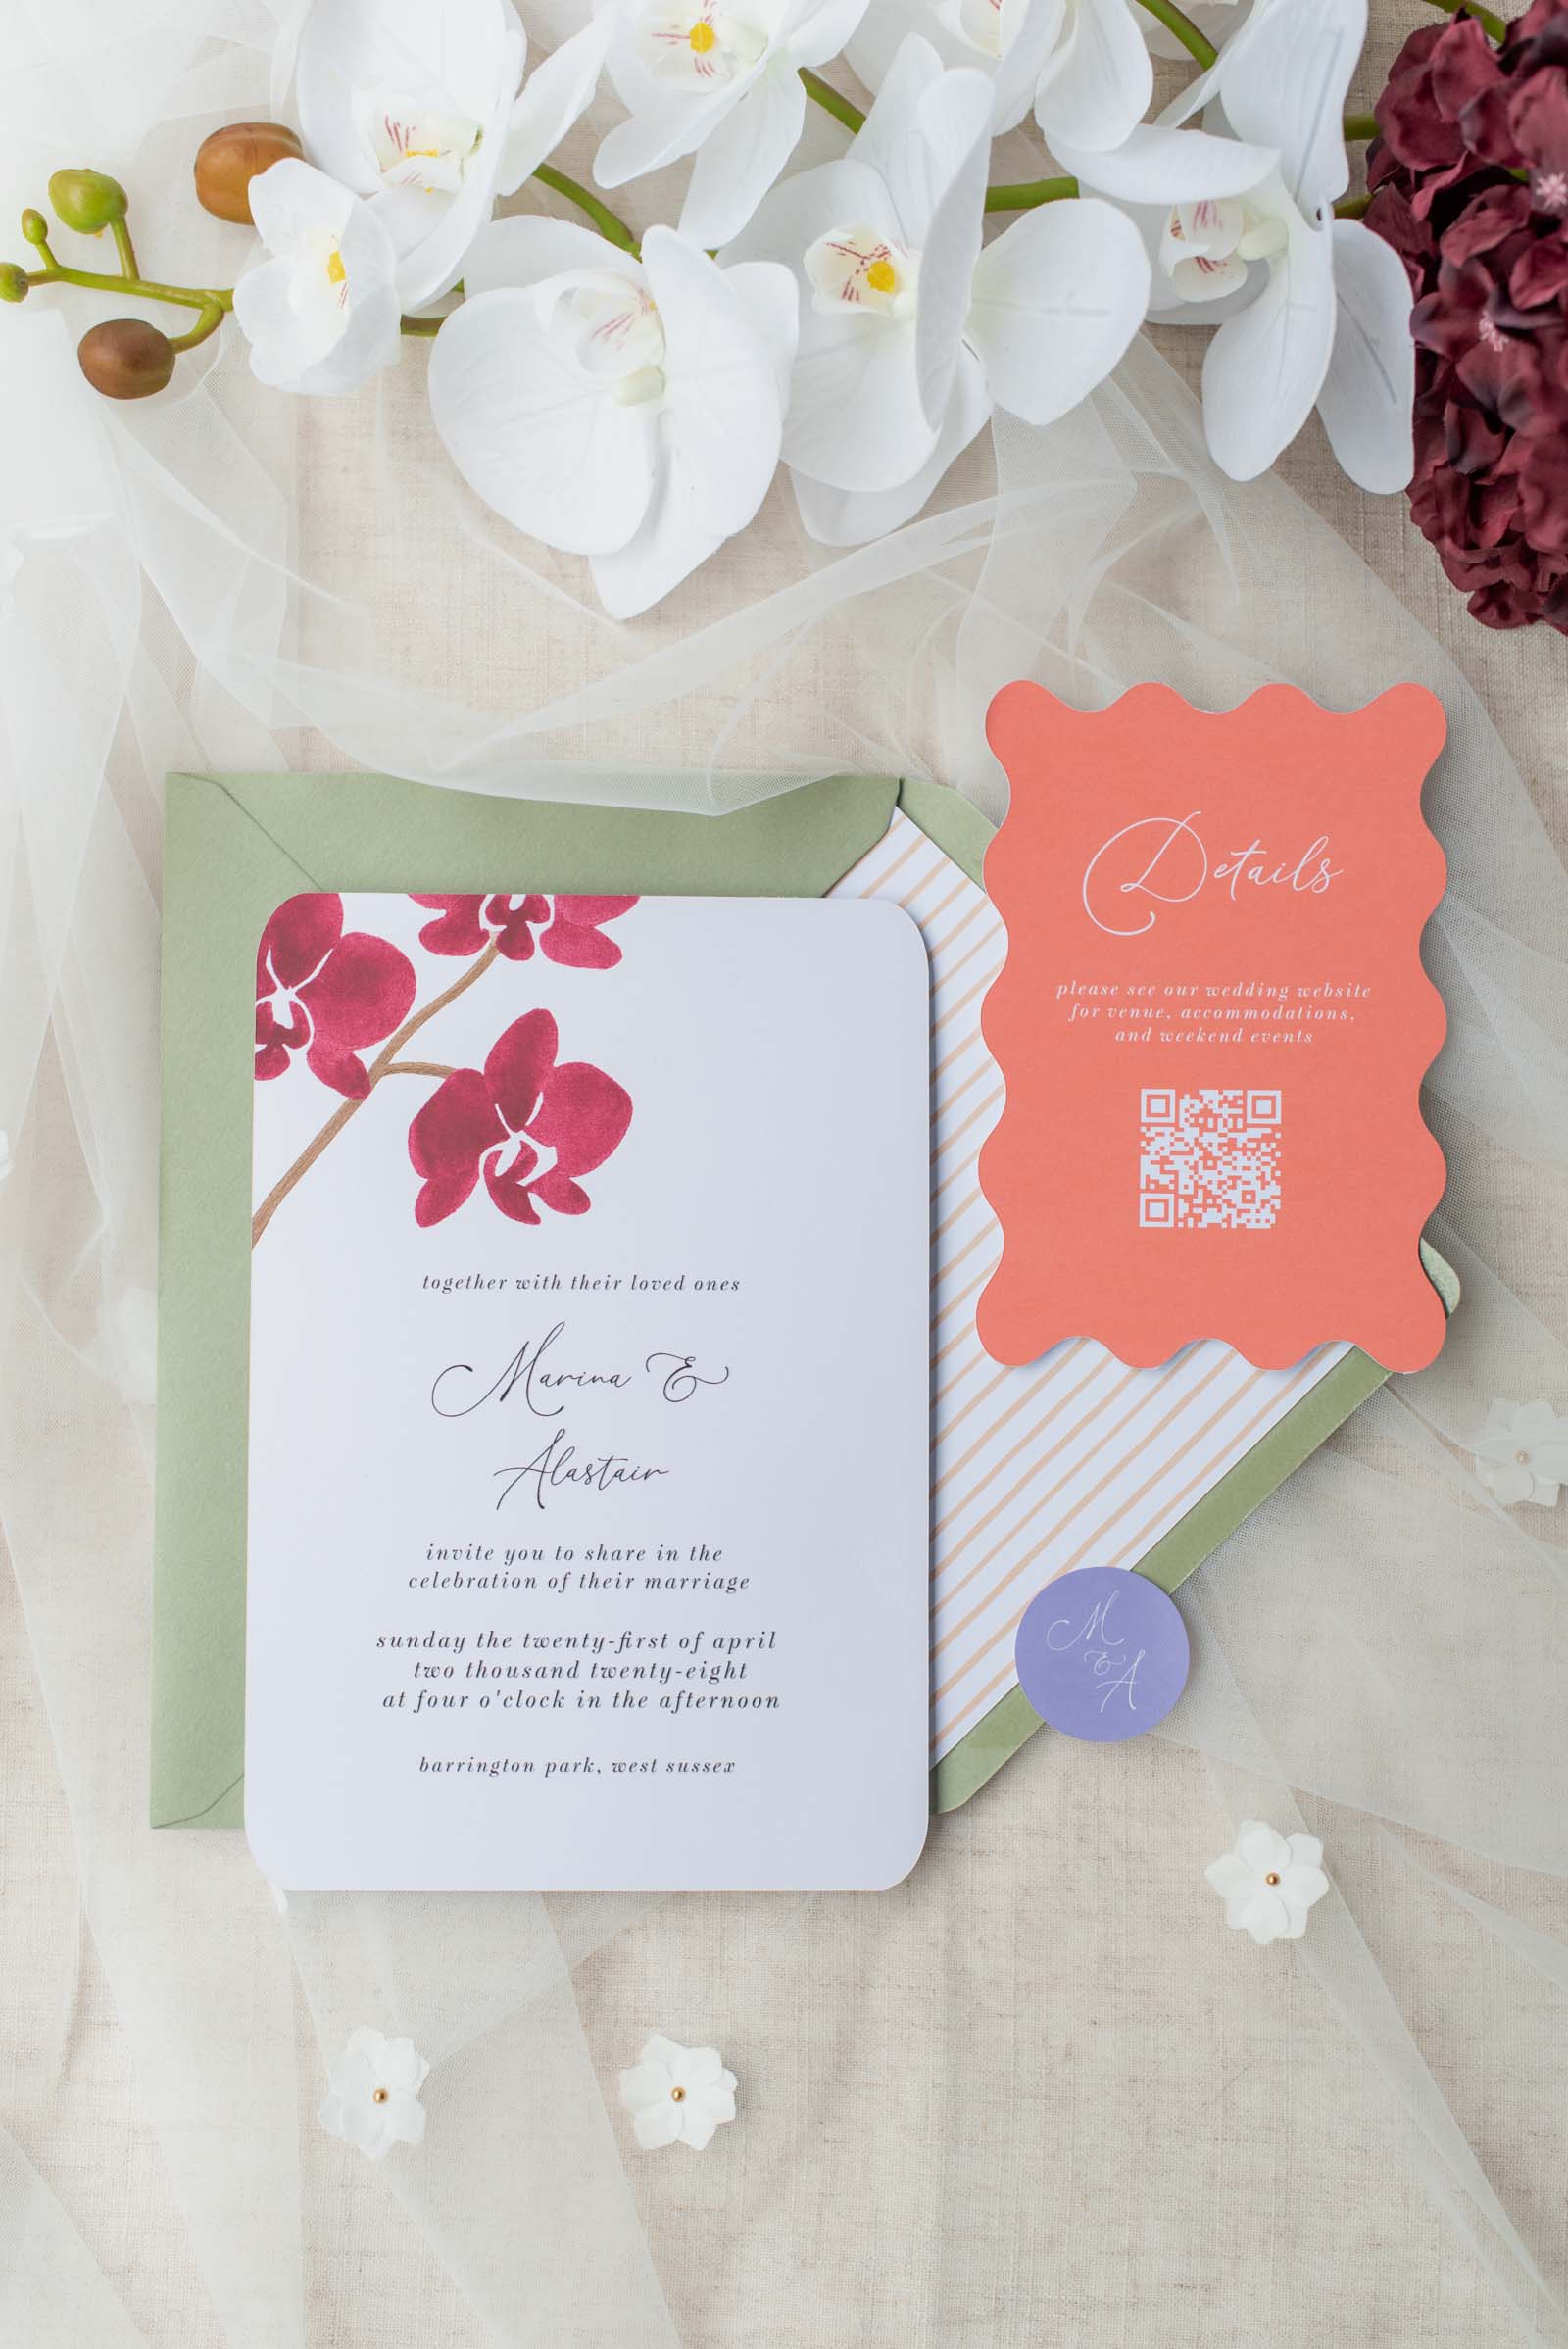
✦ Save stationery space. Keep your invitations clean and design-led by moving extra details (like directions, FAQs, and timelines) behind a simple scan.
✦ Streamline the entire day. From menus to music requests, QR codes handle the logistics so you don’t have to answer the same questions over and over when you’re supposed to be raising a glass to your newlywed status!
How to Make a Free Wedding QR Code
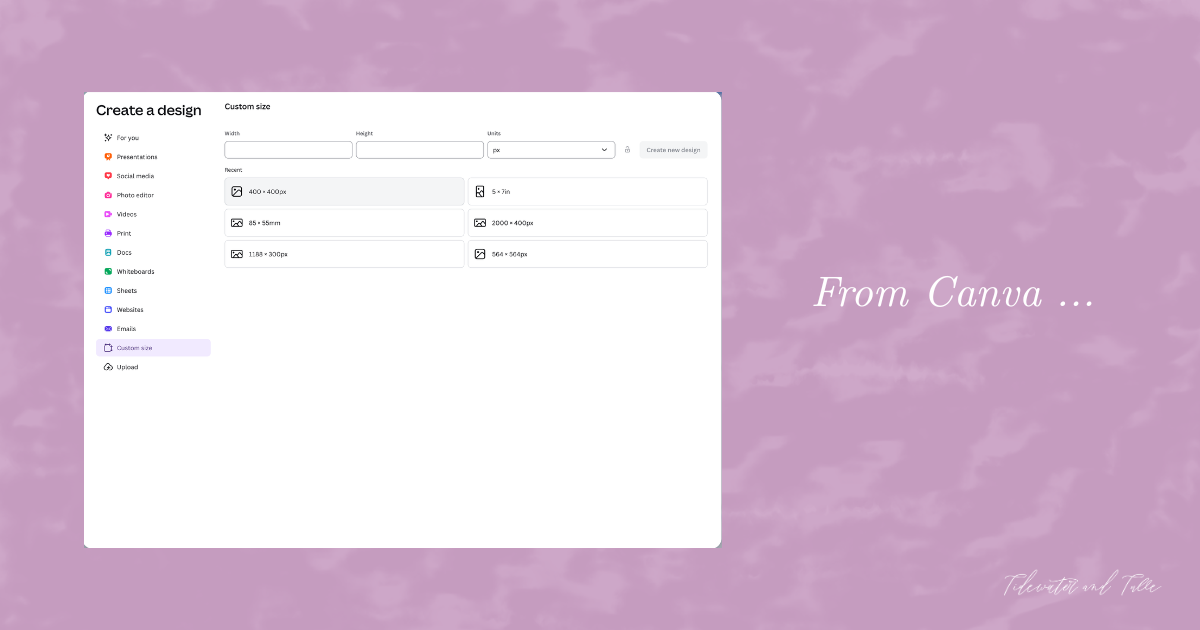
Forget paid QR generators that expire after 30 days! One of our favorite accessible-to-everyone design tools, Canva has a built-in tool that is free, permanent, customizable, and most importantly, downloadable. Here’s how to make your own:1. Open Canva and start a blank "Square" project. Canva has a 400x400px default size that works well for this.
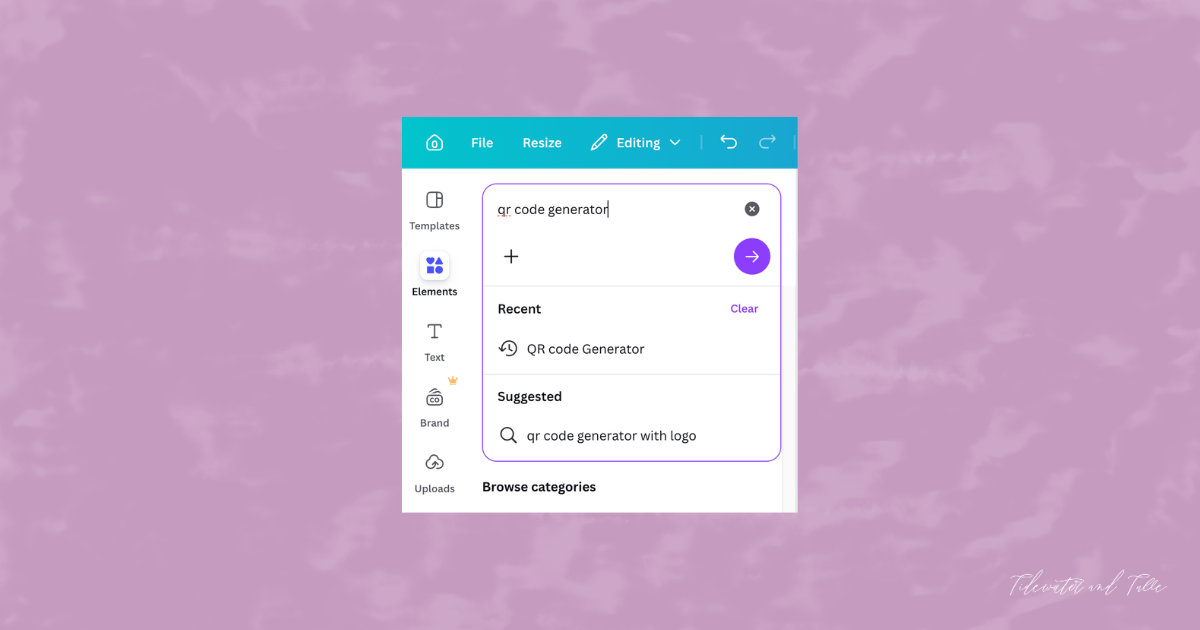
2. Click on Elements in the left-hand sidebar and search for "QR Code Generator." It should automatically pop up for you.
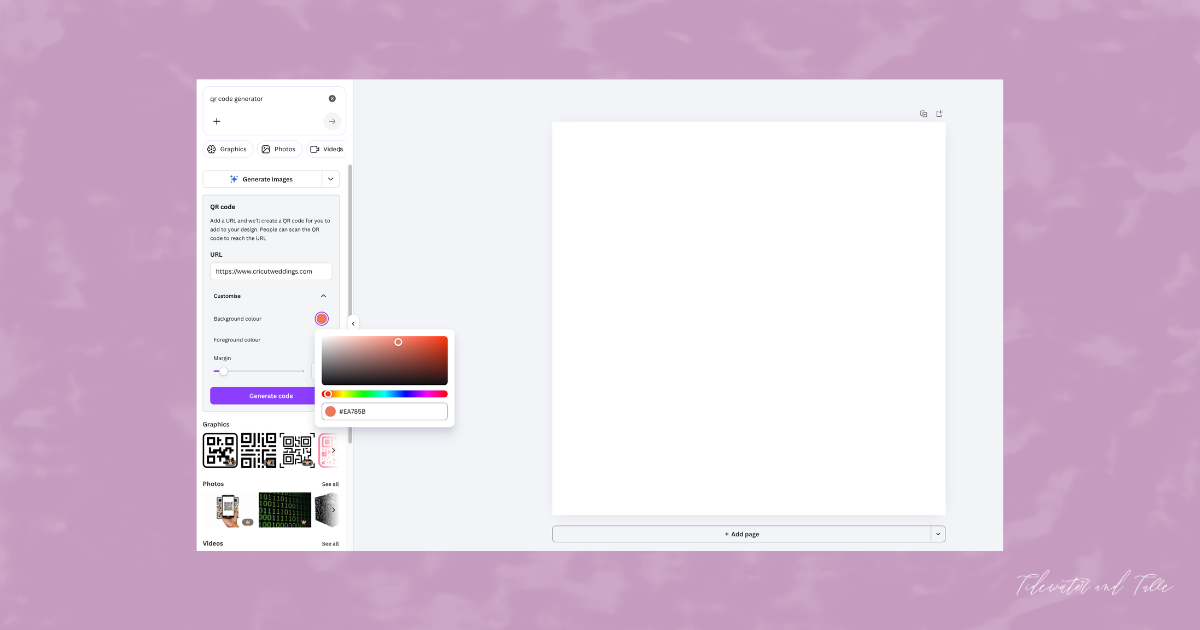
3. Enter your URL. Paste your wedding website, RSVP, or gallery link.
4. Style it. Under Customize, change the "Foreground Color" to match your wedding palette (think Navy, Emerald, or Charcoal). We usually keep the margin at 2. Click Generate Code and resize to as large as you can on your screen without getting everything cut off.
Editor’s Tip: If keeping your code with the traditional black, always keep the background white or a very light cream. If you’re incorporating a dark wedding color as your background, choose white or another light contrasting color for the code itself. High contrast is the #1 rule for a scannable code!
5. Test. Using a mobile photo, do a quick test to make sure the QR code is working.
6. Download. Once you’re happy with it, right click (on computer) or press and hold (for mobile app), then click Download Selection. This will download just your QR code! No other steps needed. Export as a PNG at the highest resolution available to you. Resolution will especially matter if you’re doing large printed items.
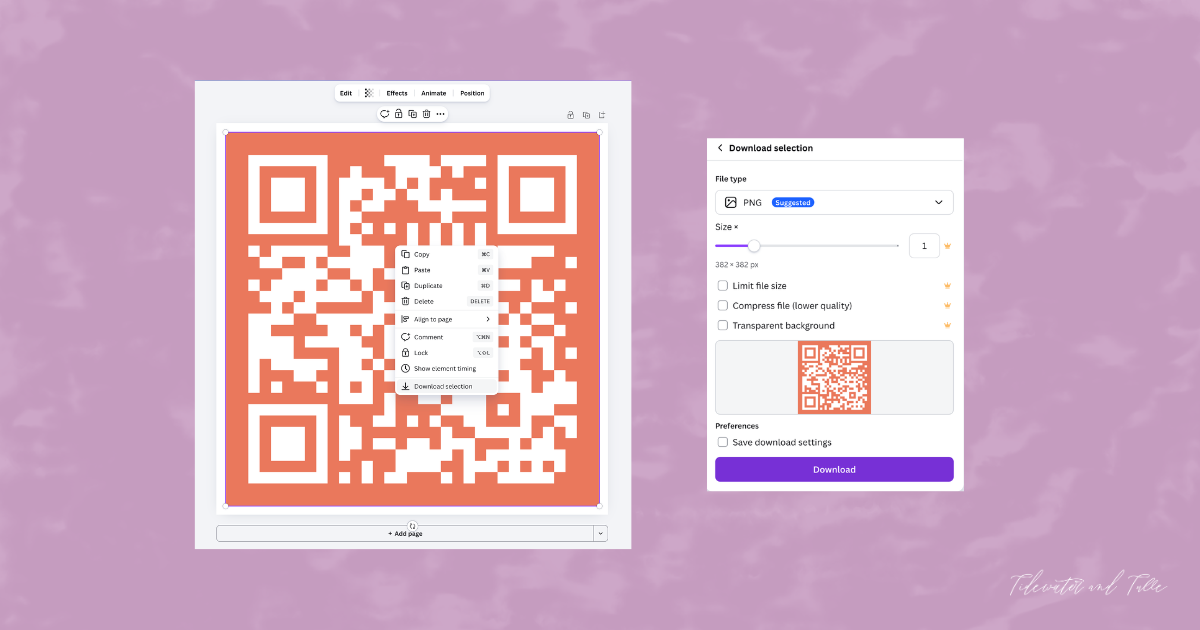
If you’re designing your invitations or signage entirely in Canva, you can absolutely stop here. Your QR code is ready to drop straight into your designs and download for print!
Always do a quick test print before committing to final pieces. The goal is effortless scanning every time, especially for those guests who might not be as familiar with how QR codes are scanned.
And if you’re using a Cricut for your wedding invitations (or want more flexibility with layered projects, specialty materials, or custom cut shapes), let's continue as here’s how to take your QR code into Cricut Design Space.
For Cricut Users: Print Then Cut in Design Space
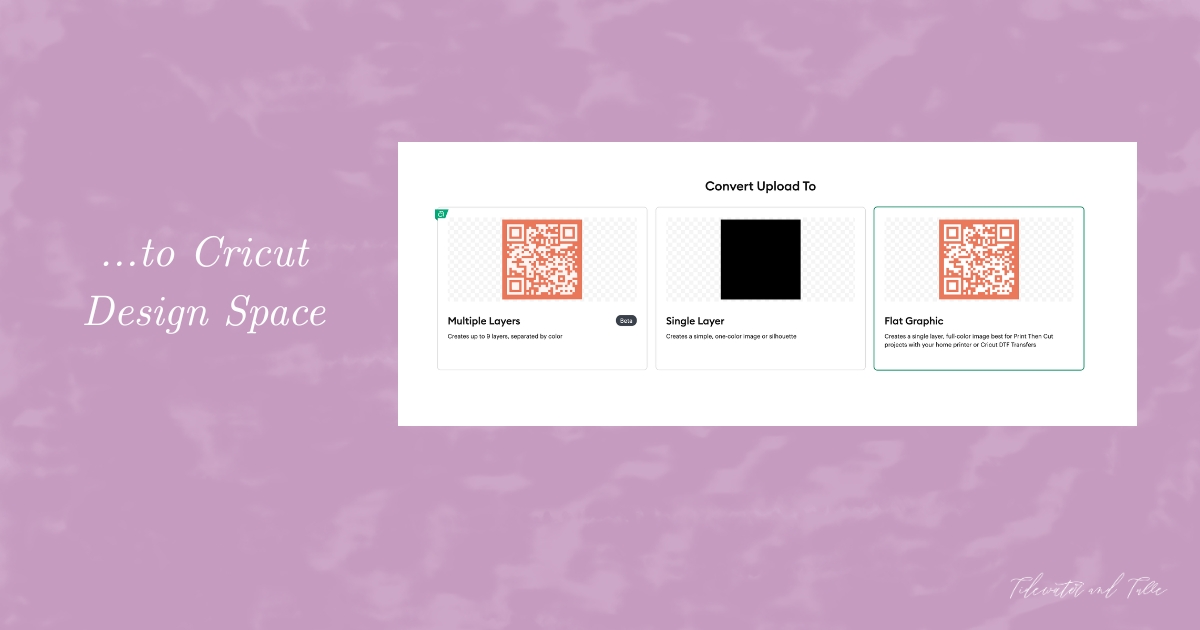
If you’re incorporating your QR code into custom cut stationery or signage, Cricut’s Print Then Cut operation is one of the easiest and most precise ways to do it when working with paper or printable materials.1. Upload your QR code to Design Space and select "Flat Graphic" as the image type to preserve every pixel of the code. This will automatically format your QR code to a Print Then Cut operation.
2. Add it to your Canvas screen and incorporate it into your design. It really is that simple!
Pro Tip:
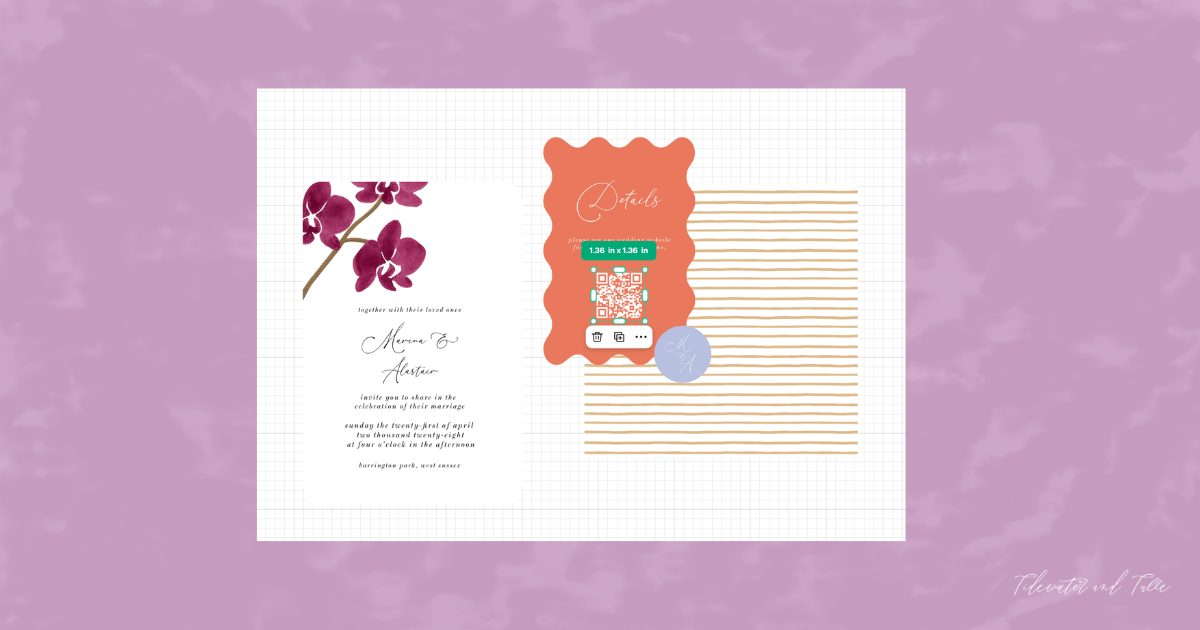
• For invitations or small stationery, your QR code should be at least 0.75" (1.9 cm) wide.
• For signage (like bar menus or welcome signs), aim for 2" (5cm) or larger so guests can scan from a distance.
Make It Work: Printing Tips + Creative Uses
Before you hit the Make button on 100 RSVP inserts or signage pieces, a quick test run will save you time, materials, and frustration later. A few small adjustments can make the difference between a code that scans instantly and one that guests just give up on.✦ Matte Over Glossy: Use matte cardstock or sticker paper whenever possible. Glossy finishes can create camera glare that interferes with scanning. If you’re using a picture frame for your signage, remove the glass before displaying.
✦ Turn Off “Bleed”: For QR codes, you want sharp, crisp edges. When you go to print in Cricut Design Space, toggle "Bleed" to OFF before sending to your printer.
✦ The Distance Test: Print one sample and scan it from about 10" (25 cm) away. If it loads in under two seconds, you’re good to go!
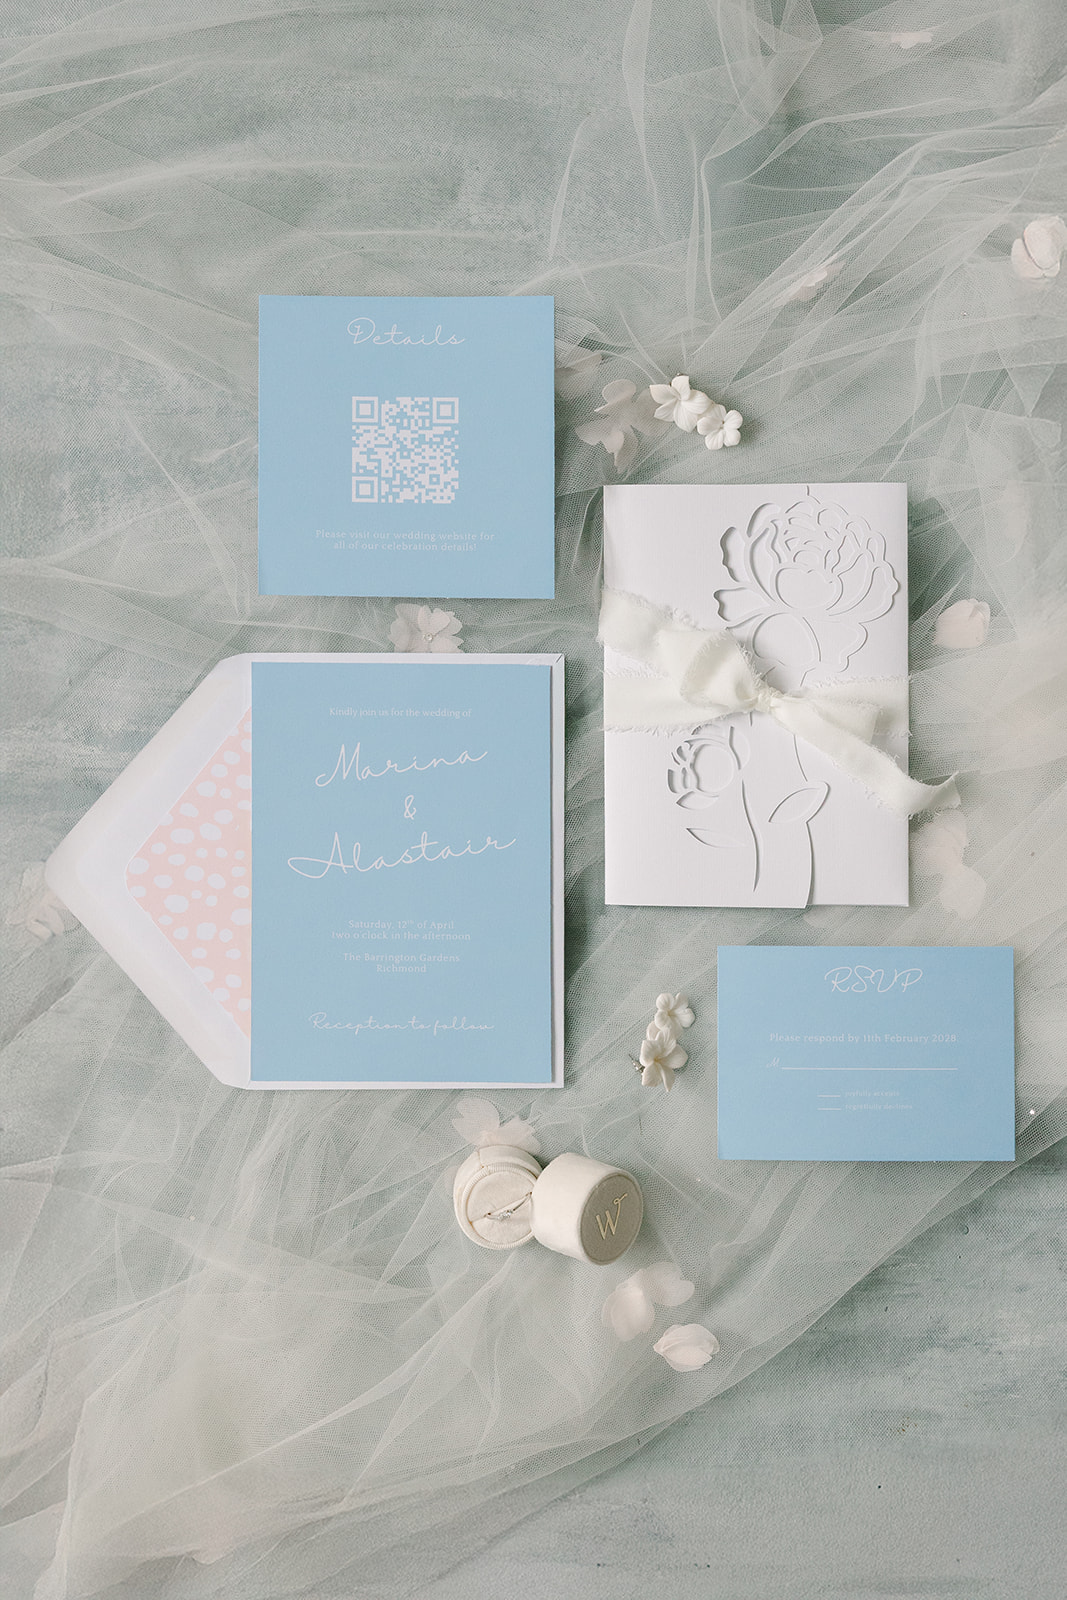
Once your QR code is working perfectly, the fun part begins. A well-designed code doesn’t have to feel technical or out of place; it can be seamlessly woven into your wedding details in ways that feel intentional and guest-friendly.
Consider using QR codes for your:
➤ Bar menu via signage or cocktail napkins
➤ Place cards with a personalized voice note
➤ Music requests through your DJ’s dance floor sign
➤ Ceremony programs with translations for multilingual guests
➤ Cultural moments like a money dance collection
➤ Guest photo sharing throughout the day
At the end of the day, QR codes aren’t about adding more “tech” to your wedding. They’re about making the guest experience effortless. When used thoughtfully, they simplify communication, reduce paper clutter, and create a smoother, more enjoyable celebration for everyone involved.
Editor's Note: Specially curated by us, the above product links may be partner-connected and purchasing through these links means we get a small commission from those brands that helps support this website. You can find our full affiliate disclosure policy here on Tidewater and Tulle.

