
Natural textures have become a defining feature of modern wedding styling, with rattan accents, woven details, and organic materials bringing warmth and effortless charm to reception tables. And we are obsessed! While real cane webbing is unmatched for larger decor pieces like signage and backdrops, it can be difficult to work with for smaller paper goods such as wedding menus and place cards.
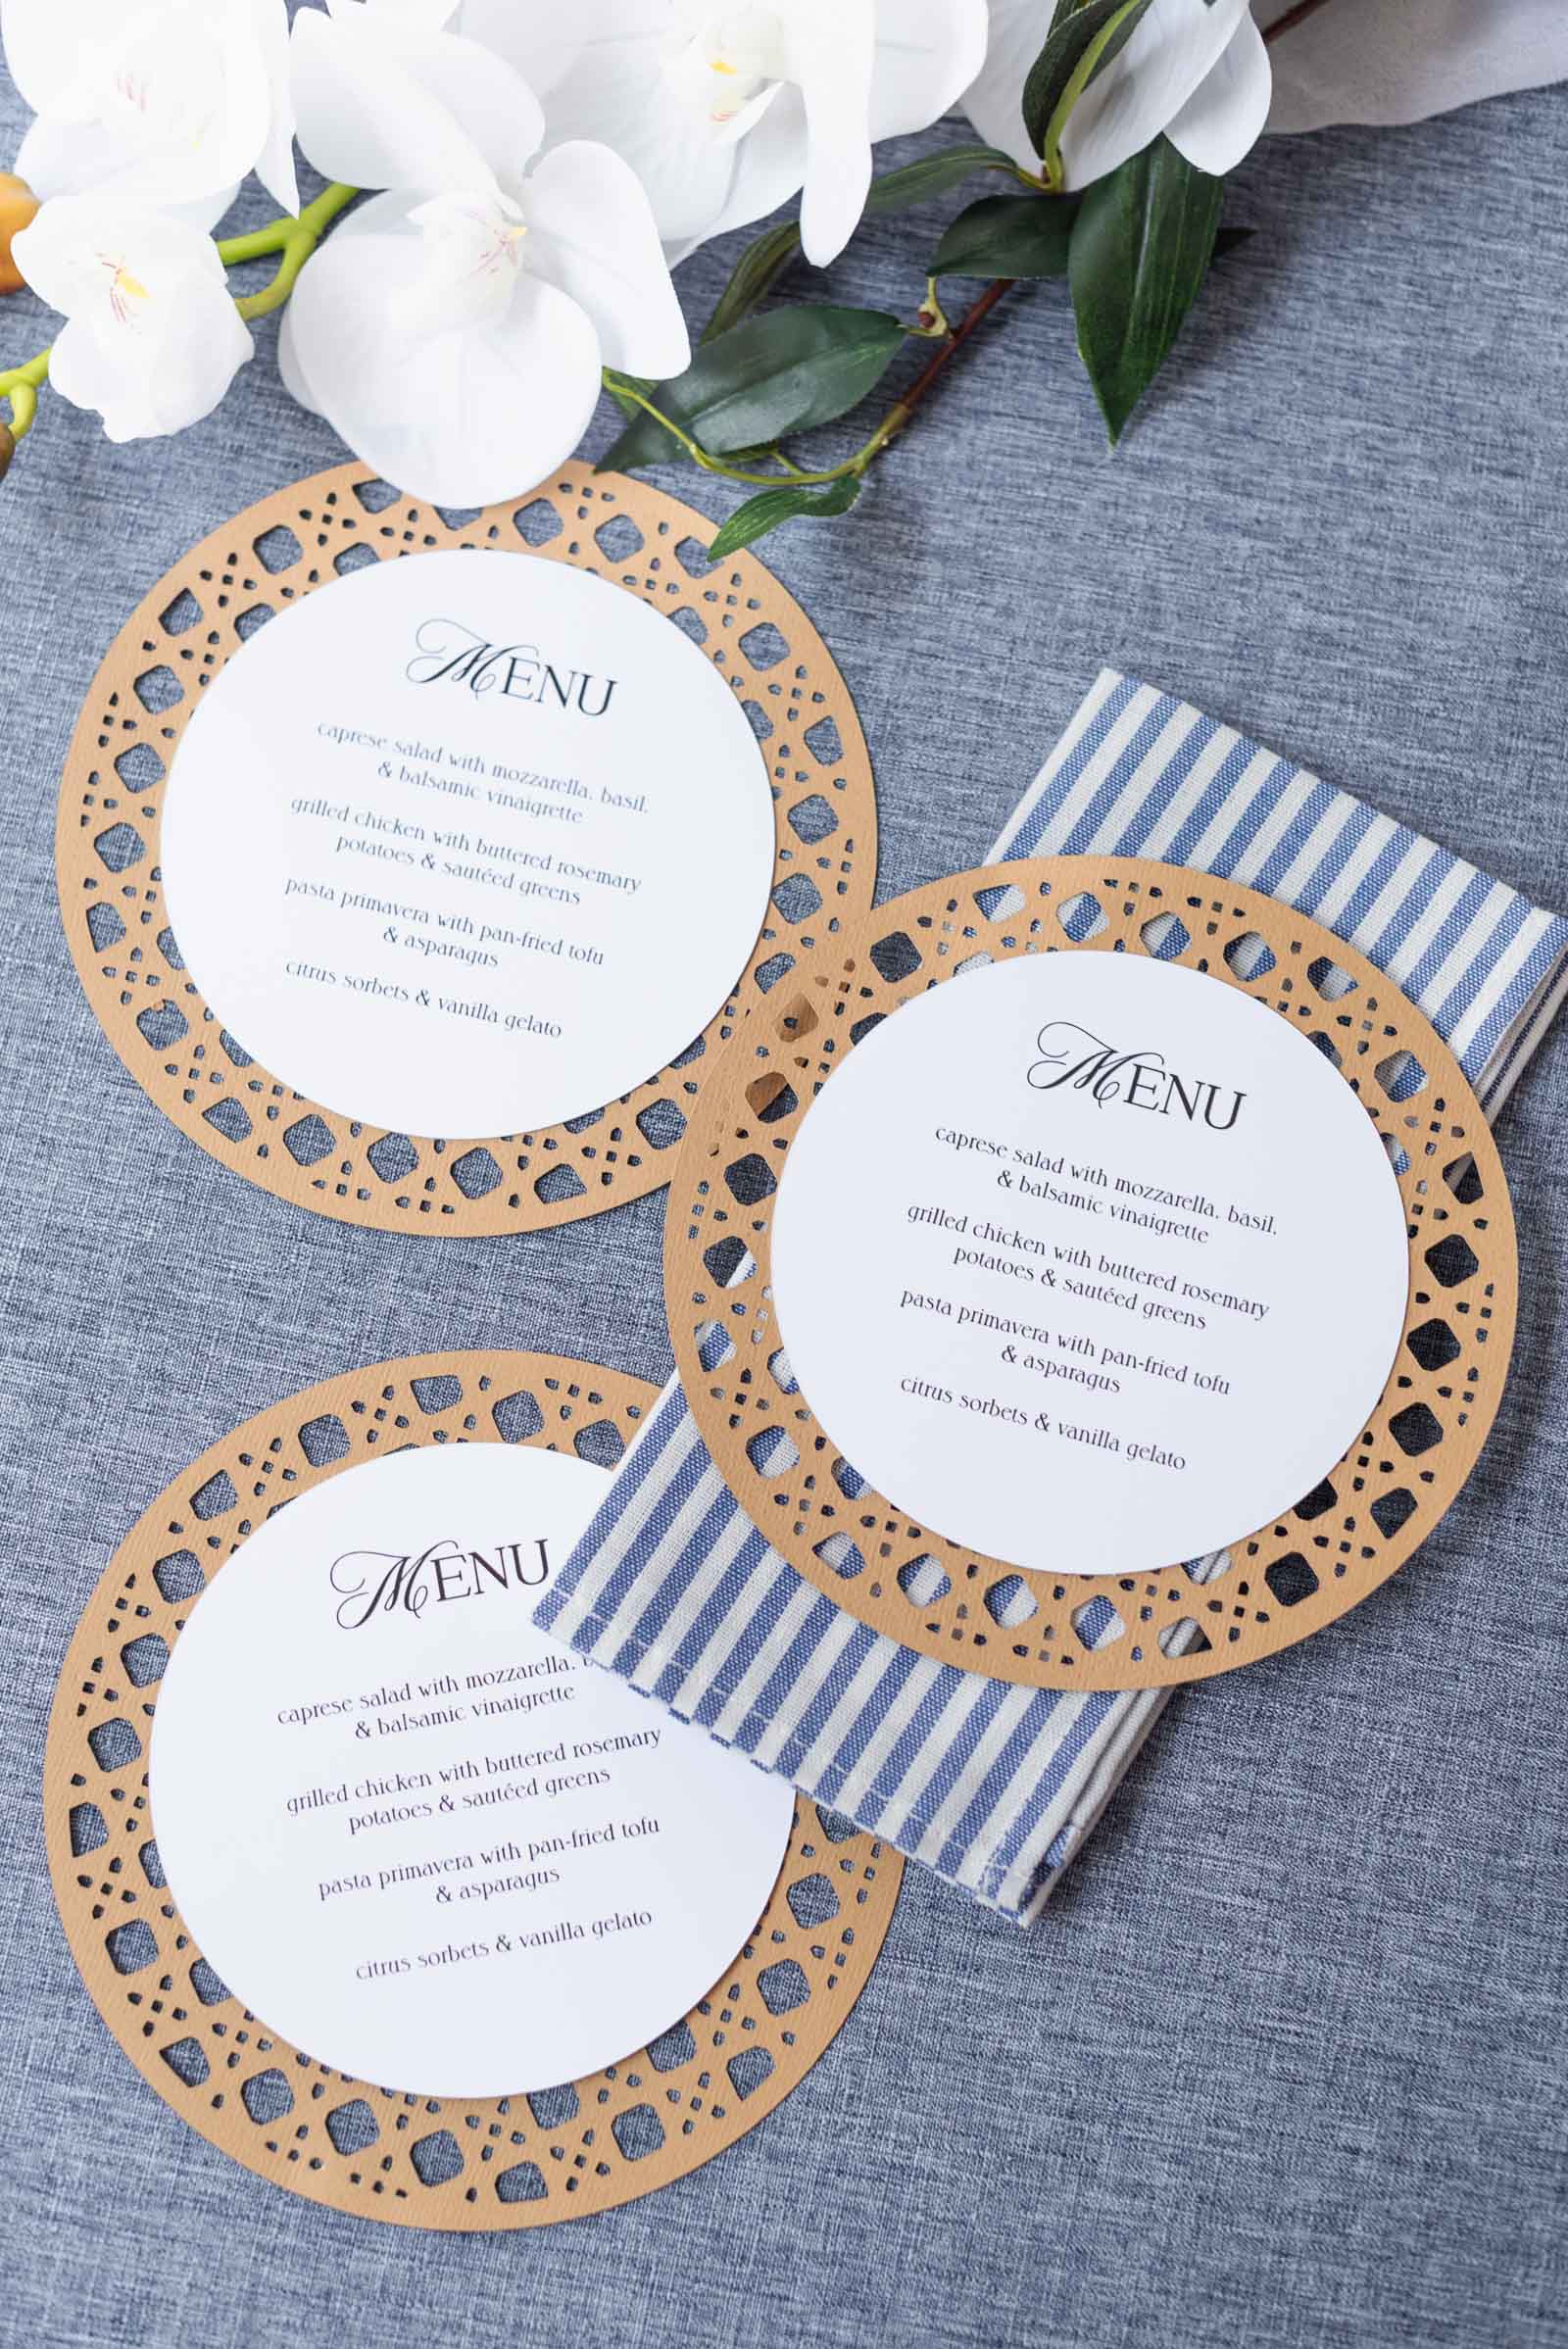
That's where papercrafting comes in! By combining textured cardstock with intricate Cricut cutwork, you can recreate the woven look of rattan without the bulk, fraying, or expense of natural cane webbing. The result is a menu that's lightweight, super easy to customize, and perfectly suited to batch making for weddings.
Whether you're planning a relaxed garden celebration, a coastal soirée, or an elevated boho reception, this DIY wedding menu tutorial brings the rattan look to your wedding table using nothing more than paper, glue, and a little Cricut magic.
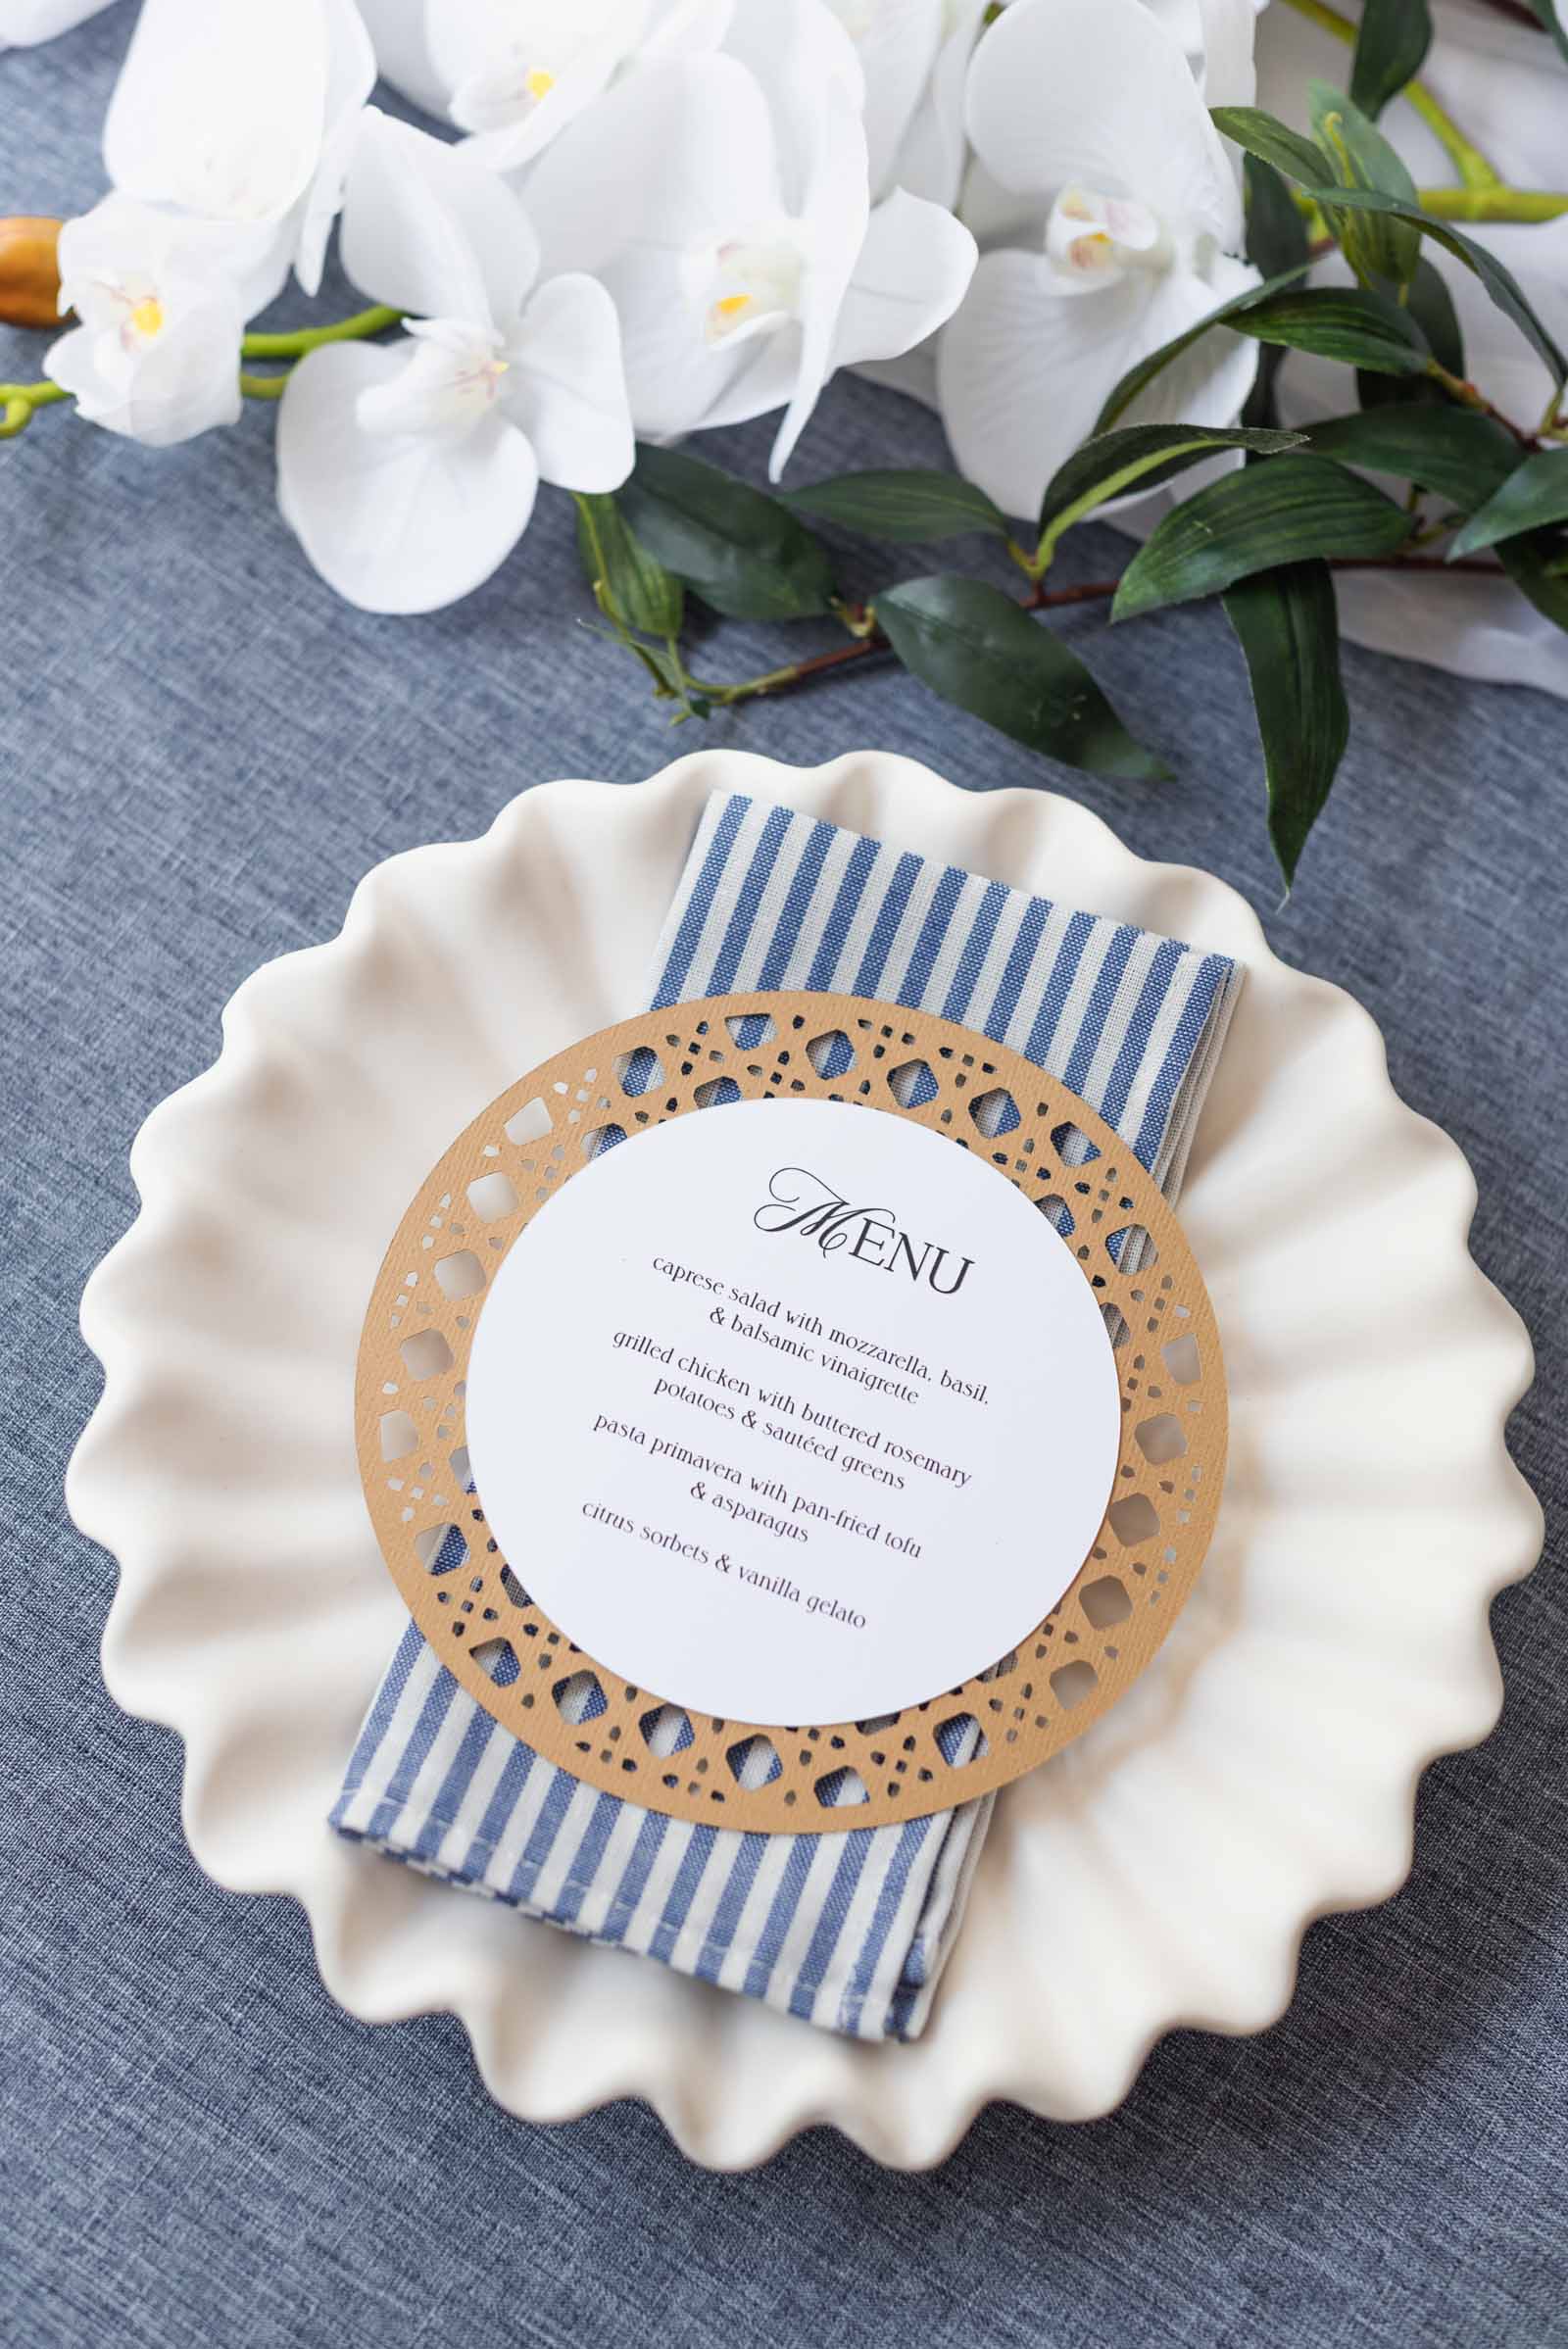
Why Choose Faux Rattan Cardstock Over Real Cane Webbing for Your DIY Wedding Menu?
If you’ve been browsing social media for modern boho or tropical wedding inspiration, chances are you’ve fallen in love with textured cane webbing and woven rattan wedding signage. They add incredible warmth, natural texture, and an understated organic luxury to any place setting. It's a firm favorite around here – as seen in our previous pom pom napkins DIY styling!
However, working with real rattan cane webbing (especially for DIY beginners and large wedding guest lists) can come with a few major drawbacks: high material costs, tedious prep work (like sometimes having to soak rigid wood fibers in warm water), and the hassle of securing rattan with heavy adhesives.
By using your Cricut machine and textured cardstock to create a faux rattan lattice effect instead, you achieve the earthy chic vibe and a high-end look at a fraction of the cost, time, and stress. The best bonus? Paper menus are recyclable after the big day, making this a stylish, low-waste choice for eco-conscious couples!
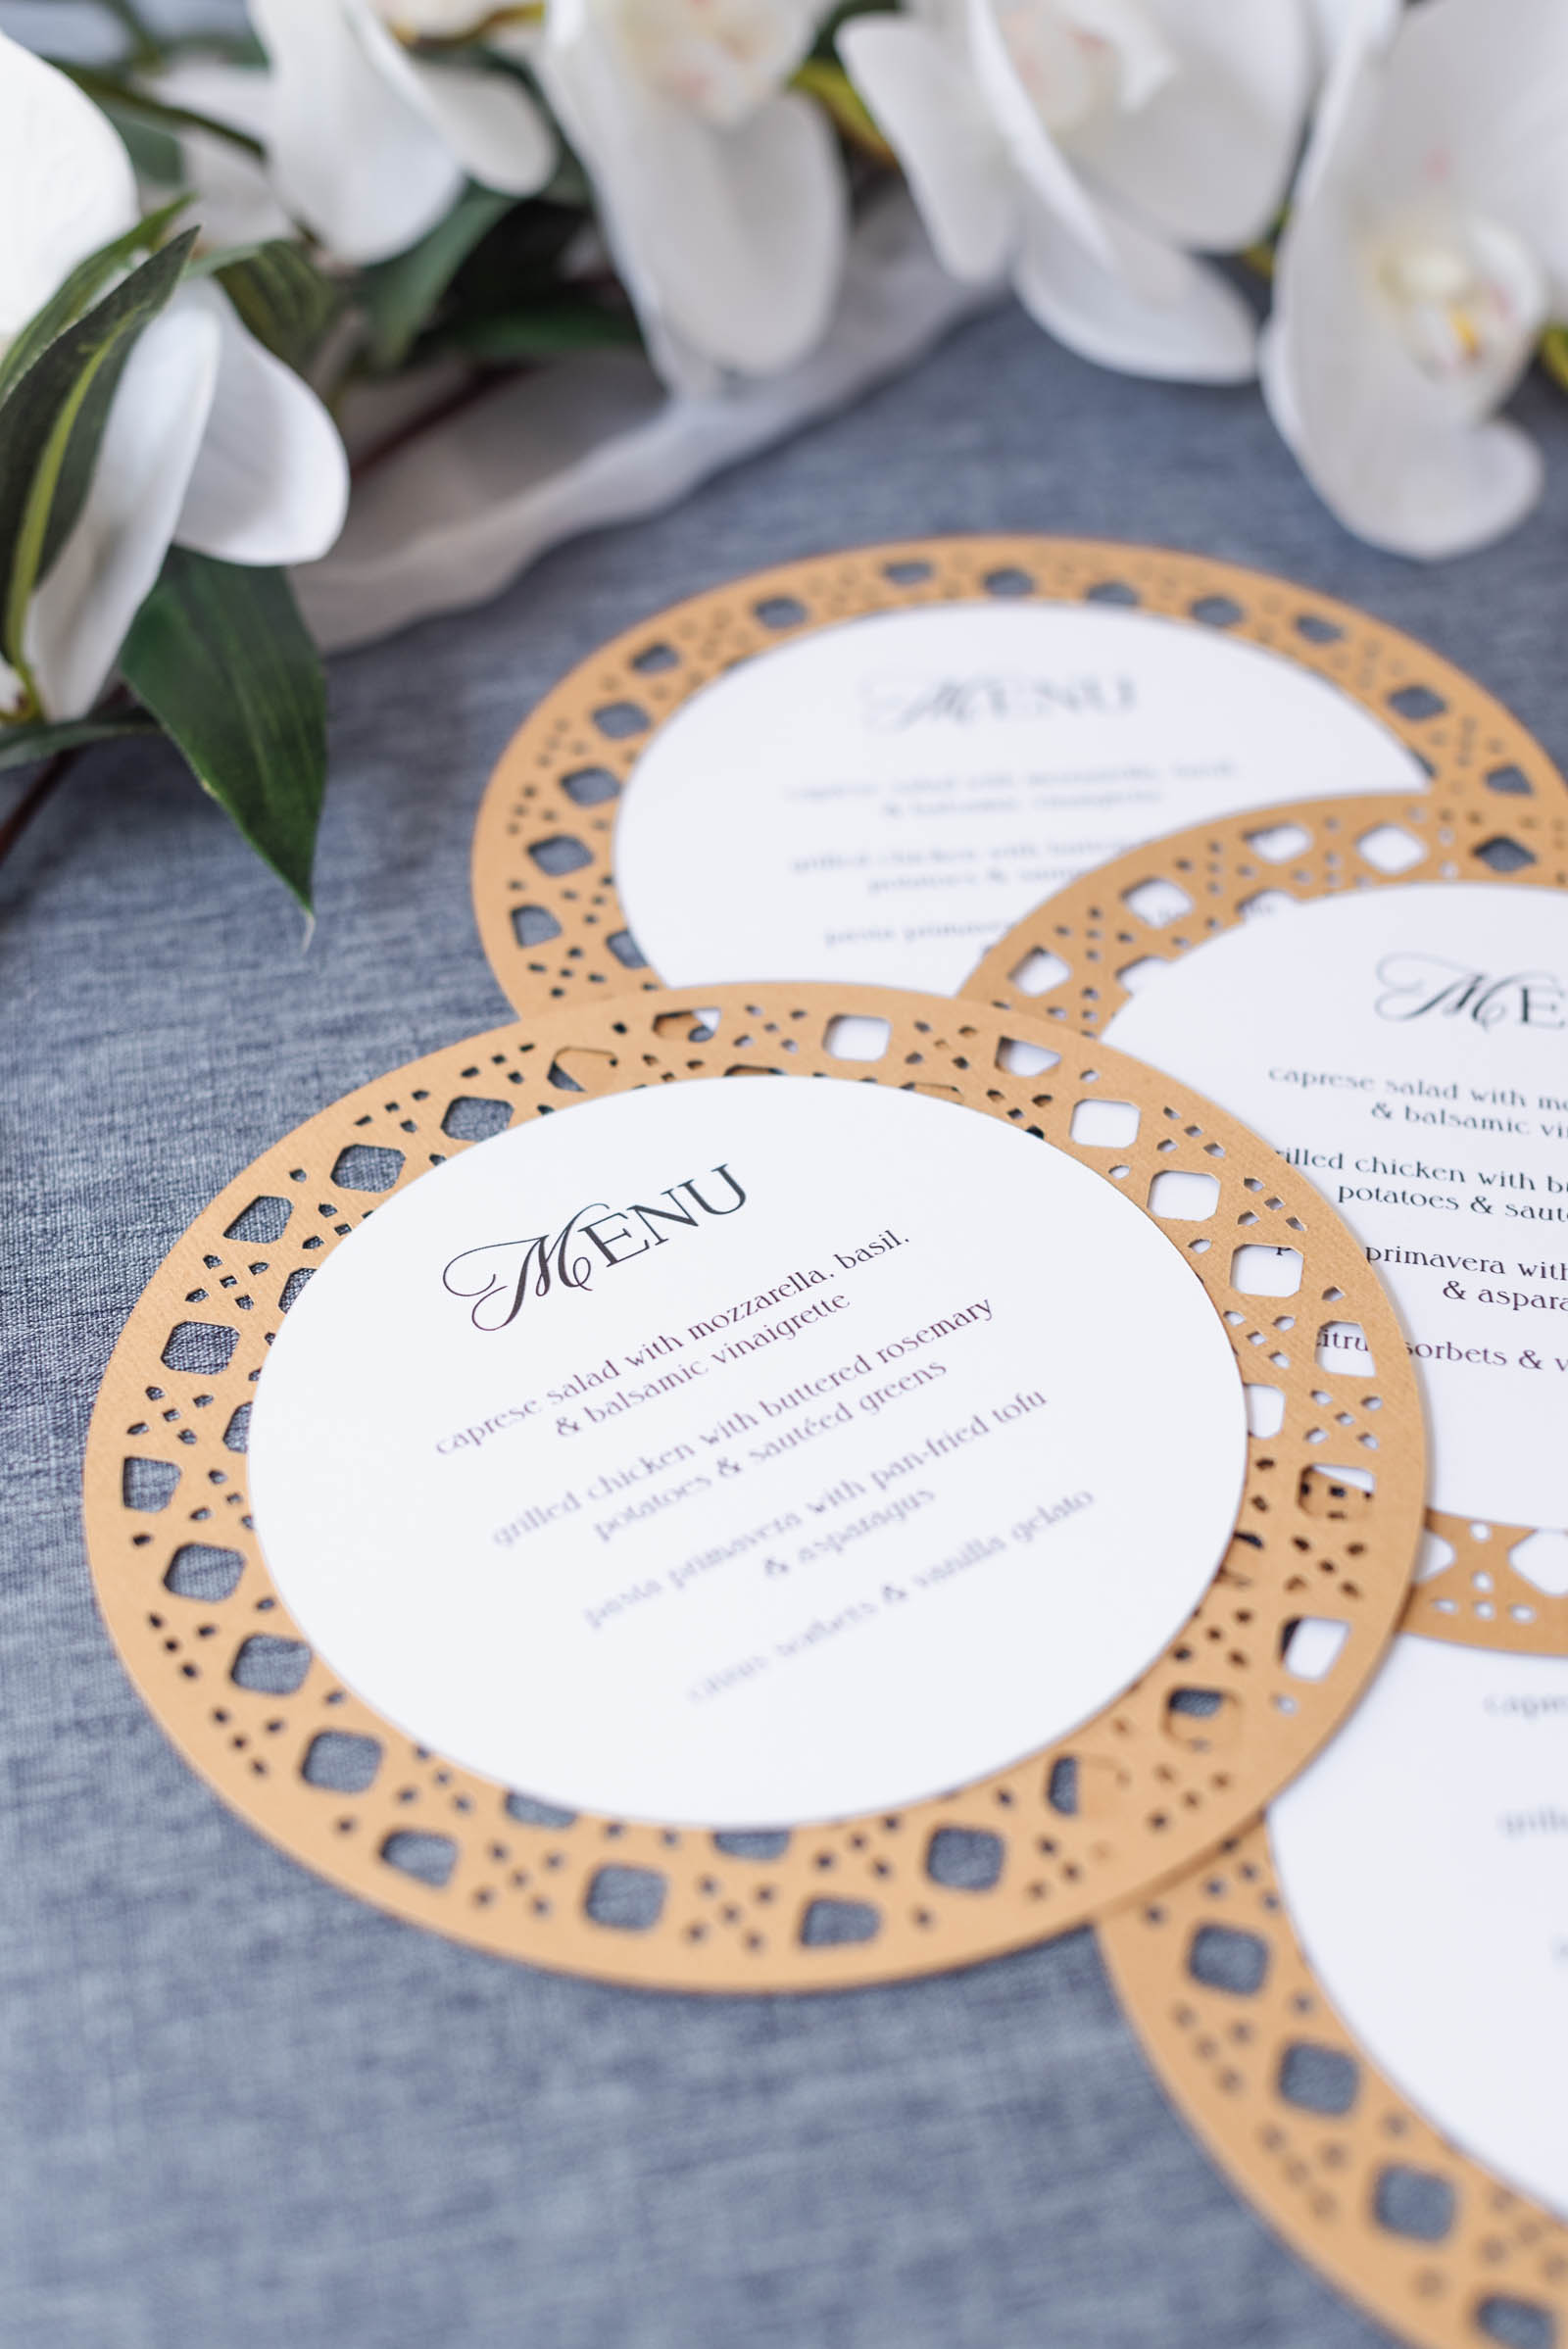
How to Make Rattan Inspired Wedding Menus with Your Cricut
Skill Level: Beginner
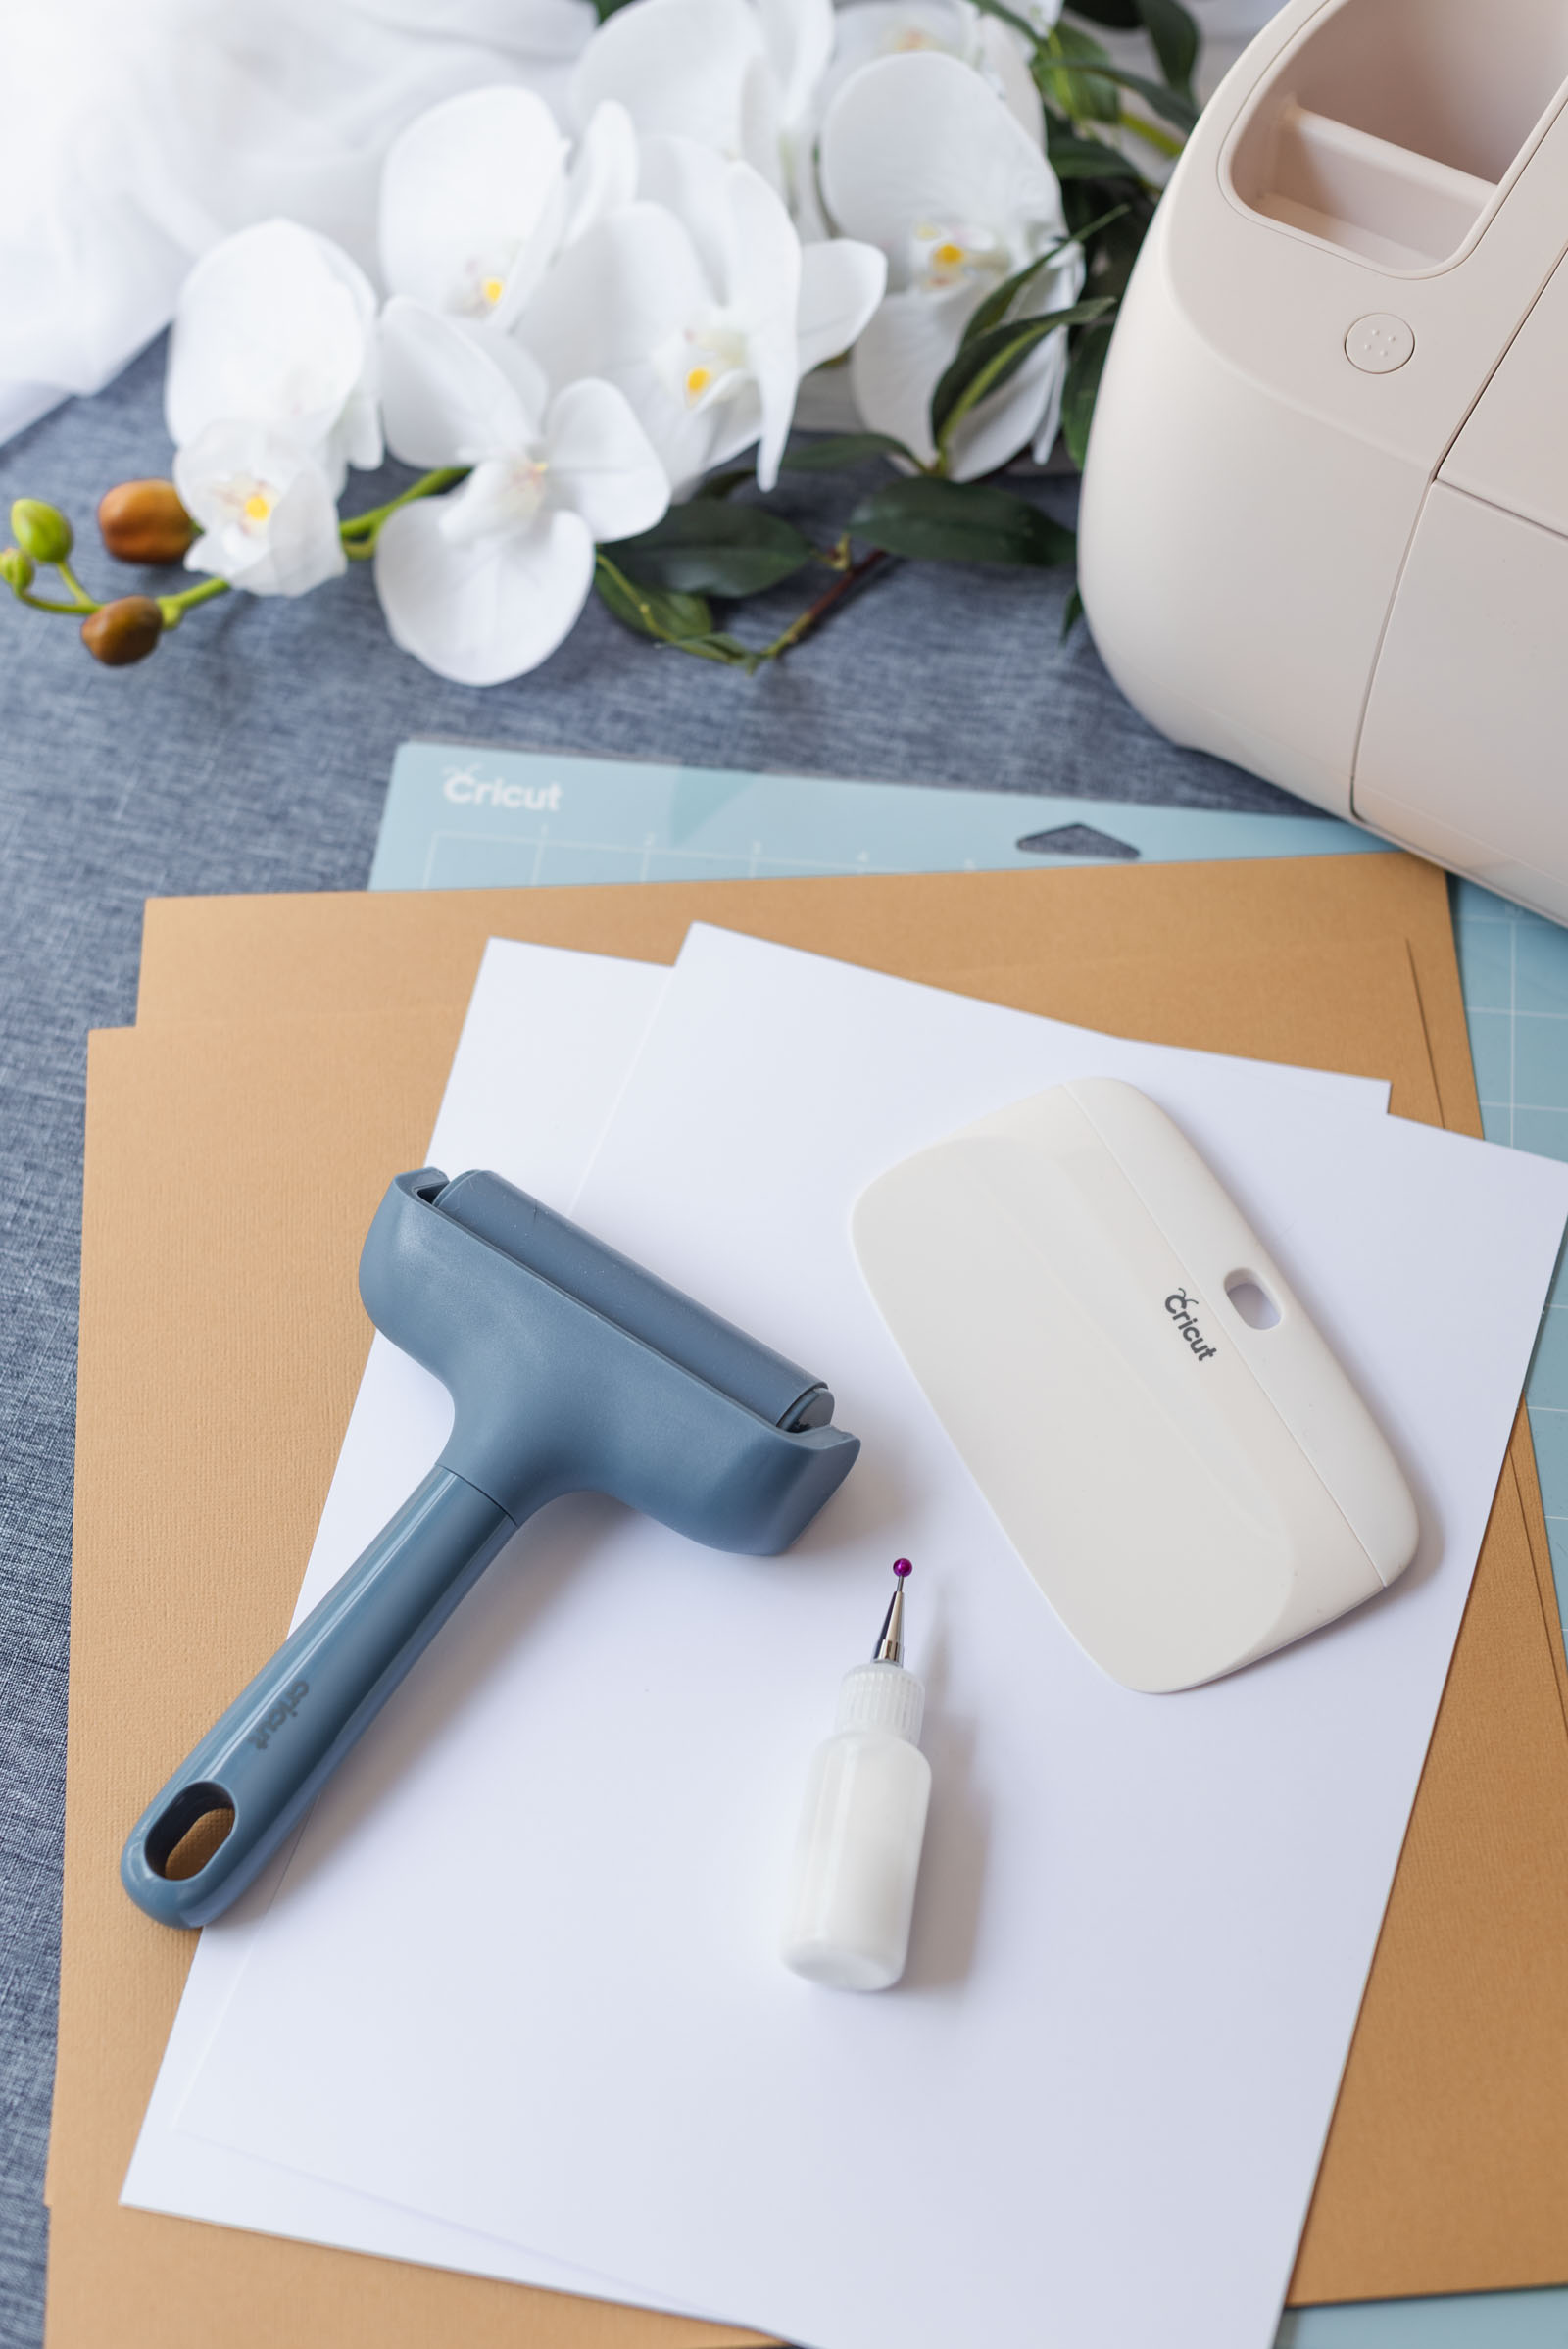
Supplies Needed for These Cardstock Rattan Menus
• Cricut cutting machine
• Fine-point blade
• Caramel-brown textured cardstock (at least 80lb / 216gsm with a solid core)
• White smooth cardstock compatible with your printer (at least 80lb / 216gsm – ours is 140lb / 300gsm)
• Home inkjet printer
• LightGrip cutting mat
• Brayer (optional, but recommended)
• Toothpick
• XL scraper tool
• Quick-drying craft glue in precision tip bottle
• Our Rattan Wedding Menu Cricut Design Space project (bookmark or make it right now!)
DESIGN NOTES: For our project template, we used Design Space-sourced images designed by Cricut Contributing Artists which means you will need a Cricut Access subscription or purchase the images as à la carte to make as is. You can also swap out and use your own computer's images and fonts as you wish. You can also find the script "Menu" heading in our SVG shop (just upload into Design Space and use the Contour feature to remove 'bar' from the image!).
Base Material Setting for Cutting Textured Cardstock
Find your paperweight (listed as lbs or gsm) on your cardstock packaging; this is important as your Cricut needs to know how deep the blade will cut.
For our rattan cardstock, we found the best results with both Medium Cardstock - Intricate Cuts. And for our menu layer, Poster Board.
Compatible Cricut Machines
• Joy Xtra
• Explore family
• Maker family
EDITOR'S NOTE: Our assembled rattan menus are 6" (15.2cm) circles at its widest. For Explore and Maker machines, you can get 2 rattan circles on 1 sheet of 12x12 cardstock. For Joy Xtra machines, you can cut 1 rattan circle at a time for your sized cutting mat. For our printed menu layer, you can get 2 menu circles on 1 sheet of U.S. Letter or A4 cardstock.
Step-by-Step Instructions: Rattan Cardstock Wedding Menus
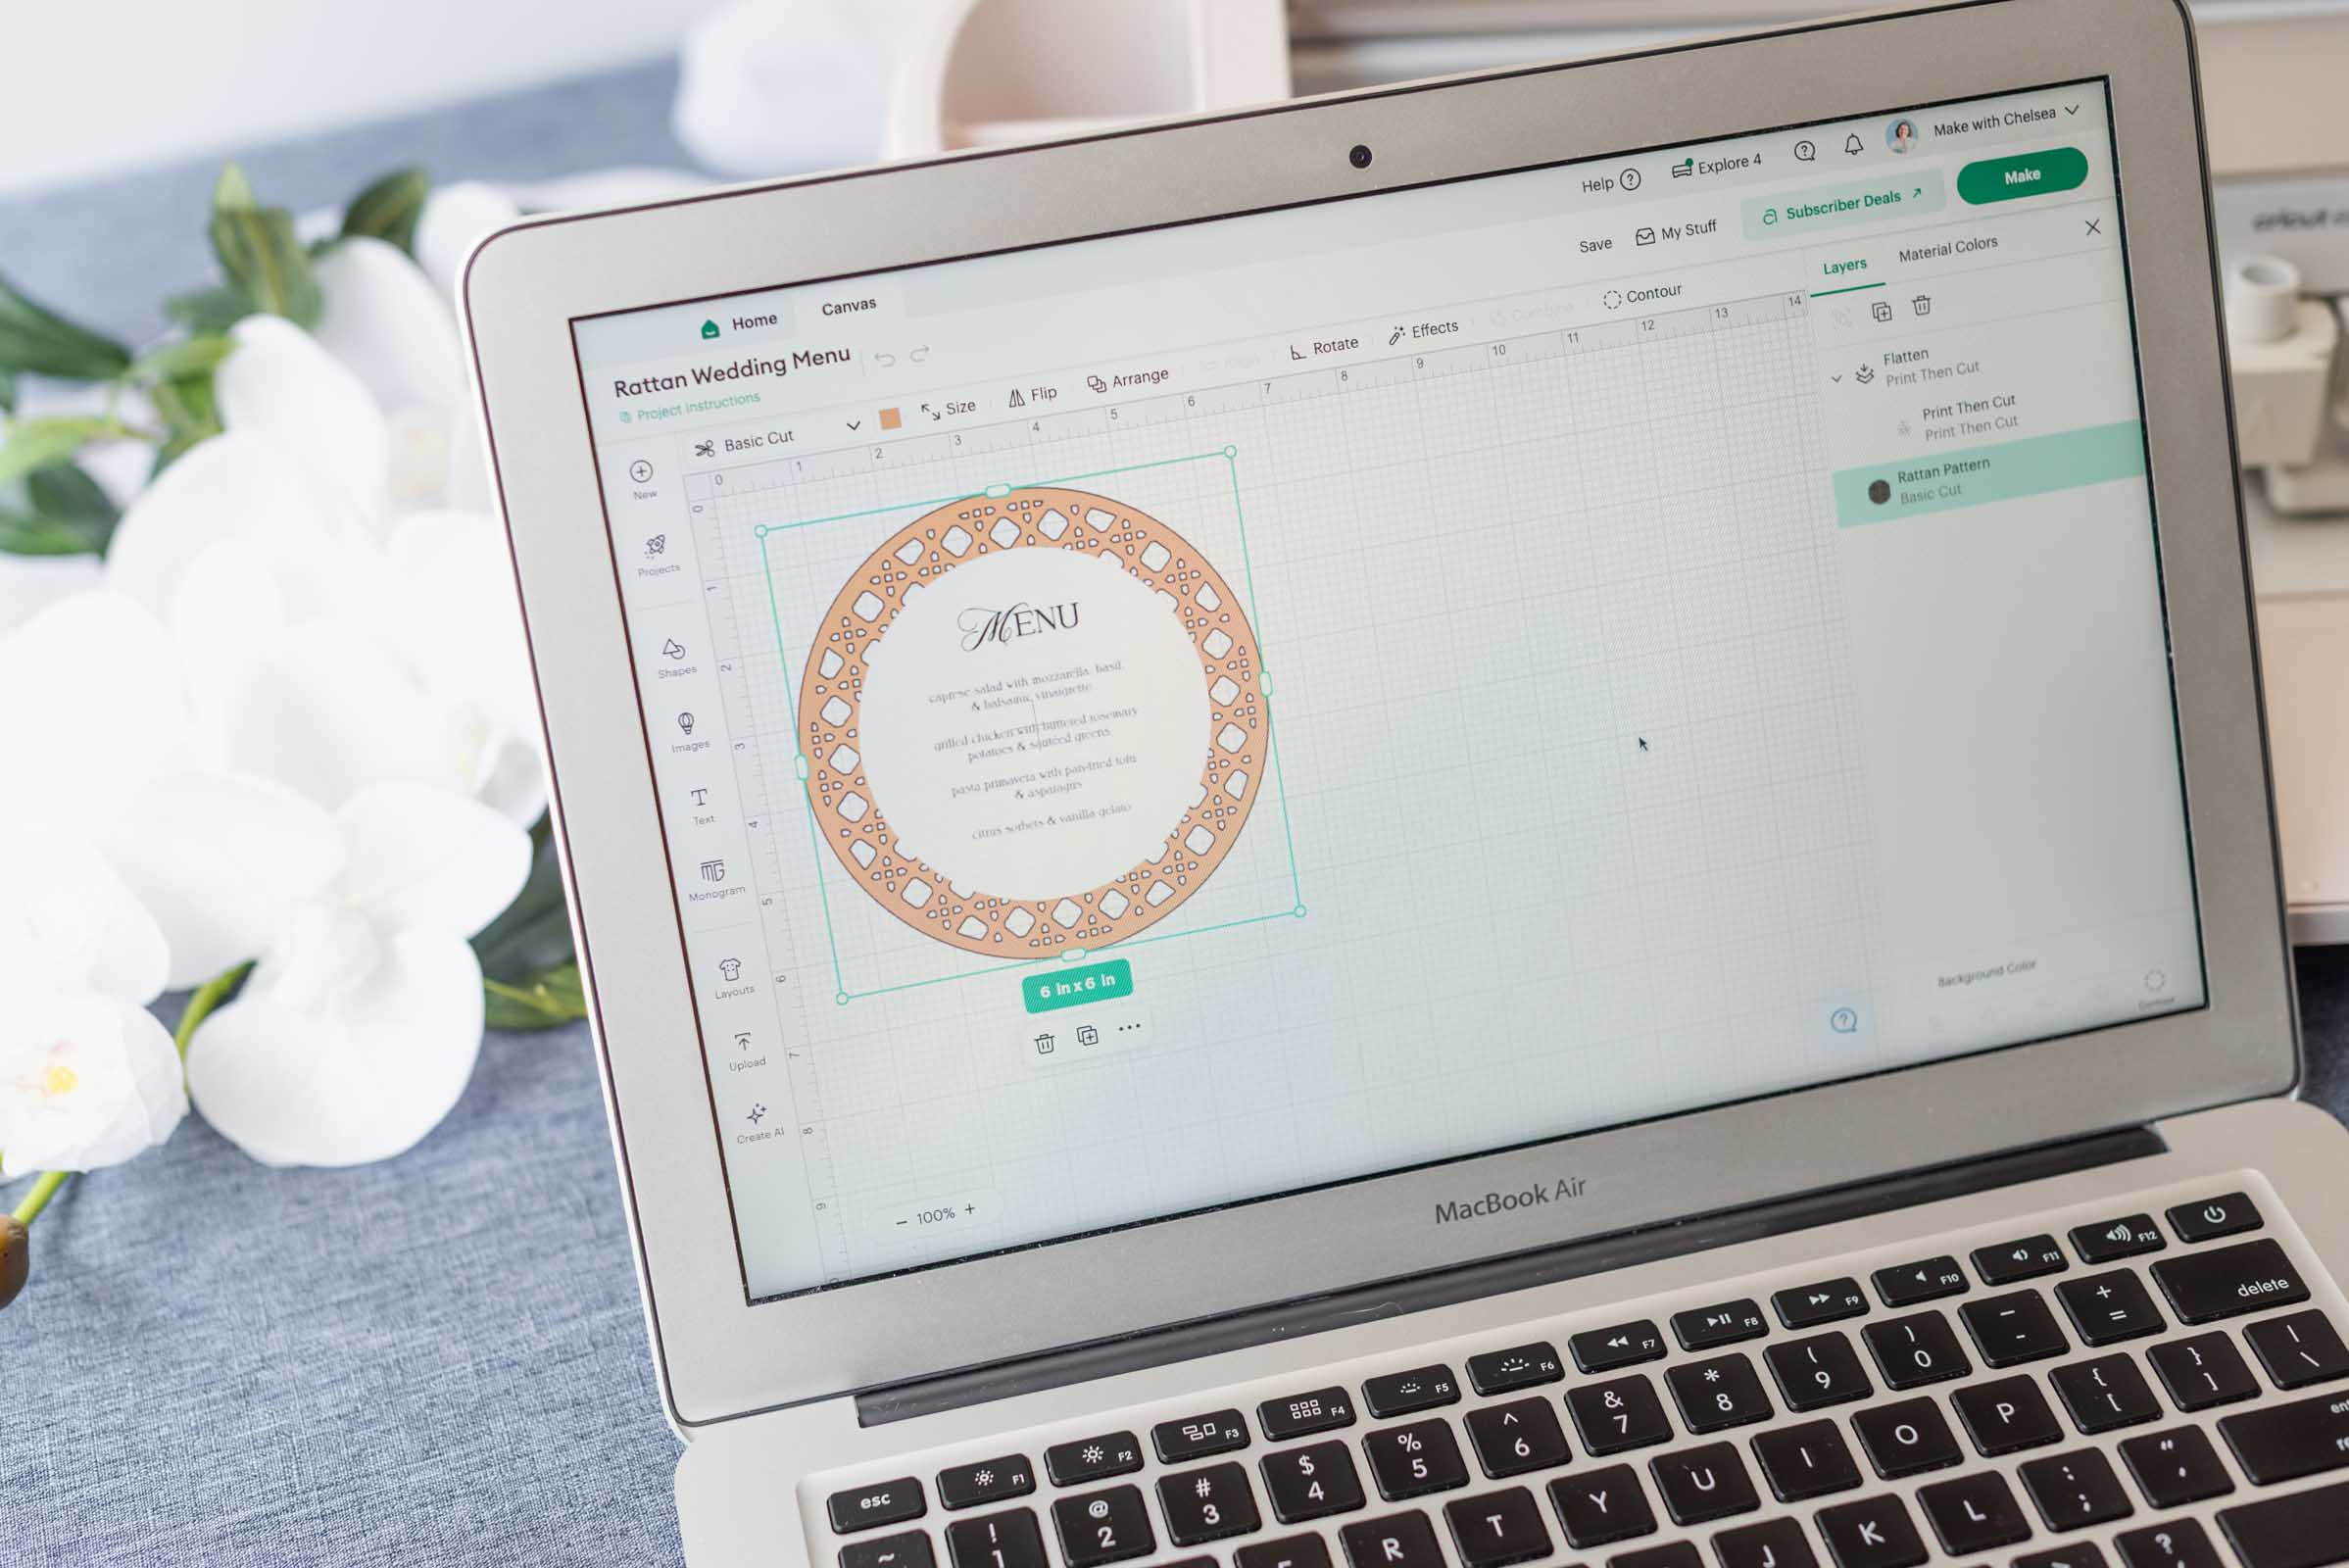
1Prep your project. Set out all of your materials and prep your computer, laptop, or mobile phone with Cricut Design Space. If you haven't calibrated your Cricut in a while, now's a good time to do so since this project uses Print Then Cut. If using our pre-made Design Space project, all you need to do is click Customize, and double-click on the text box to edit with your menu items!
2Edit and/or resize as needed. Adjust the menu size if desired. Our finished menus measure 6 inches (15.2 cm) which were designed to go on an average 10" wedding dinner plate. Chat with your caterer or dishware rentals company for measurements if you want a precise or more custom fit for your menus. Click Make when ready.
3Setup your on-screen mat. On the Prepare screen, Duplicate your menu pieces as needed to make enough menus for each guest. If you're batch making, return to the Canvas screen and hide the layer you're not cutting yet. This allows you to cut all of one layer before moving onto the next. See below for important batch making tip.
WEDDING BATCH MAKING PRO TIP: We recommend batch making each menu layer separately instead of switching back and forth between Print Then Cut and normal cutting. First, make all of your rattan cardstock layers as these take the longest to cut due to their intricacy. Then, on another day, print all of your menu cards before cutting them all at once.
Did you know you can print everything and then come back another day to cut? Yes, you can! Design Space gives you the option to choose "Already Printed" and skip straight to the cutting – it's a lifesaver for batch making! When you batch make, you save time, some sanity, and possibly money!
4Cut your menu pieces.
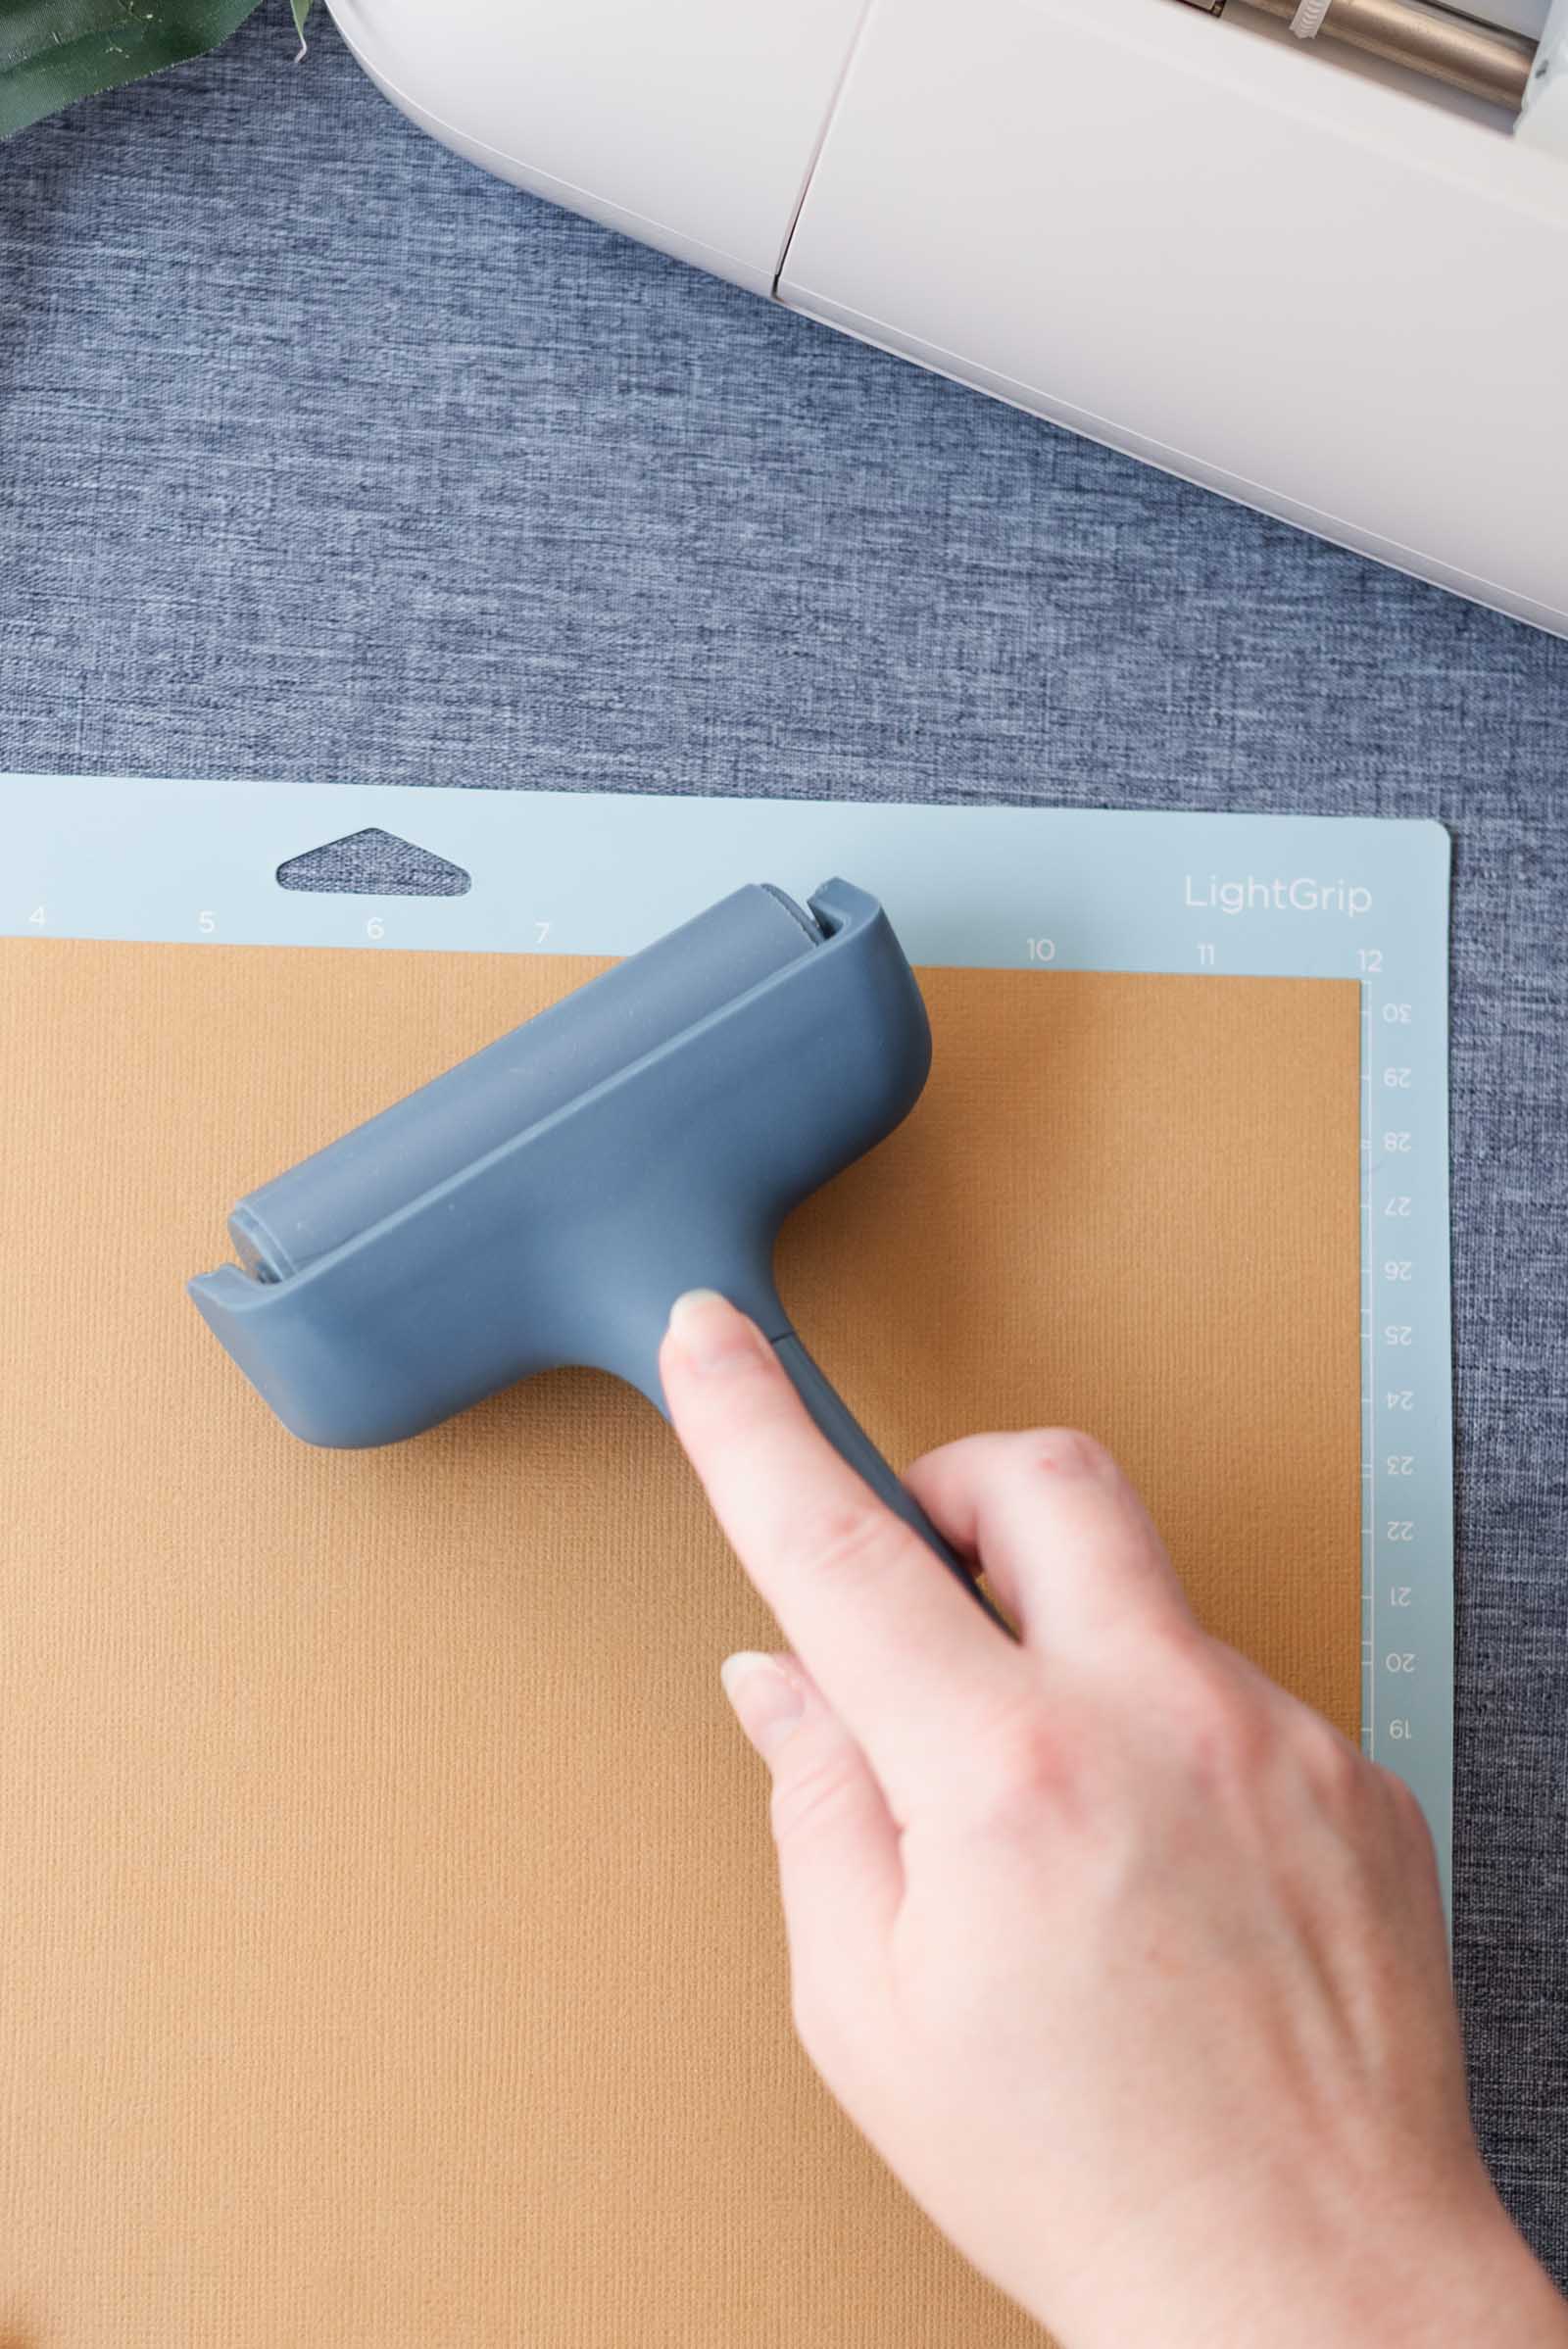
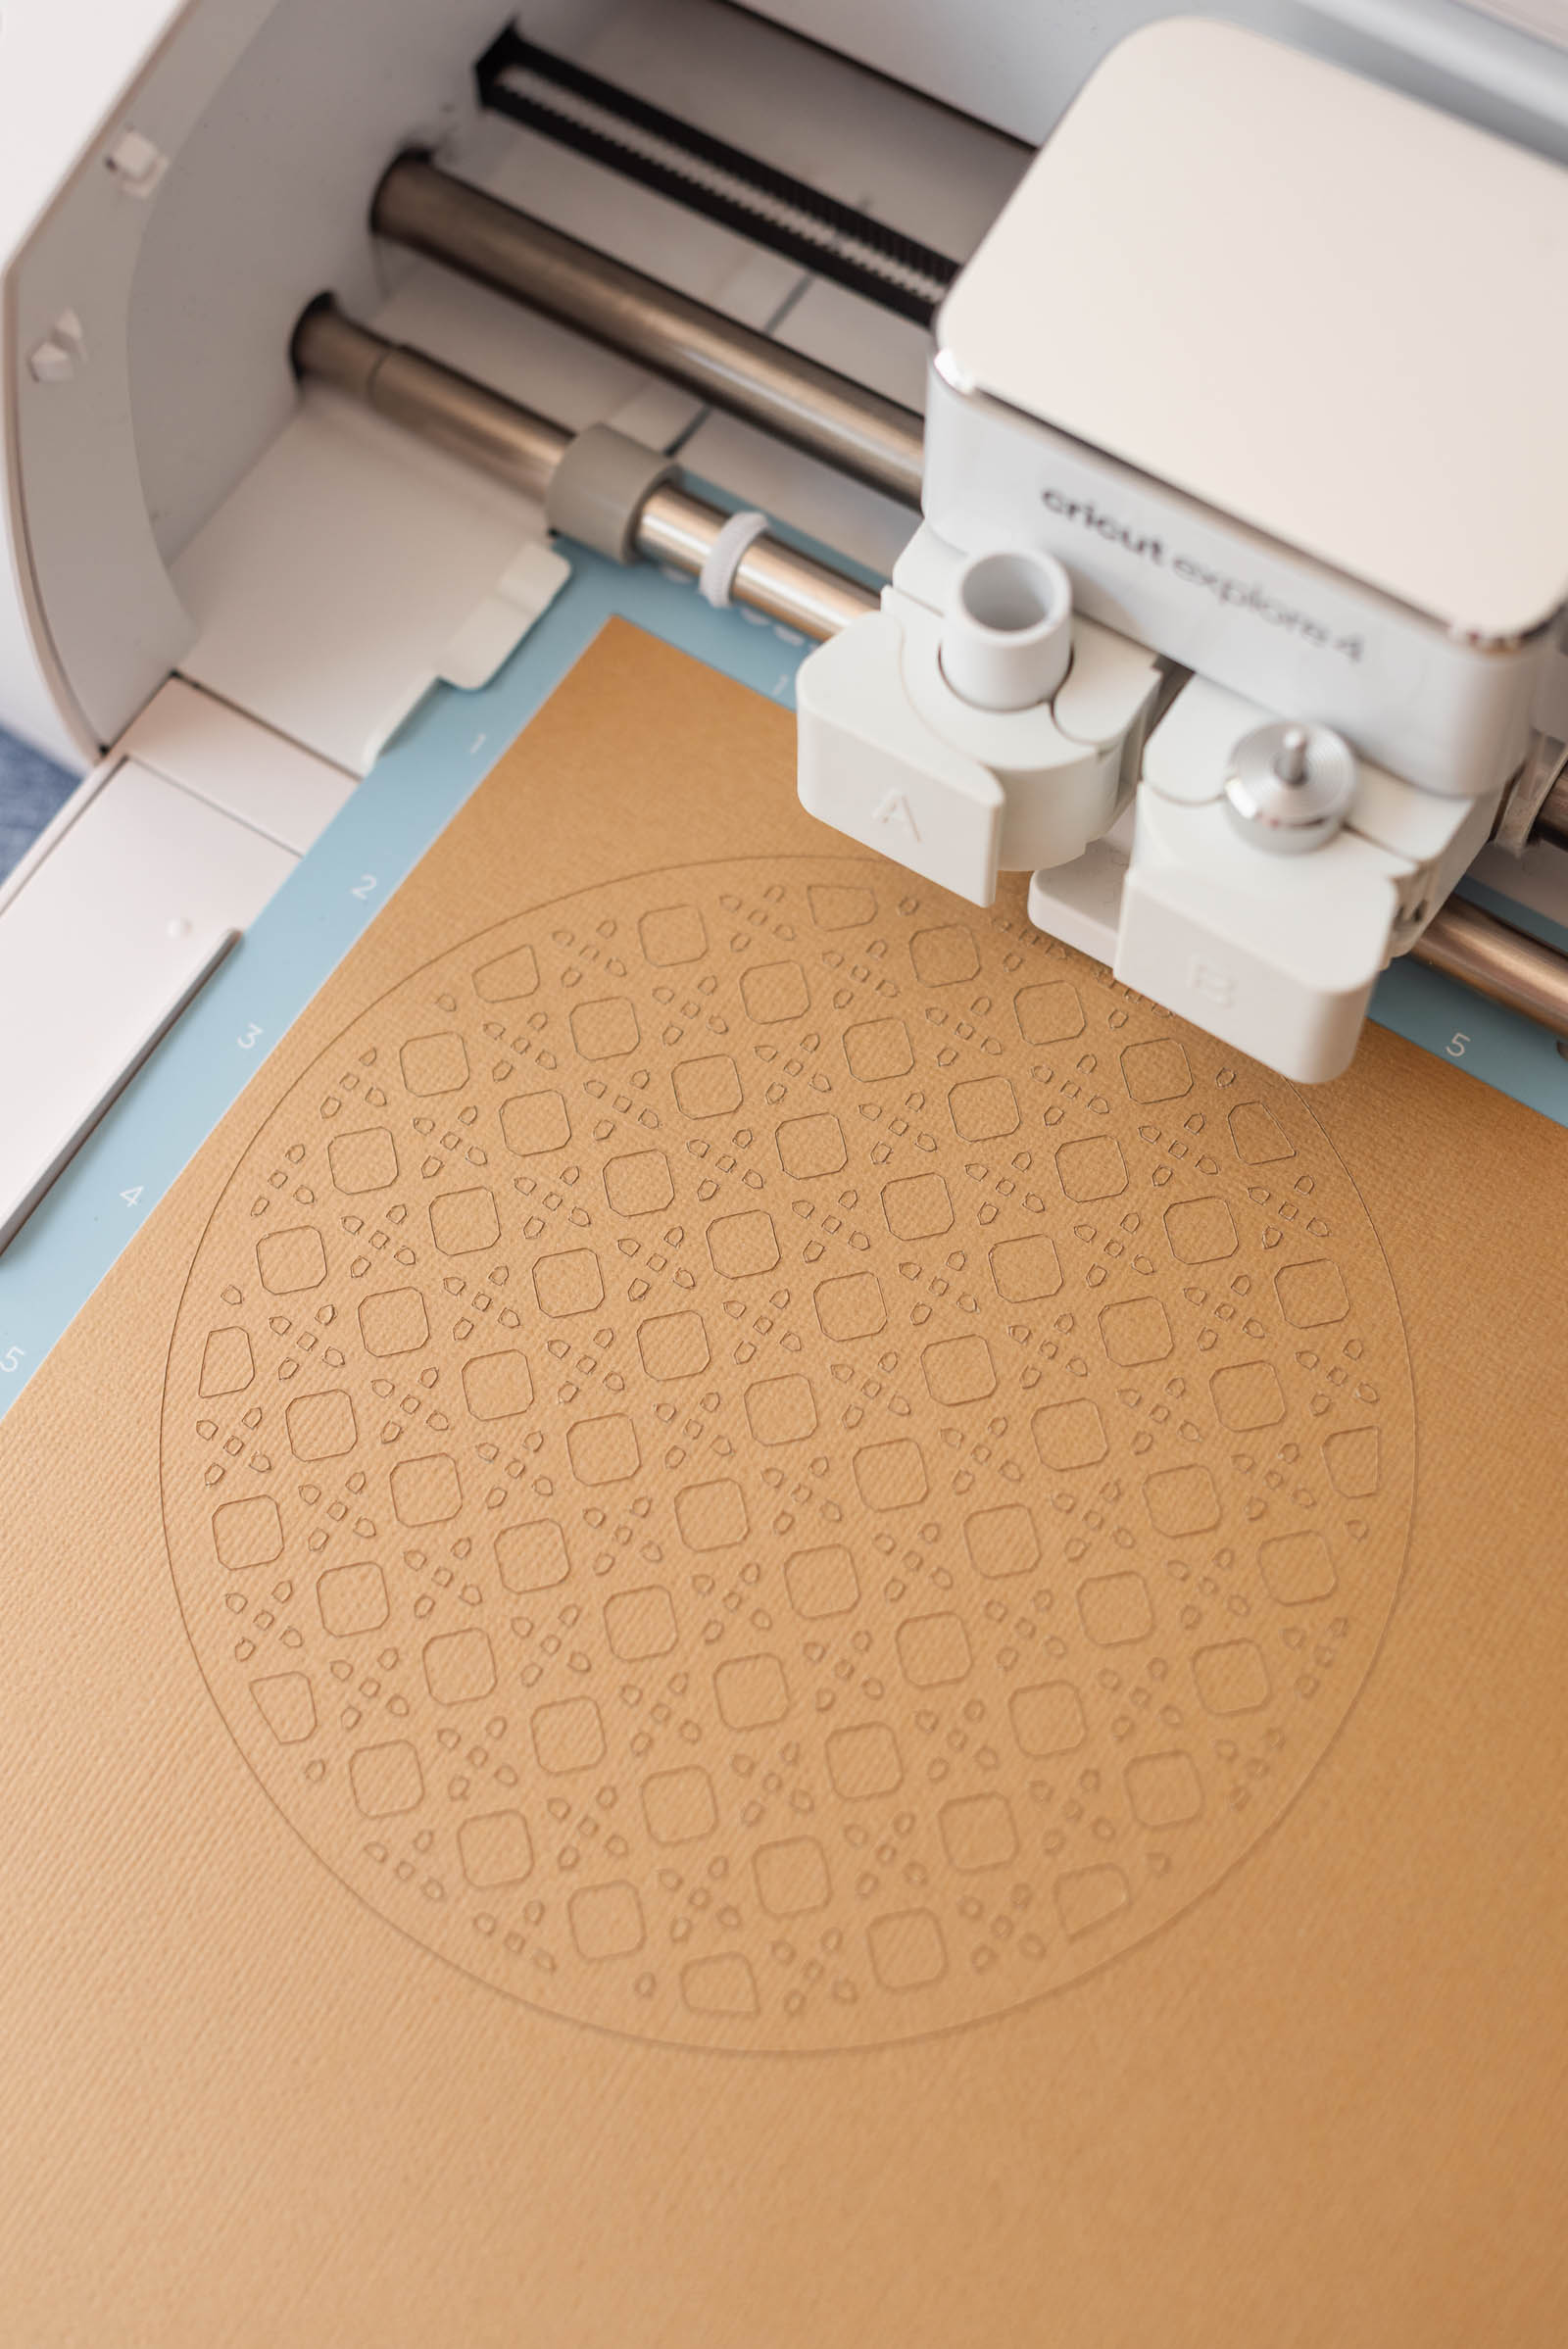
➤ For Rattan Layer: If you're making your rattan layers first like we did, place the cardstock on your LightGrip mat. Using a brayer, make sure the cardstock is firmly adhered to your cutting mat as any looseness can affect your cut. Select your Base Material so your machine knows how deep the blade needs to cut – ours cut best on Medium Cardstock - Intricate Cuts.
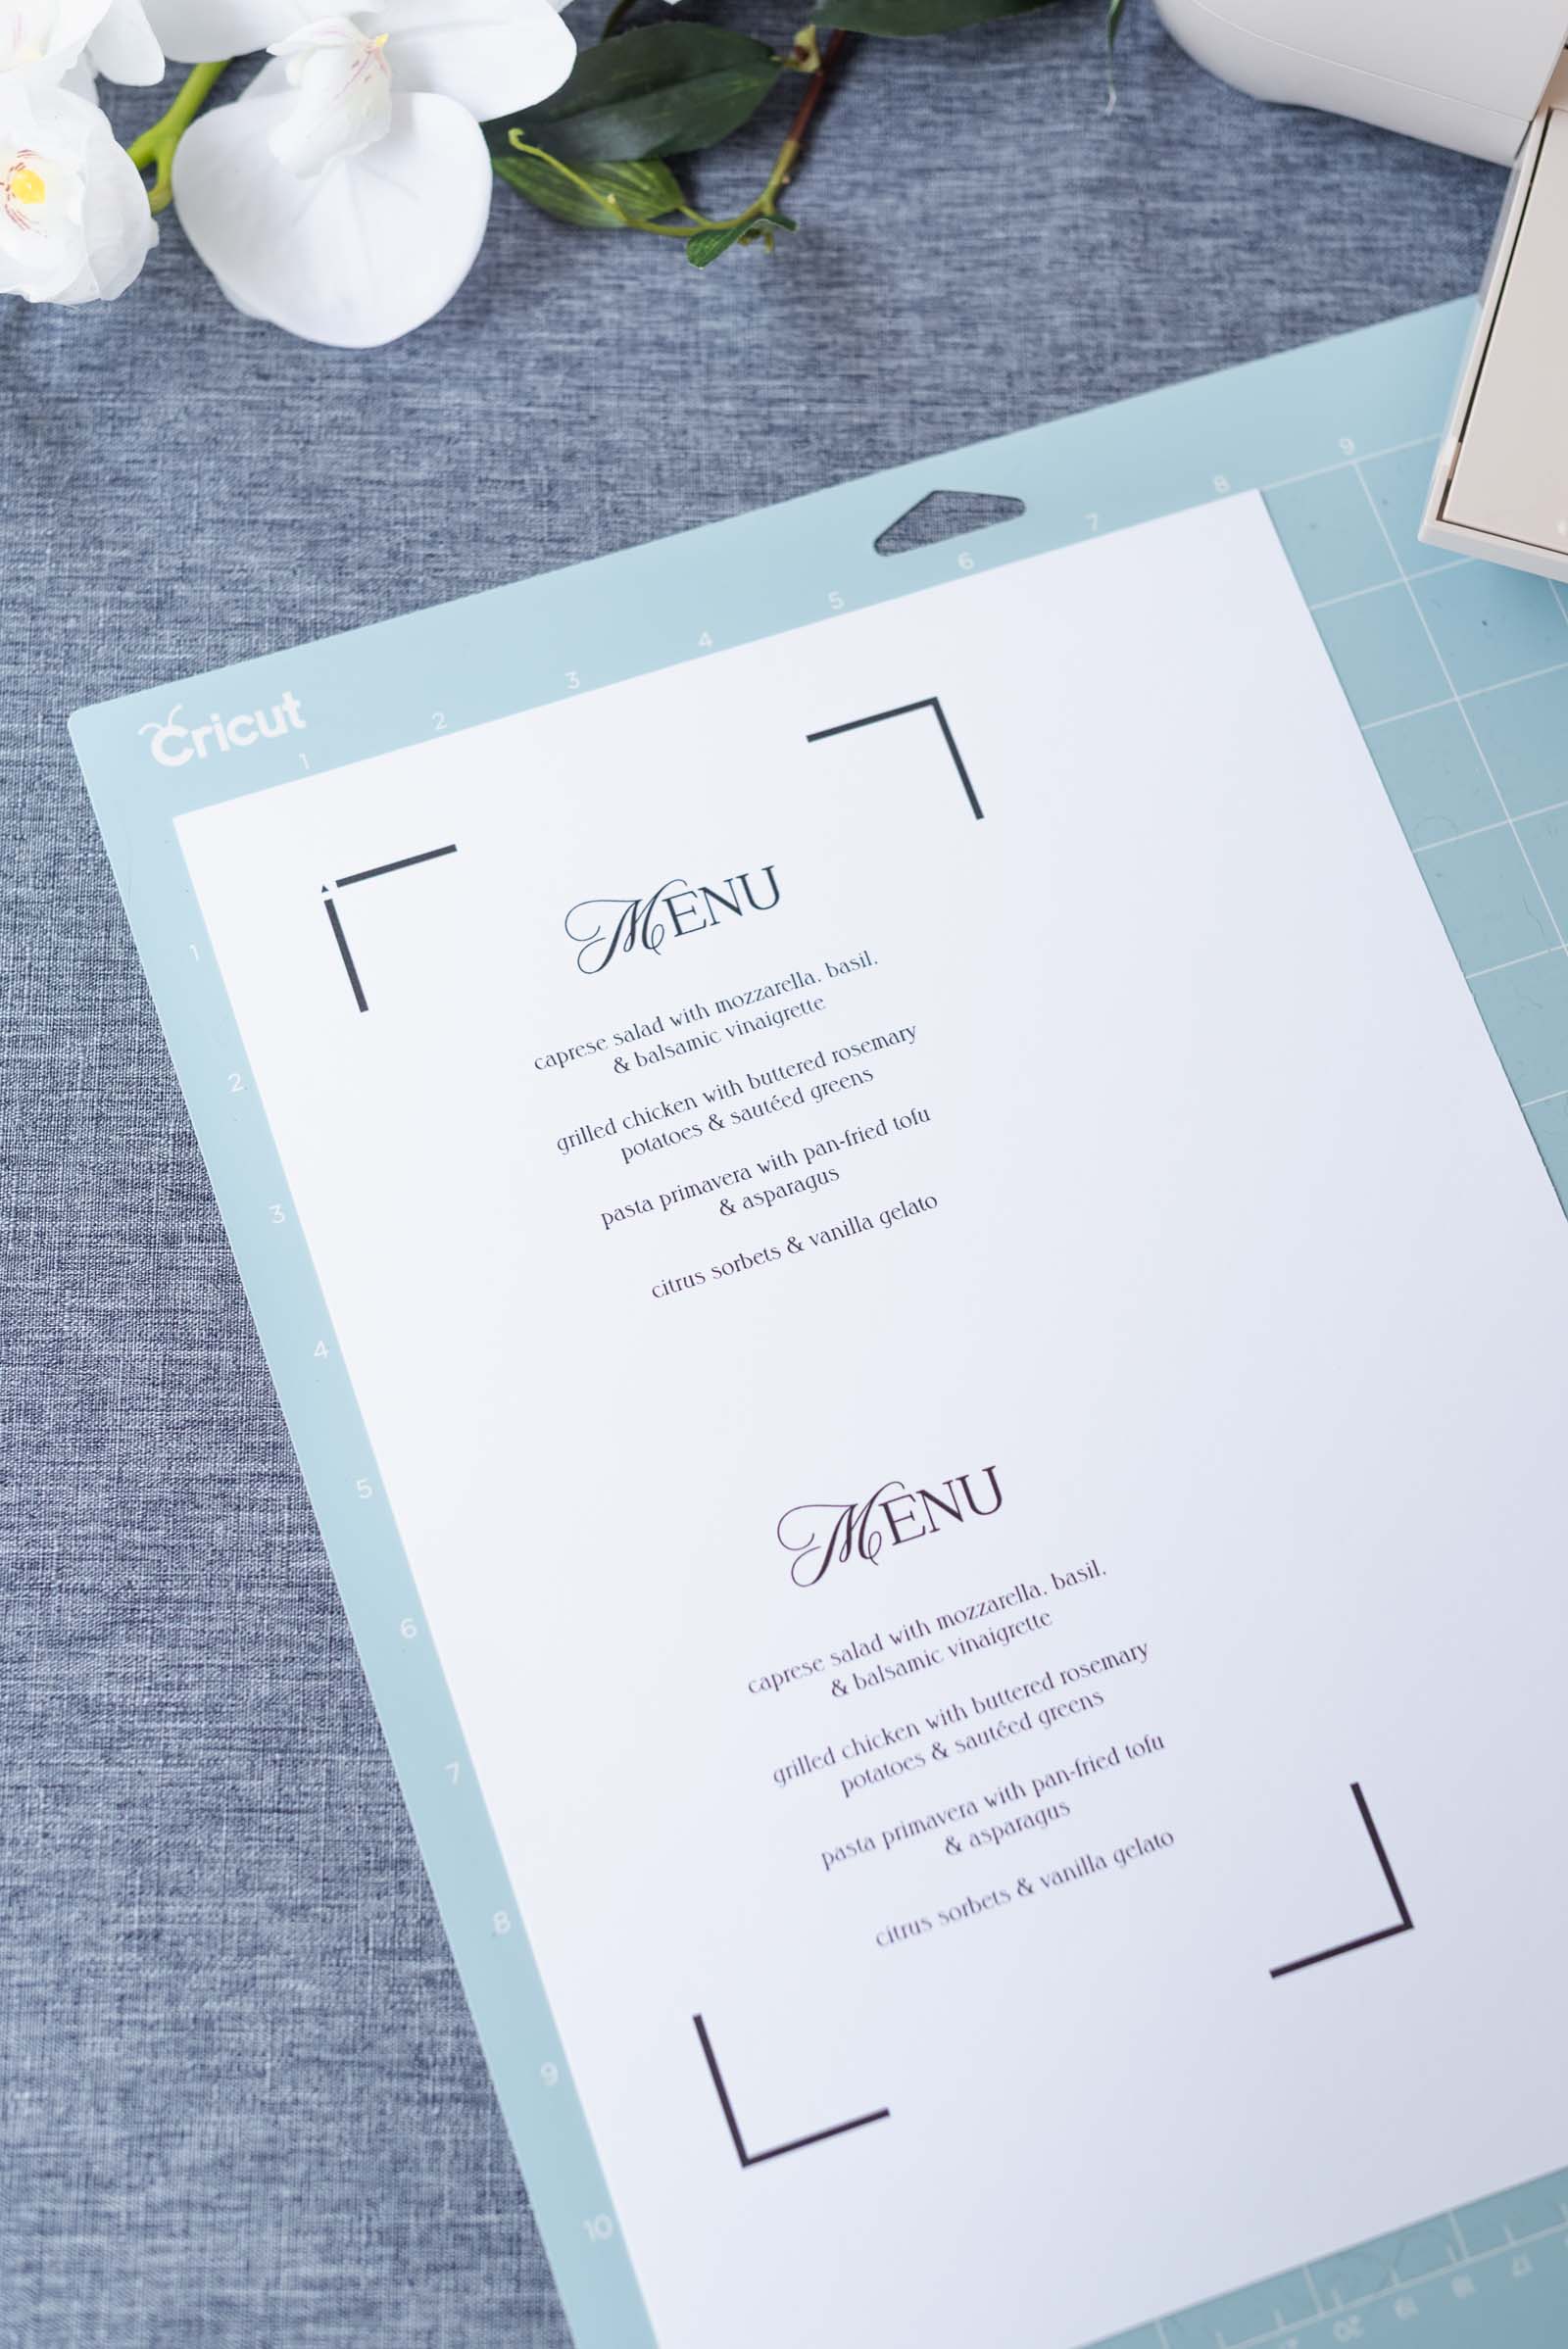
➤ For Menu Layer: Click Continue and Send to Printer. Turn off "Bleed" unless you have created a full-color menu. For white menus like ours, it's not needed. We recommend printing a test copy on plain printer paper first to check your printer alignment before using your final cardstock. Once you're happy that everything's printing as it should, then use your more expensive cardstock. Once printed, place on a LightGrip mat and select your Base Material so your machine knows how deep the blade needs to cut – ours cut best on Heavy Watercolor Paper (140lb / 300gsm).
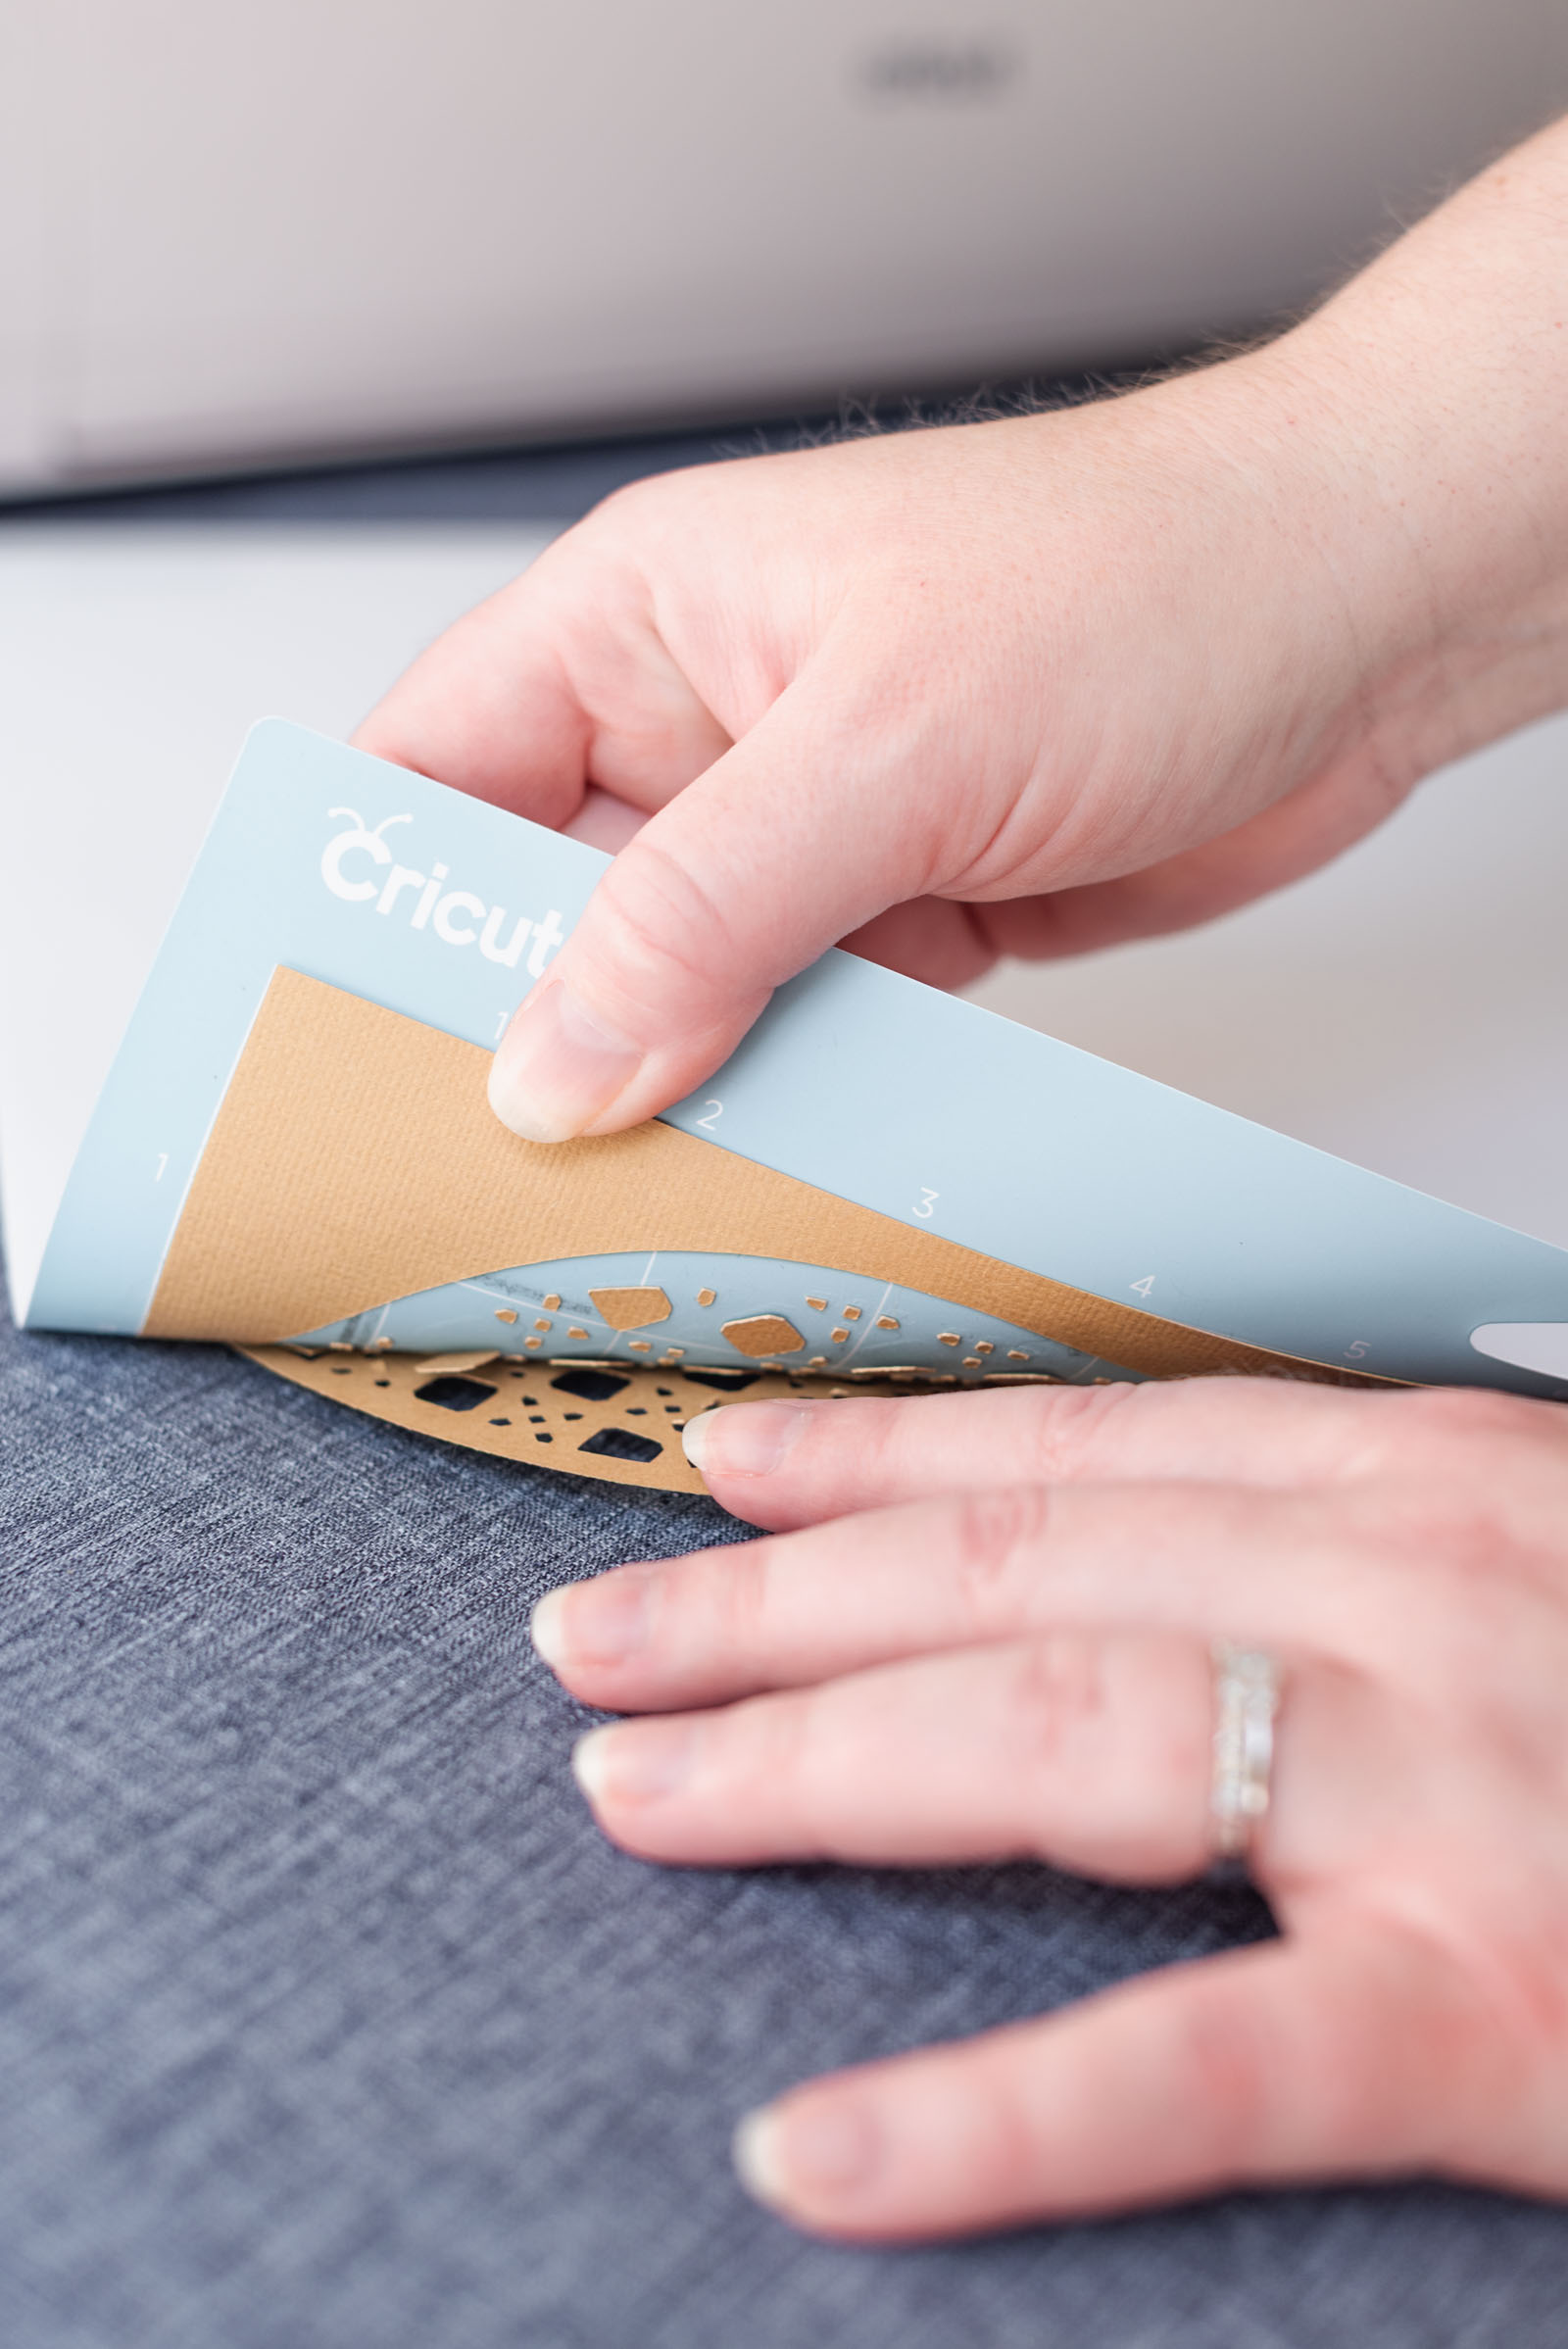
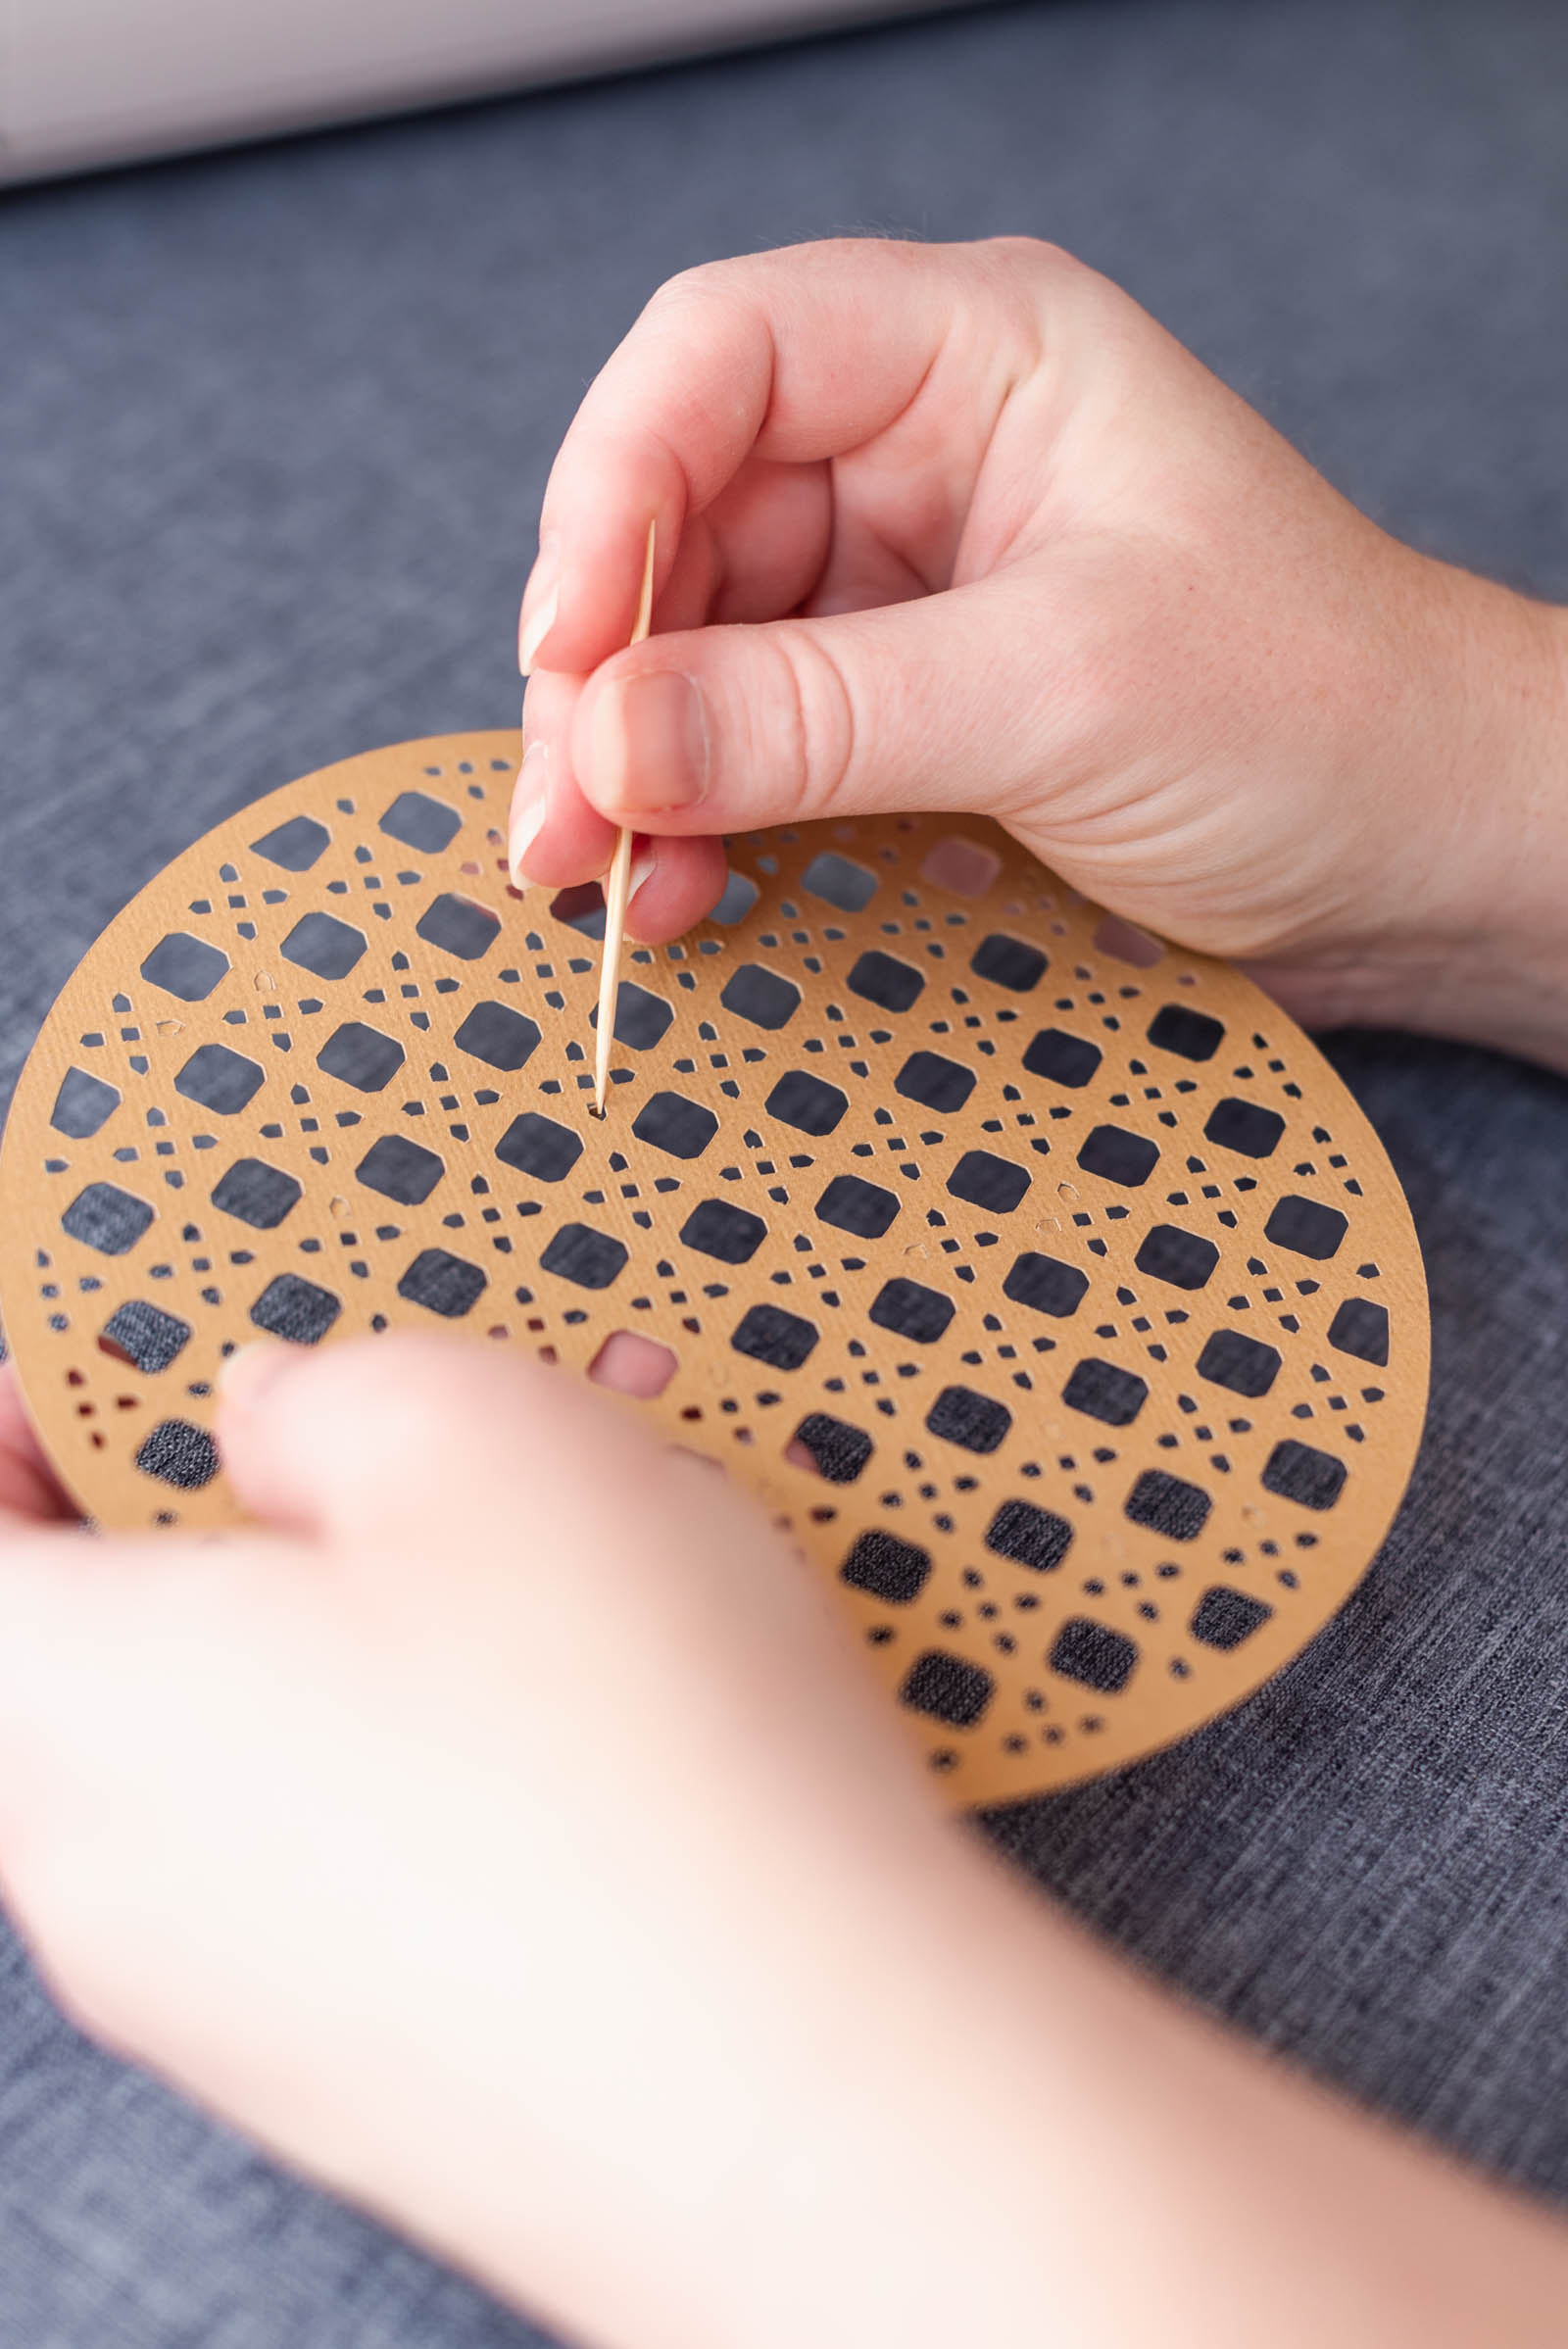
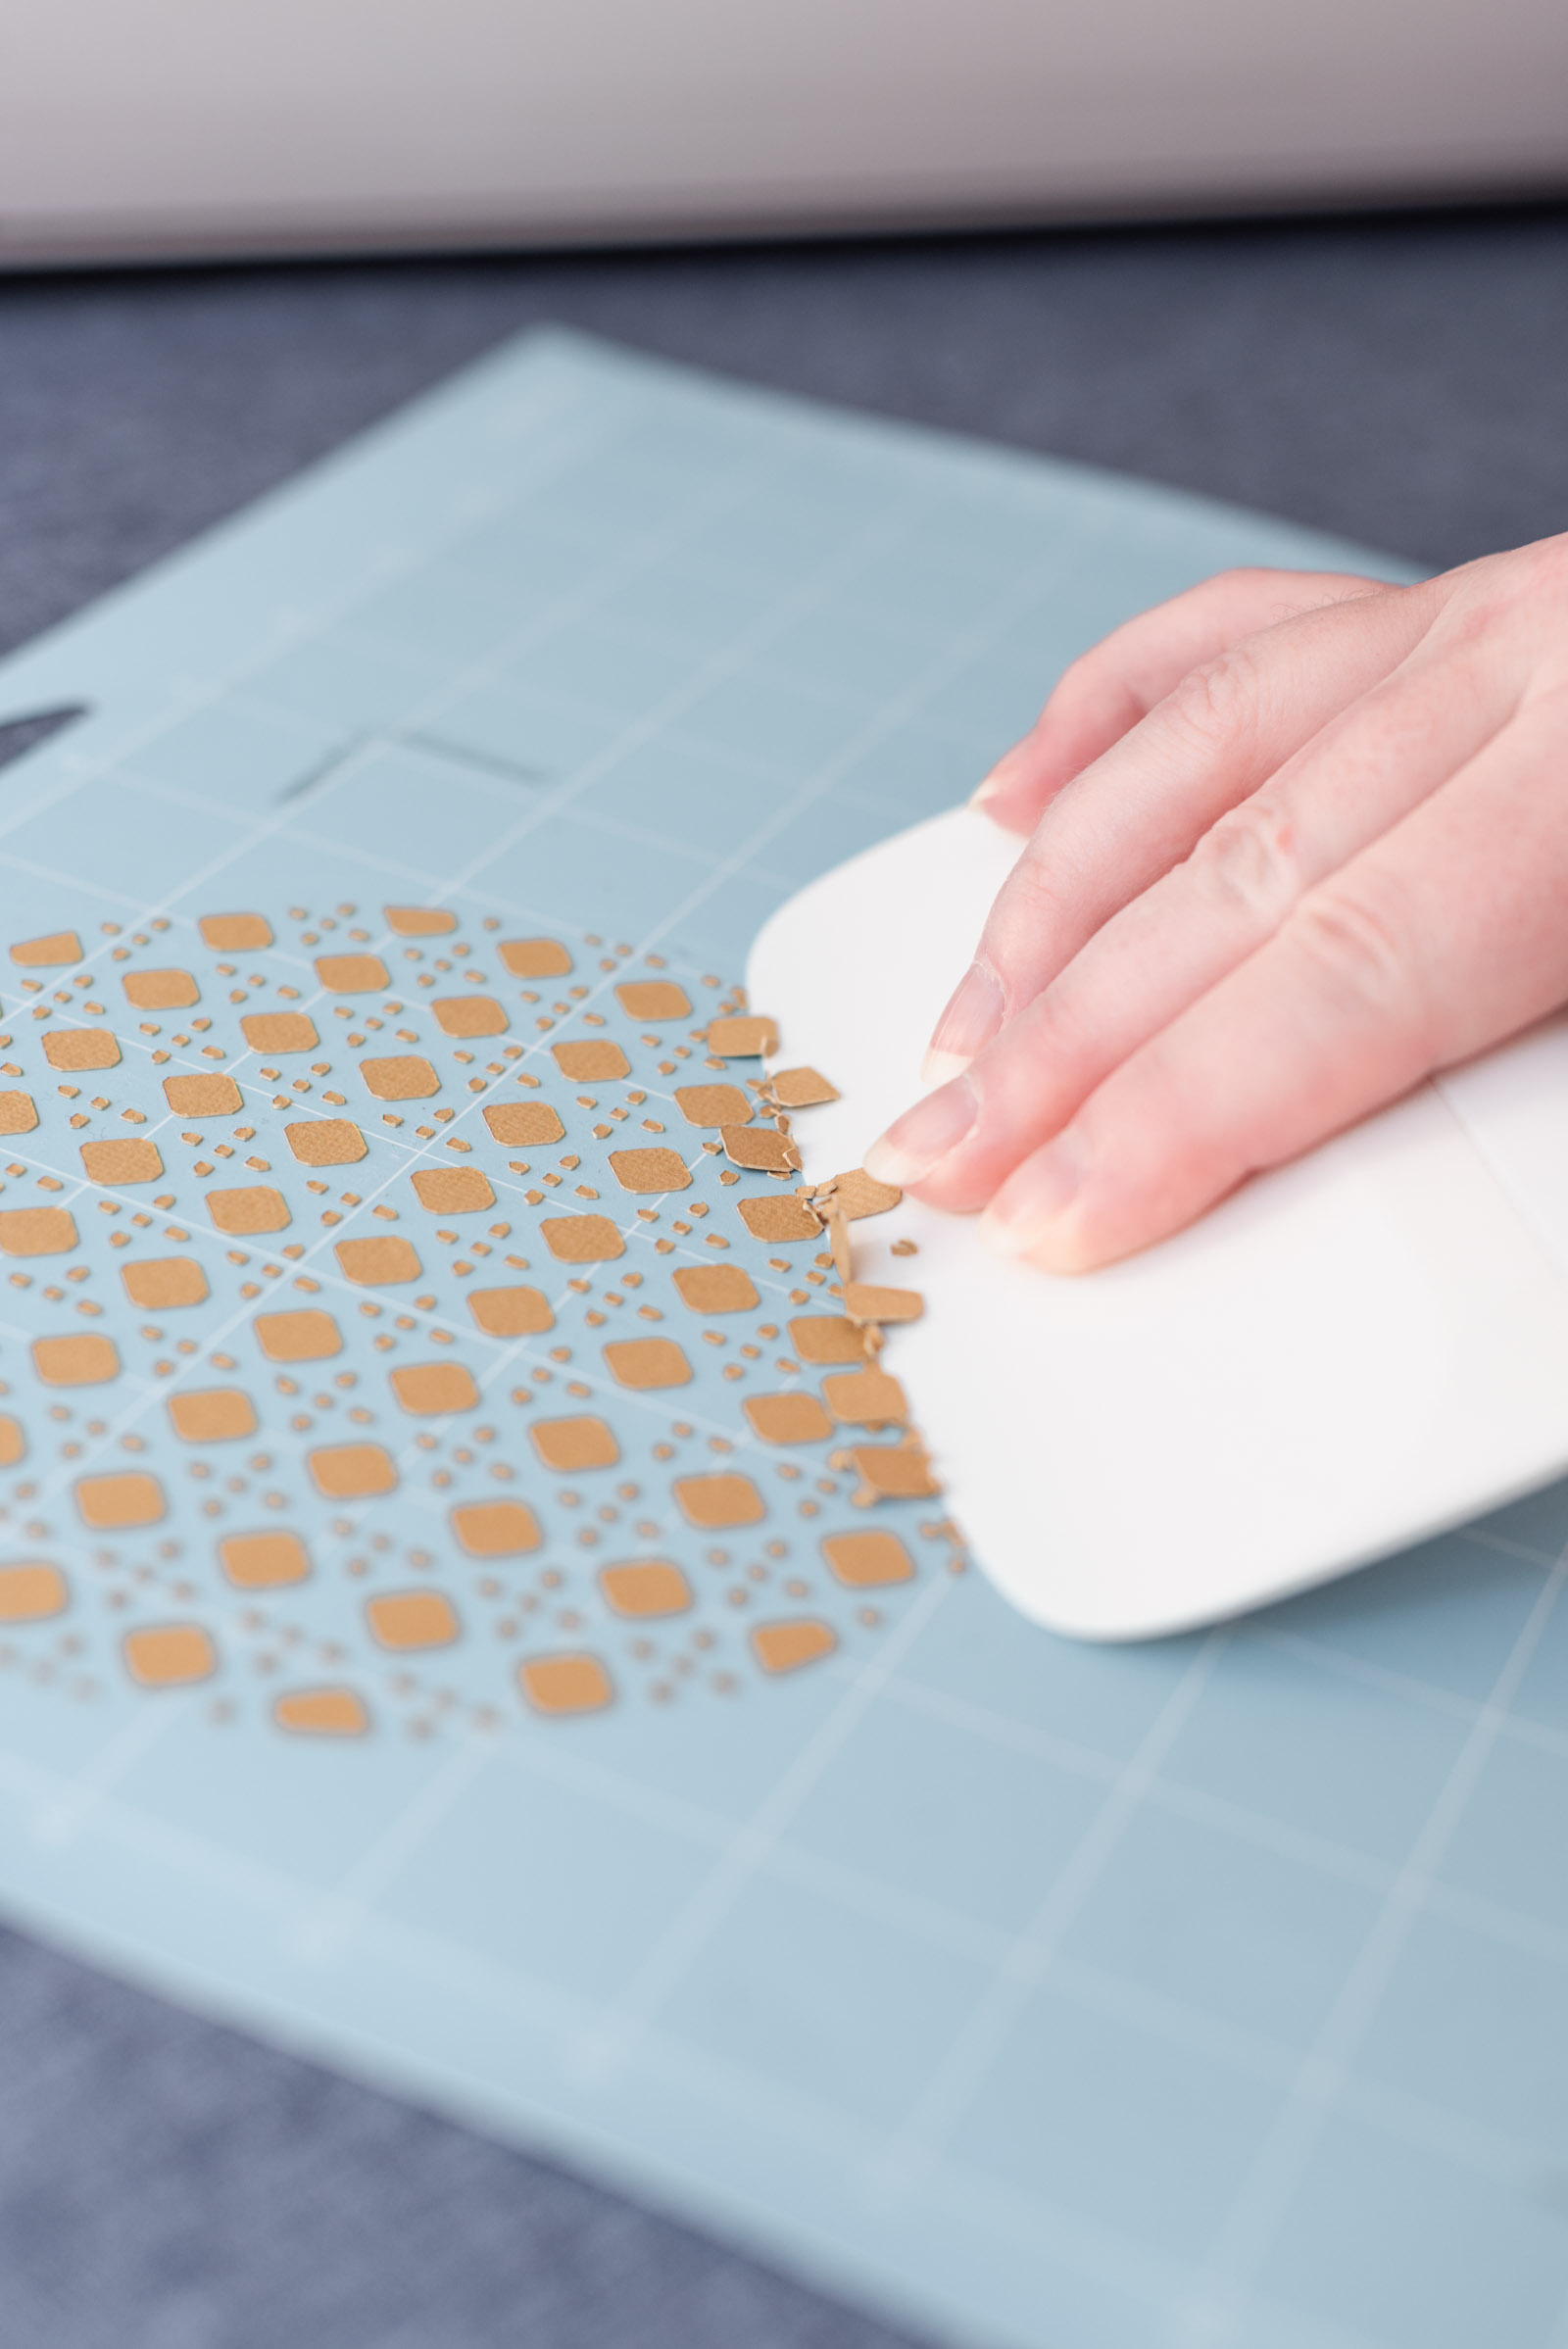
5Peel and repeat. Once cut, peel the machine mat away from your cardstock. You may need to use a toothpick to poke through any rattan bits that didn't stay on your mat. Next, for the rattan cardstock, use your XL scraper tool to remove all of the tiny paper bits by scraping outwards to the edge of your mat. Once clean, repeat the above steps to make the numbers of menus you need for your wedding day!
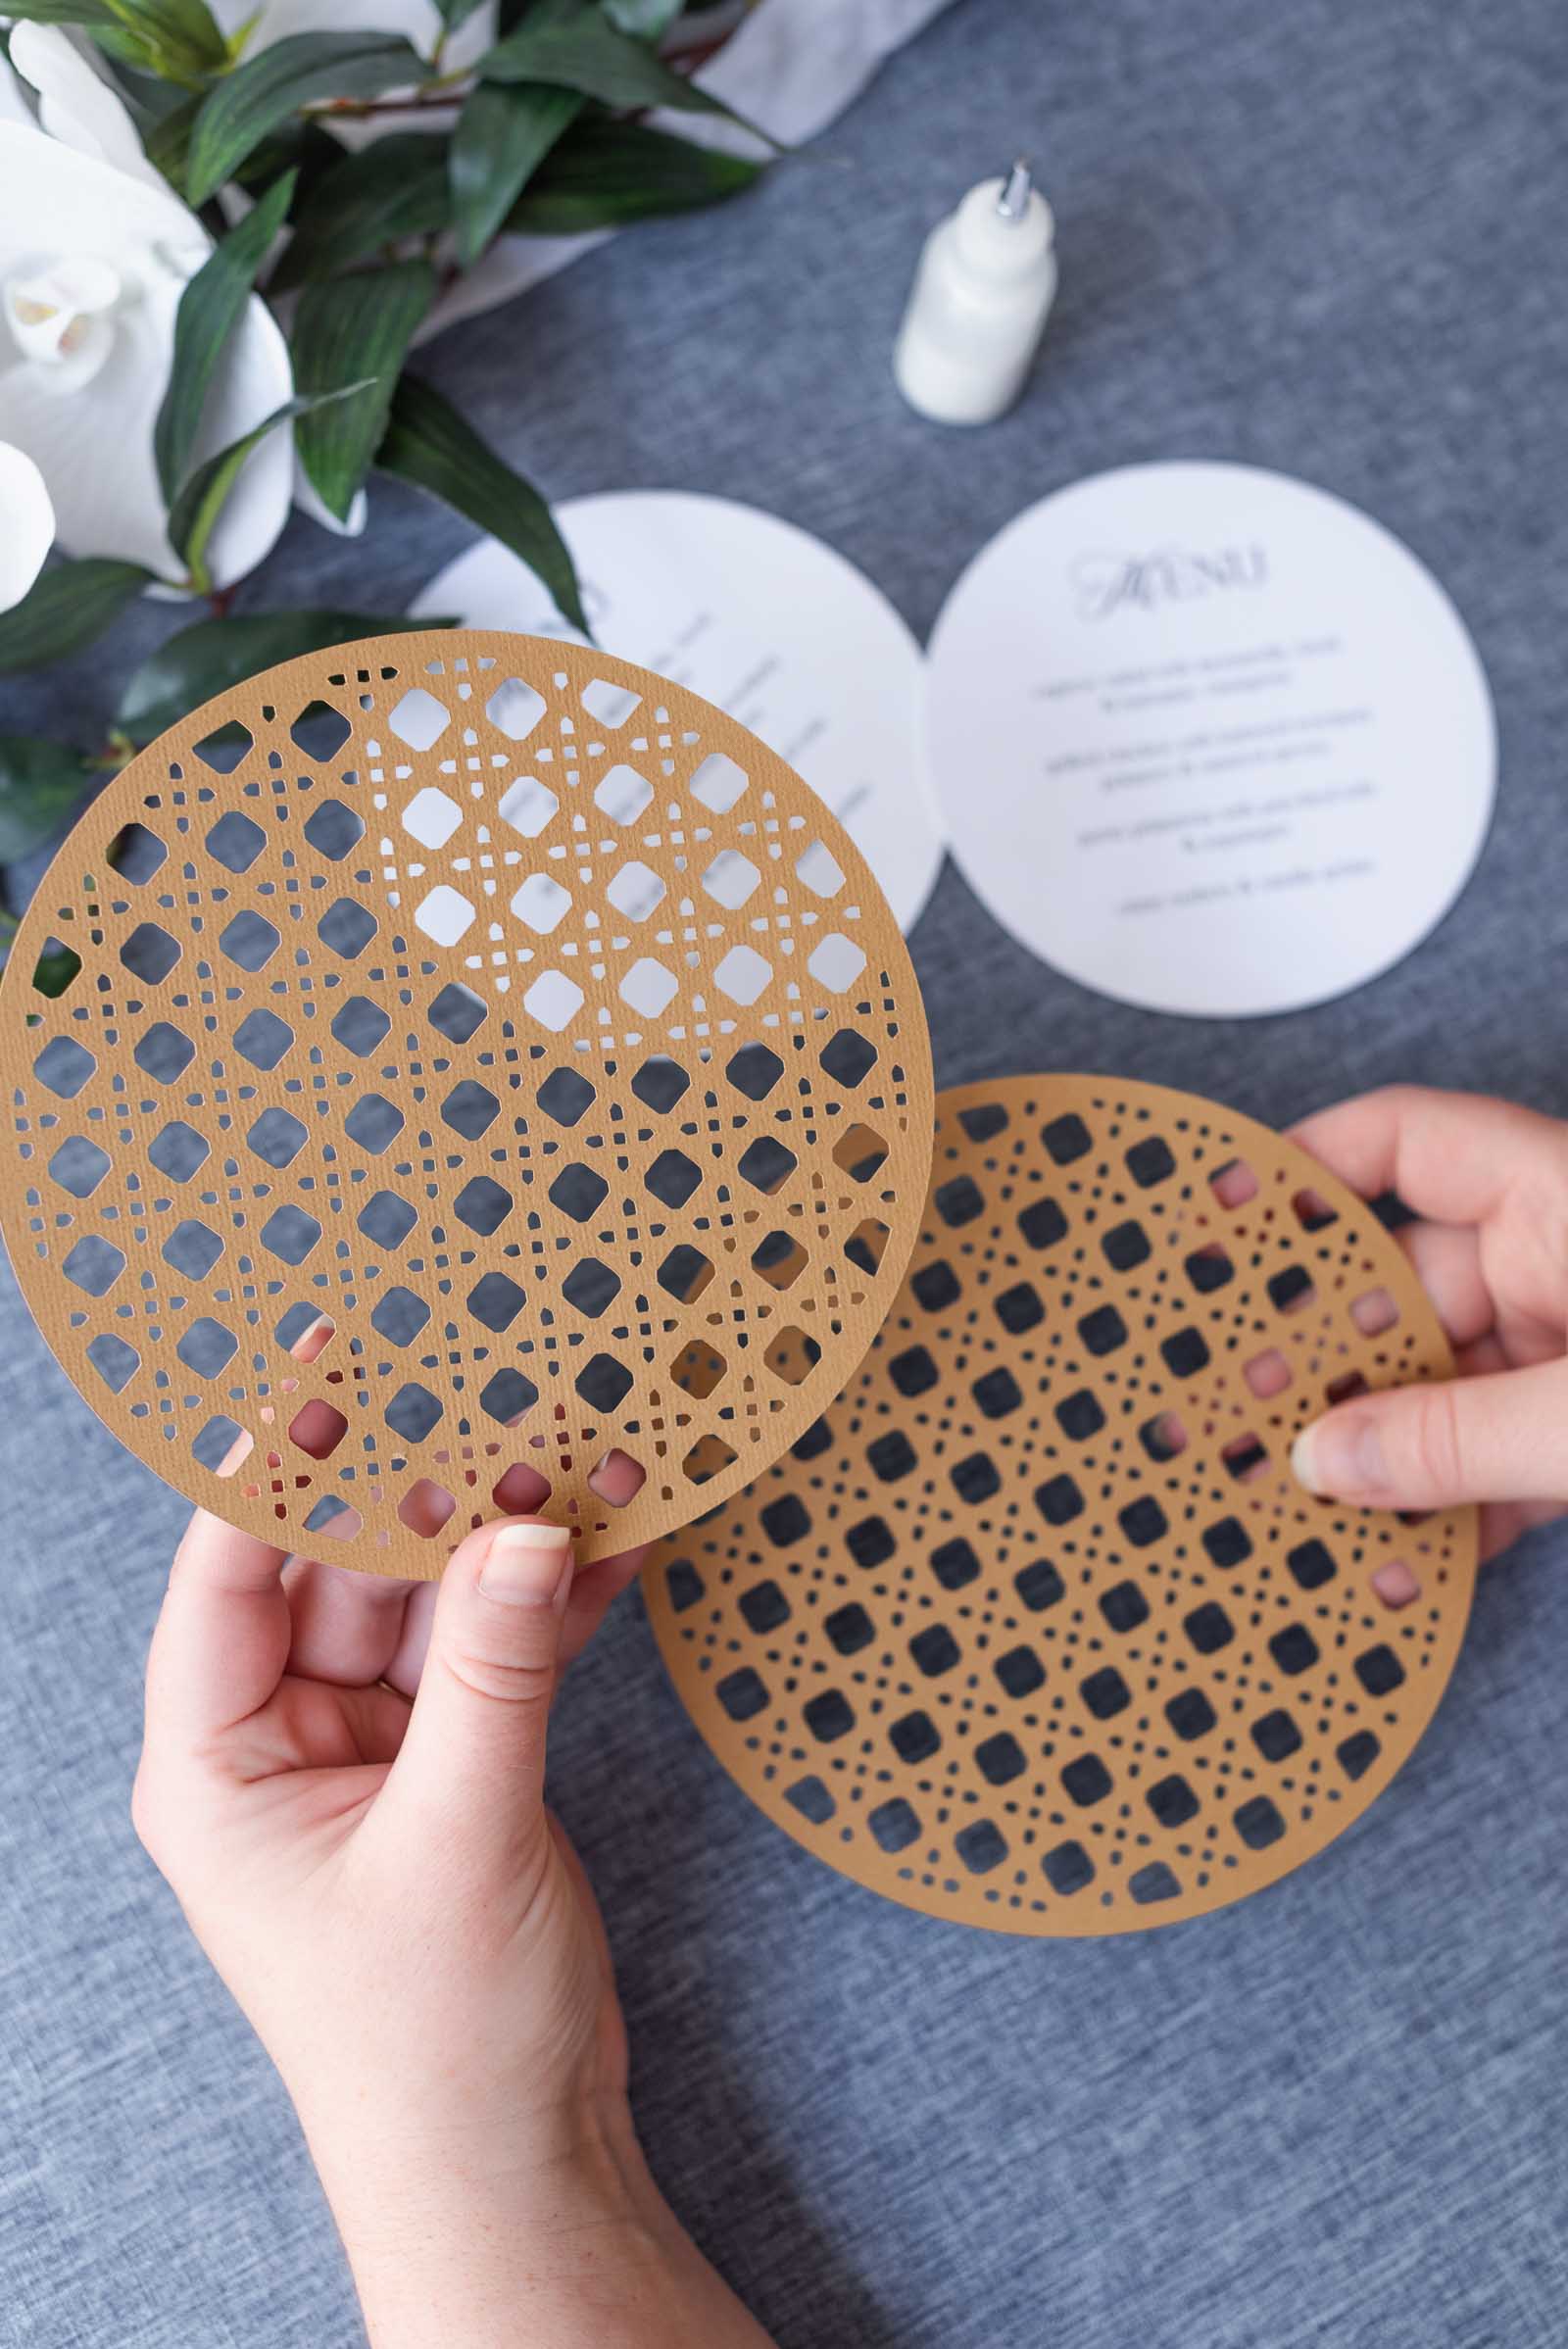
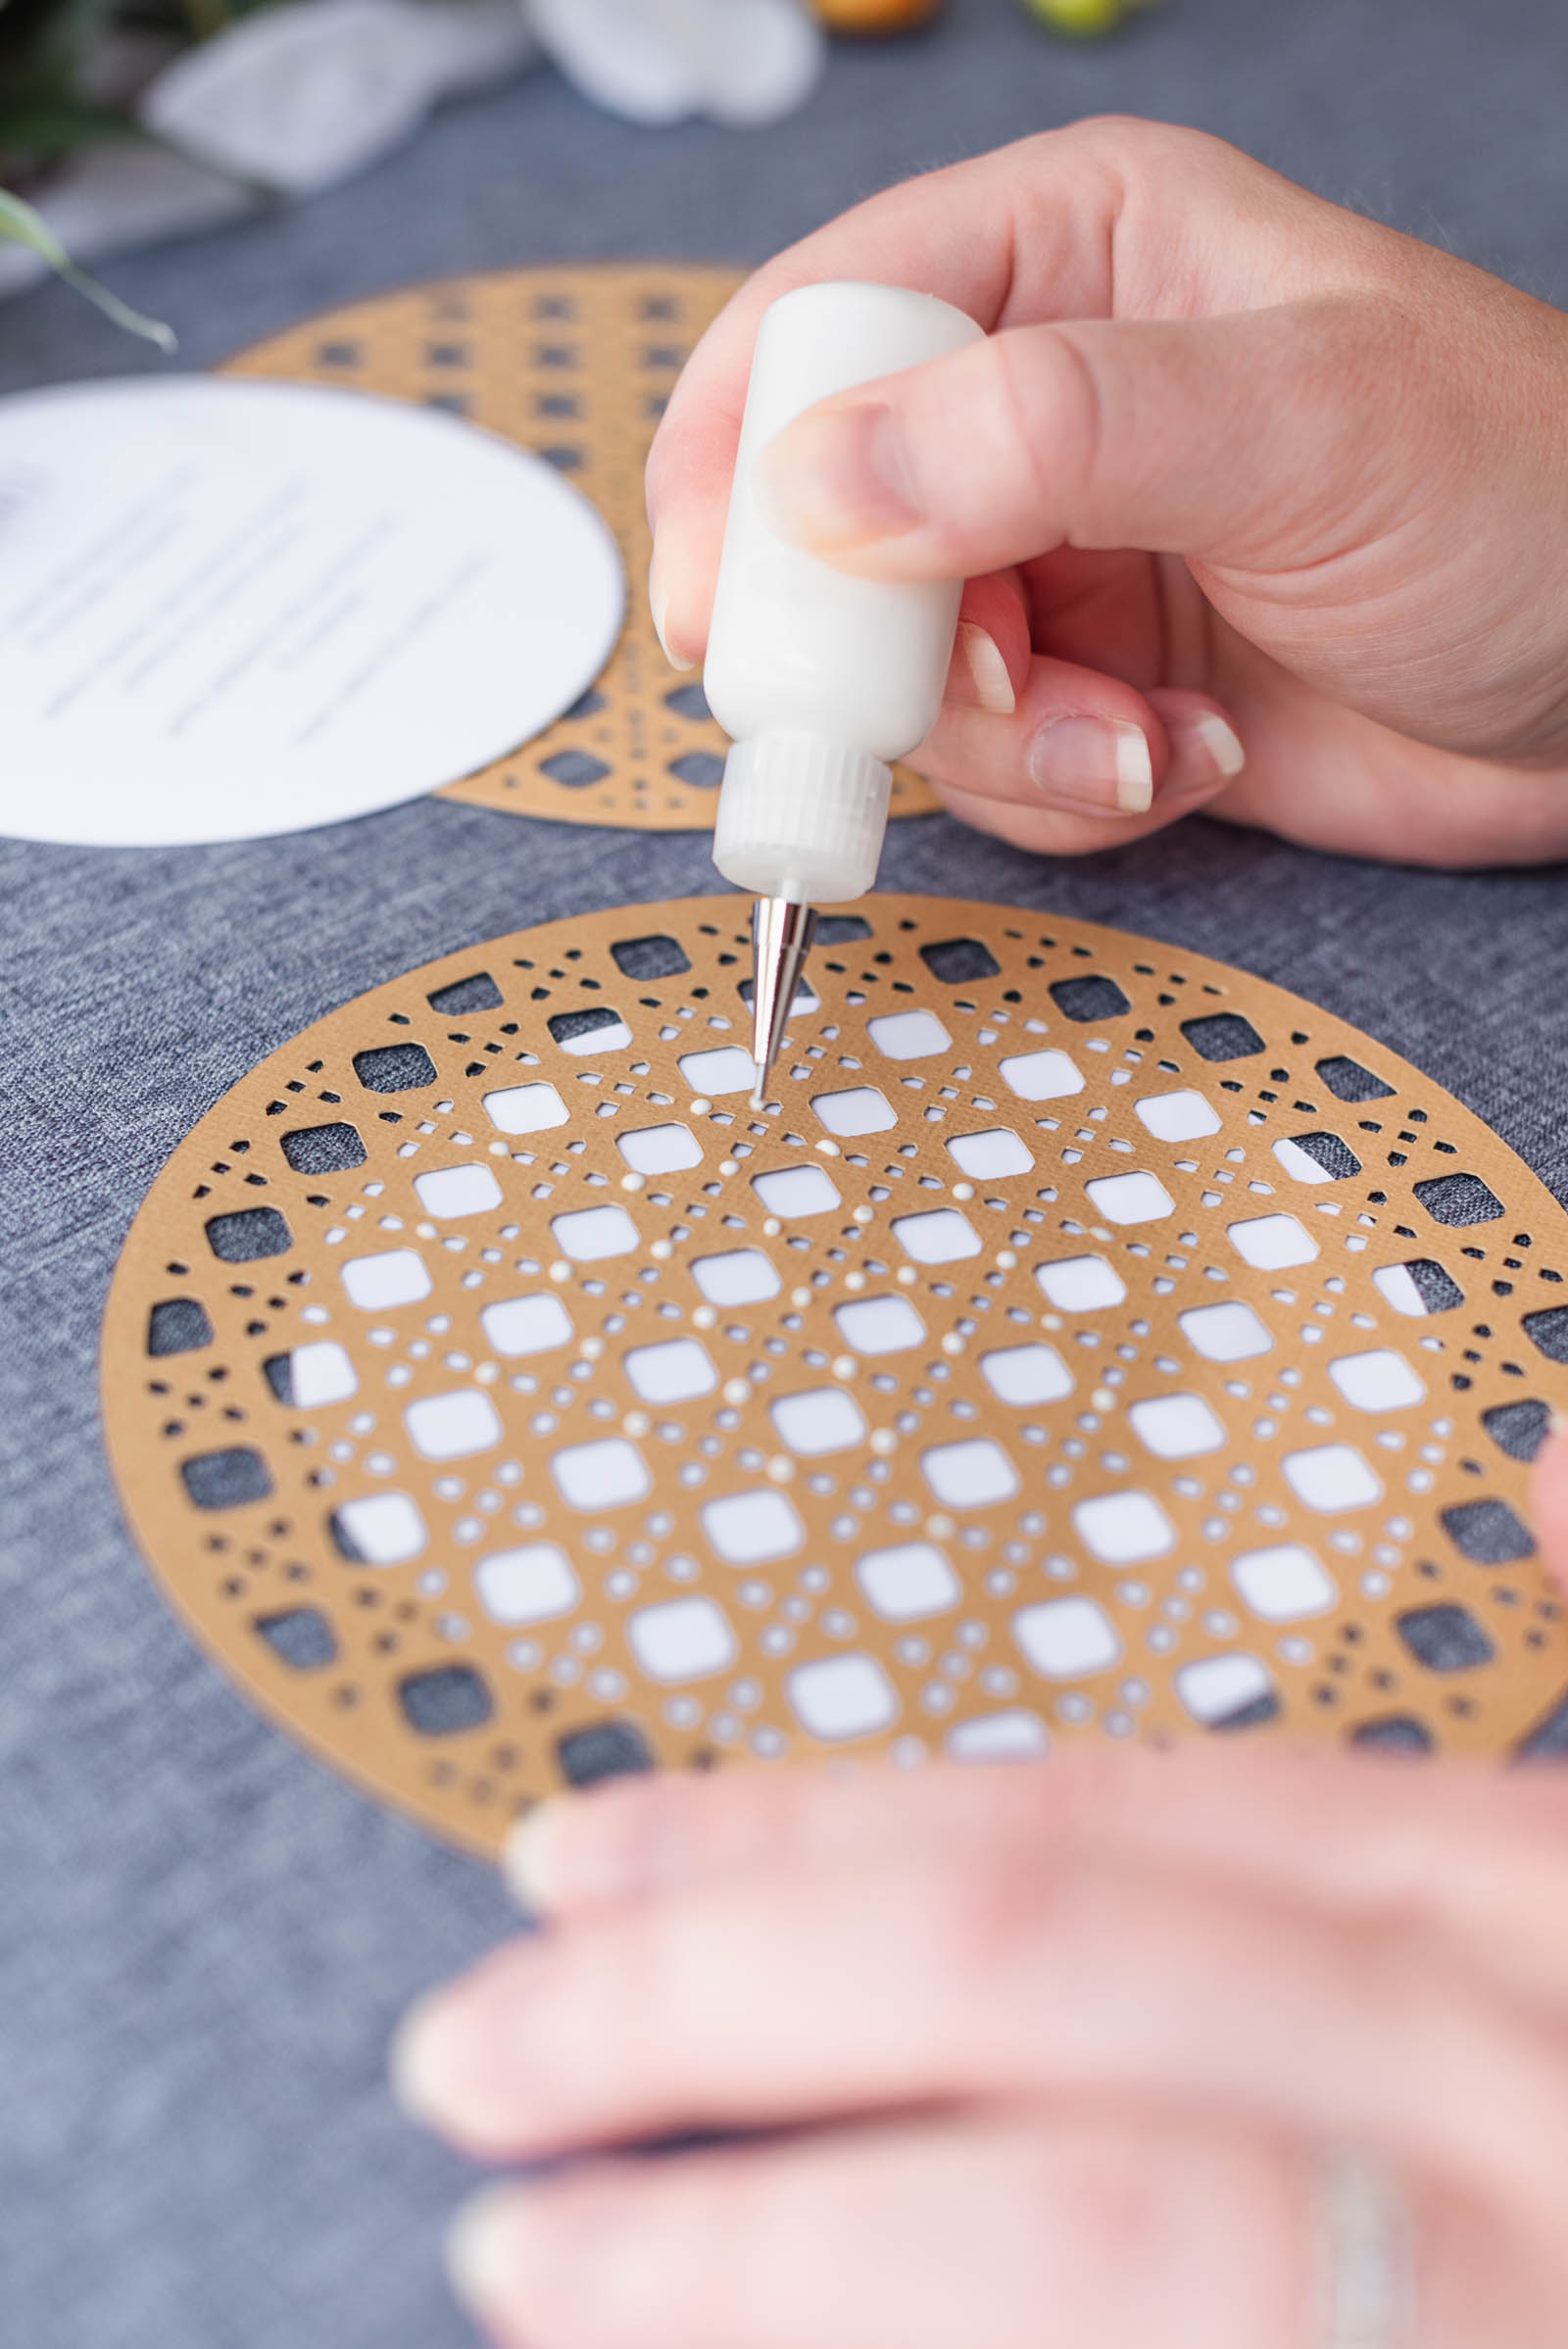
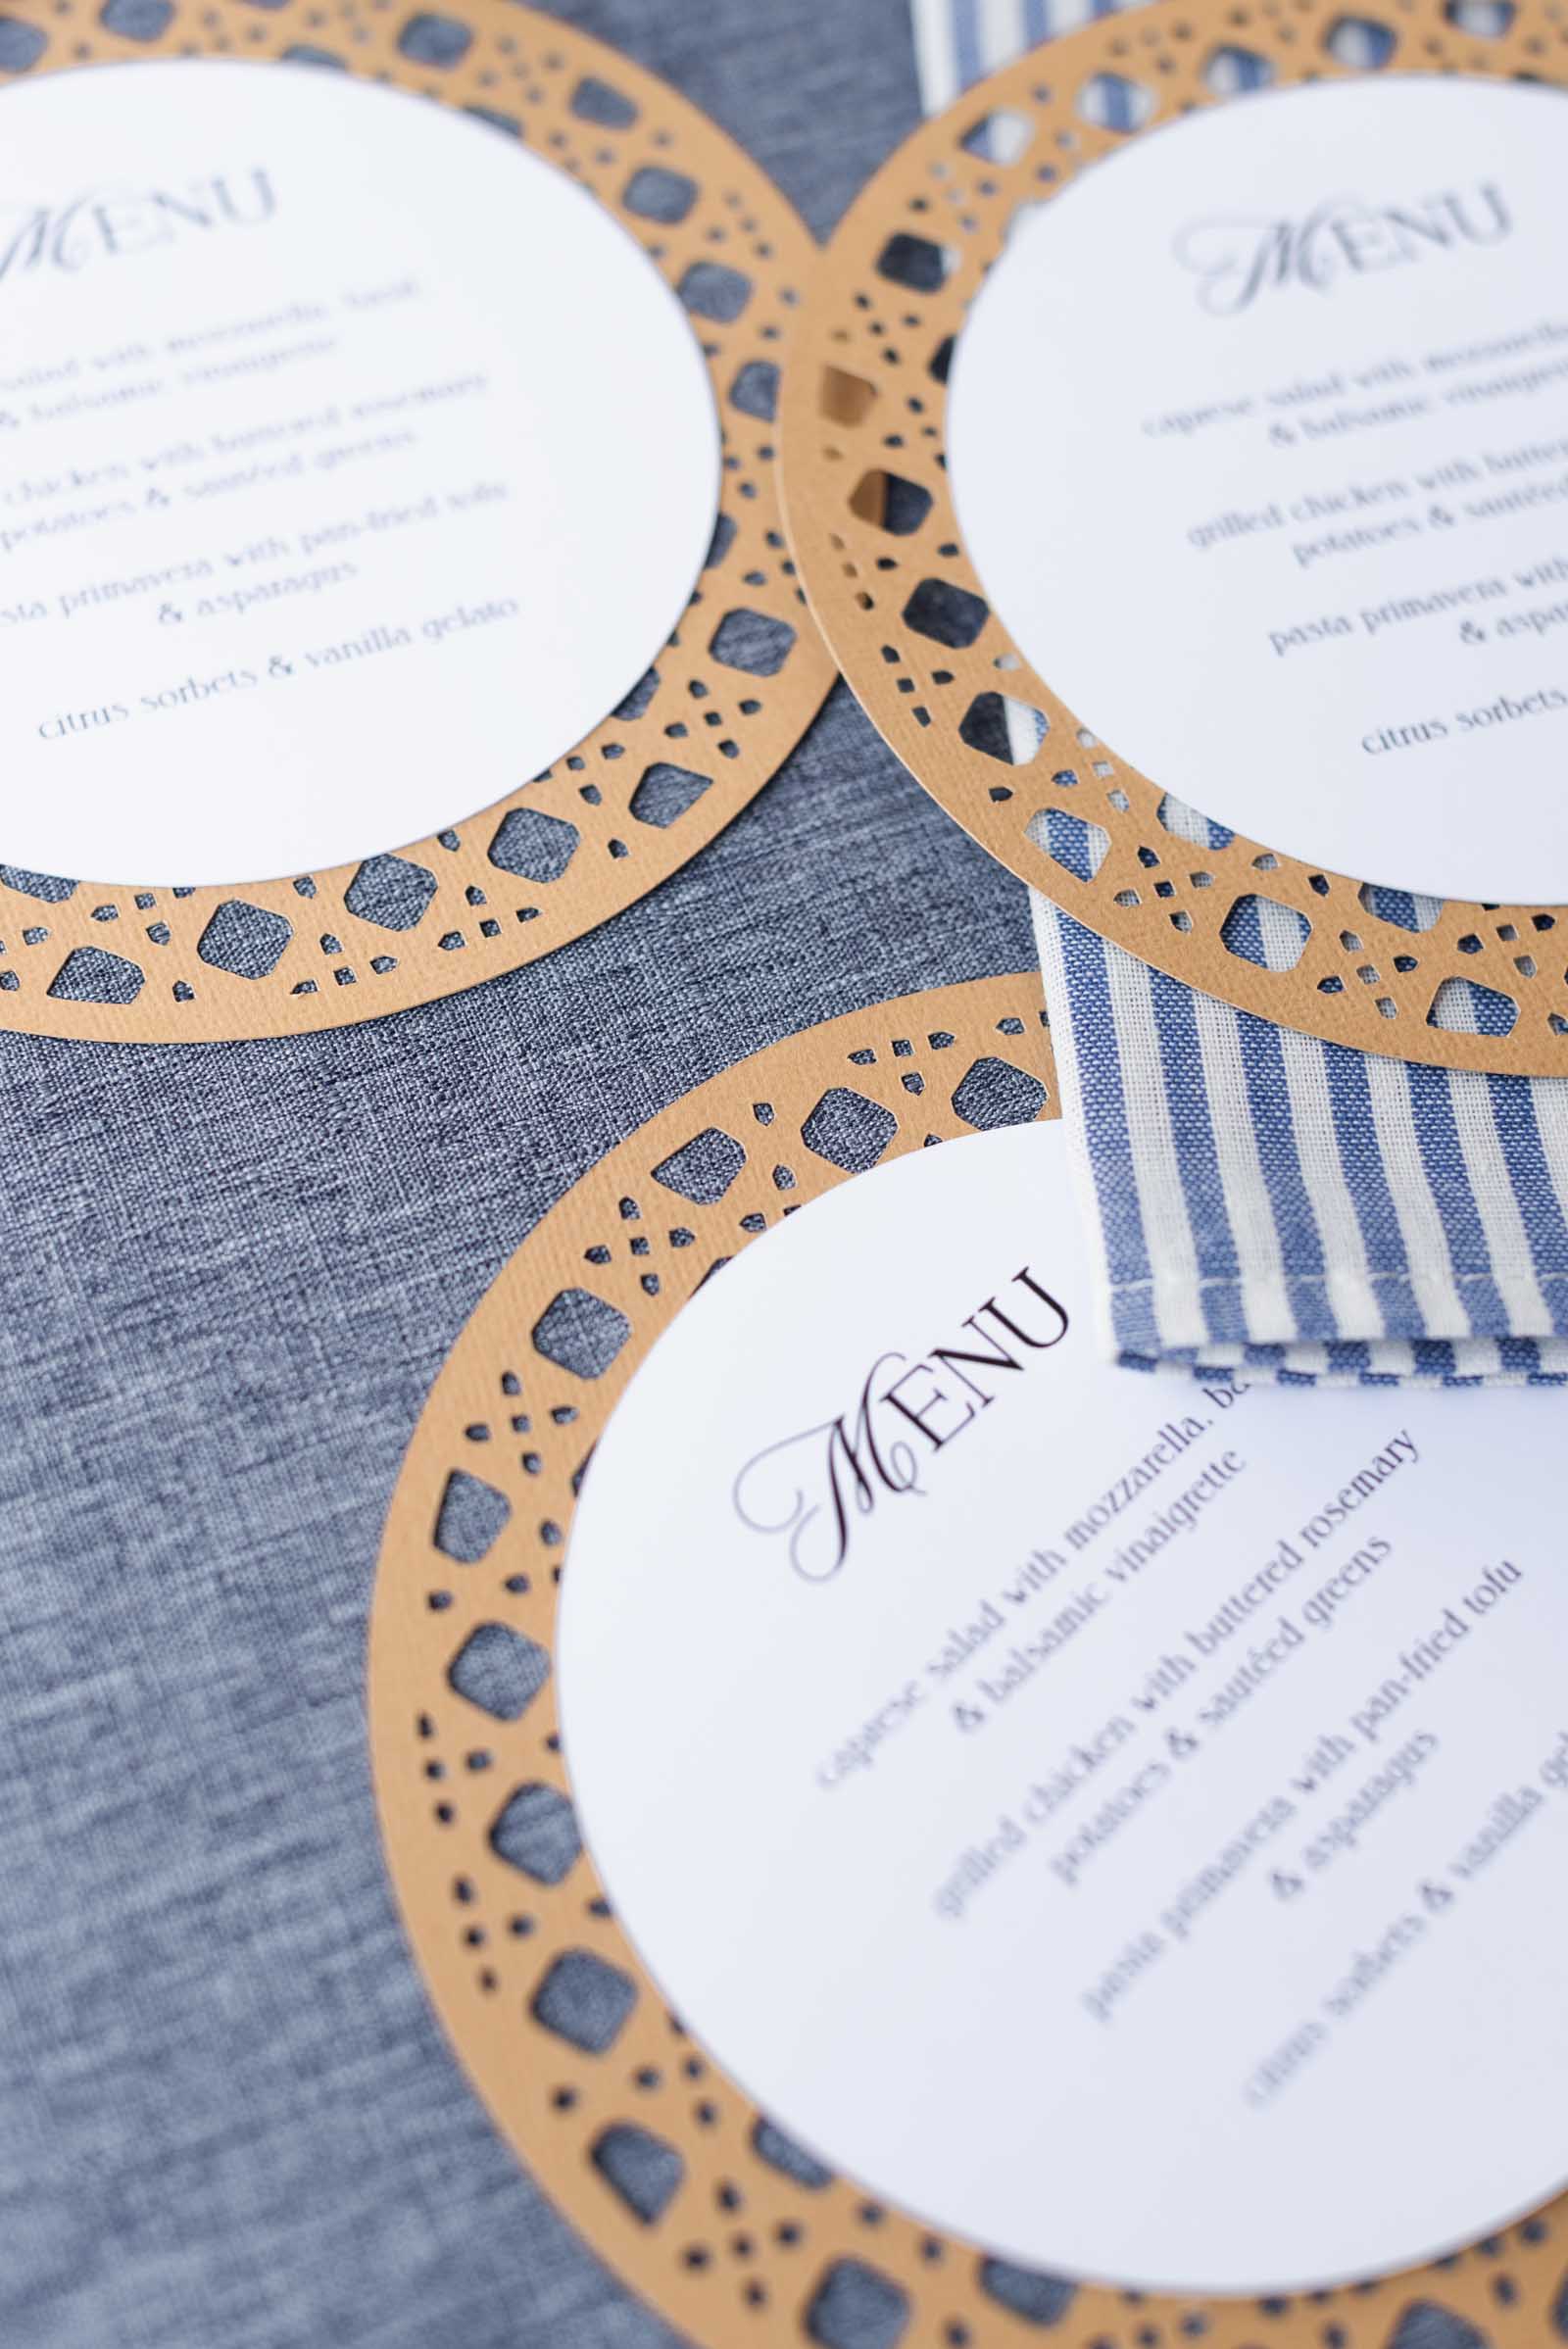
6Assemble. Once you have everything you need cut and ready, create your assembly line of paper goods. Using your precision tip bottle of craft glue, apply tiny dots of craft glue to the rattan cardstock, beginning in the center and working outward. Use just enough glue to securely attach the menu card (as seen in the photos). Once all of the glue has been applied, place your menu card on top and smooth it down. Allow to dry. Repeat until you've finished assembling them all! Store flat until the big day.
TOP TIP: As a guide, place a spare menu card underneath your rattan so you know where you need to place your dots of glue. Stay within the circle, and you won't have any sticky backs!
How to Troubleshoot Cricut Cardstock Cuts (And Stop Paper Ripping!)
If your Cricut is tearing your cardstock, dragging through the paper, or failing to make clean cuts on your intricate faux rattan layer, try these quick fixes:
- Secure Your Cardstock to the Mat: If your paper shifts or lifts even a fraction of an inch during the cut, the blade will catch and drag. Use a brayer tool to firmly roll your cardstock onto your LightGrip mat. If your mat is well-loved and has lost its stick, swap it for a fresh one as sticky mats are crucial for intricate wedding paper crafts!
- Change Your Design Space Cut Settings: Paper weight and fiber density vary greatly. In Cricut Design Space, search for and select the "Medium Cardstock - Intricate Cuts" setting if cutting your rattan layer. This setting automatically adjusts the blade pressure and performs double passes for delicate lattice and rattan patterns.
- Clean or Replace Your Fine-Point Blade: Paper dulls blades faster than vinyl. Before replacing a dull blade, also check for tiny paper fibers stuck inside the metal housing unit.
- Remove Cardstock Without Curling: When your cut is finished, turn your mat upside down on a flat surface and gently peel the mat away from the cardstock rather than pulling the paper off the mat. This prevents your intricate rattan menu from tearing or curling up! See our reel above for an in-action video.
Faux Rattan Wedding Menus Made Simple
Even if you're new to Cricut crafting, this faux rattan menu project shows how a few simple materials and thoughtful design can create wedding details you'll be excited to share with your guests. By recreating the woven look with cardstock, you can add warmth and texture to each place setting while creating something that's uniquely yours.

WRITTEN BY
Chelsea Barton
Founder & Wedding DIY Expert
A former wedding photographer, the founder of Tidewater and Tulle, and author of Cricut Weddings, Chelsea Barton has been helping couples bring their dream weddings to life through creative, approachable ideas since 2009. Her insight and work have been featured in Martha Stewart Weddings, Southern Living, and other top publications around the world. She combines editorial expertise and real-world insight to inspire meaningful celebrations.
TUTORIAL CREDITS
Photography and Video: Chelsea Barton
Editor's Note: Some above product links may be partner-connected and purchasing through these links means we get a small commission from those brands that helps support this website. You can find our full affiliate disclosure policy here on Tidewater and Tulle.