
Because Cricut Design Space doesn't have a built-in double-sided "Print Then Cut" feature, most DIYers are left manually flipping paper and praying for the best. When you're managing a wedding budget and a timeline, wasting ink and paper is the last thing you need.
Thankfully, you don't need a fancy printer to get flawless results. This step-by-step tutorial covers a simple Cricut alignment hack to create perfectly aligned, professional-looking double-sided wedding fans right from home.
Let's dive in and save your sanity (and your cardstock)!
The Secret to Perfect Cricut Double-Sided Print Then Cut Alignment
The big secret to flawless double-sided alignment actually comes down to one thing: the exact placement of your backside design on the Cricut Design Space's Prepare screen before you hit print.When your screen placement matches your paper-feeding method perfectly, your cuts will line up cleanly on both sides every single time. No more wonky borders or upside-down backs!
This simple hack completely changes the game for double-sided wedding programs, menus, and favor tags. Now scroll down for the exact steps and see our video tutorial visual at the end!
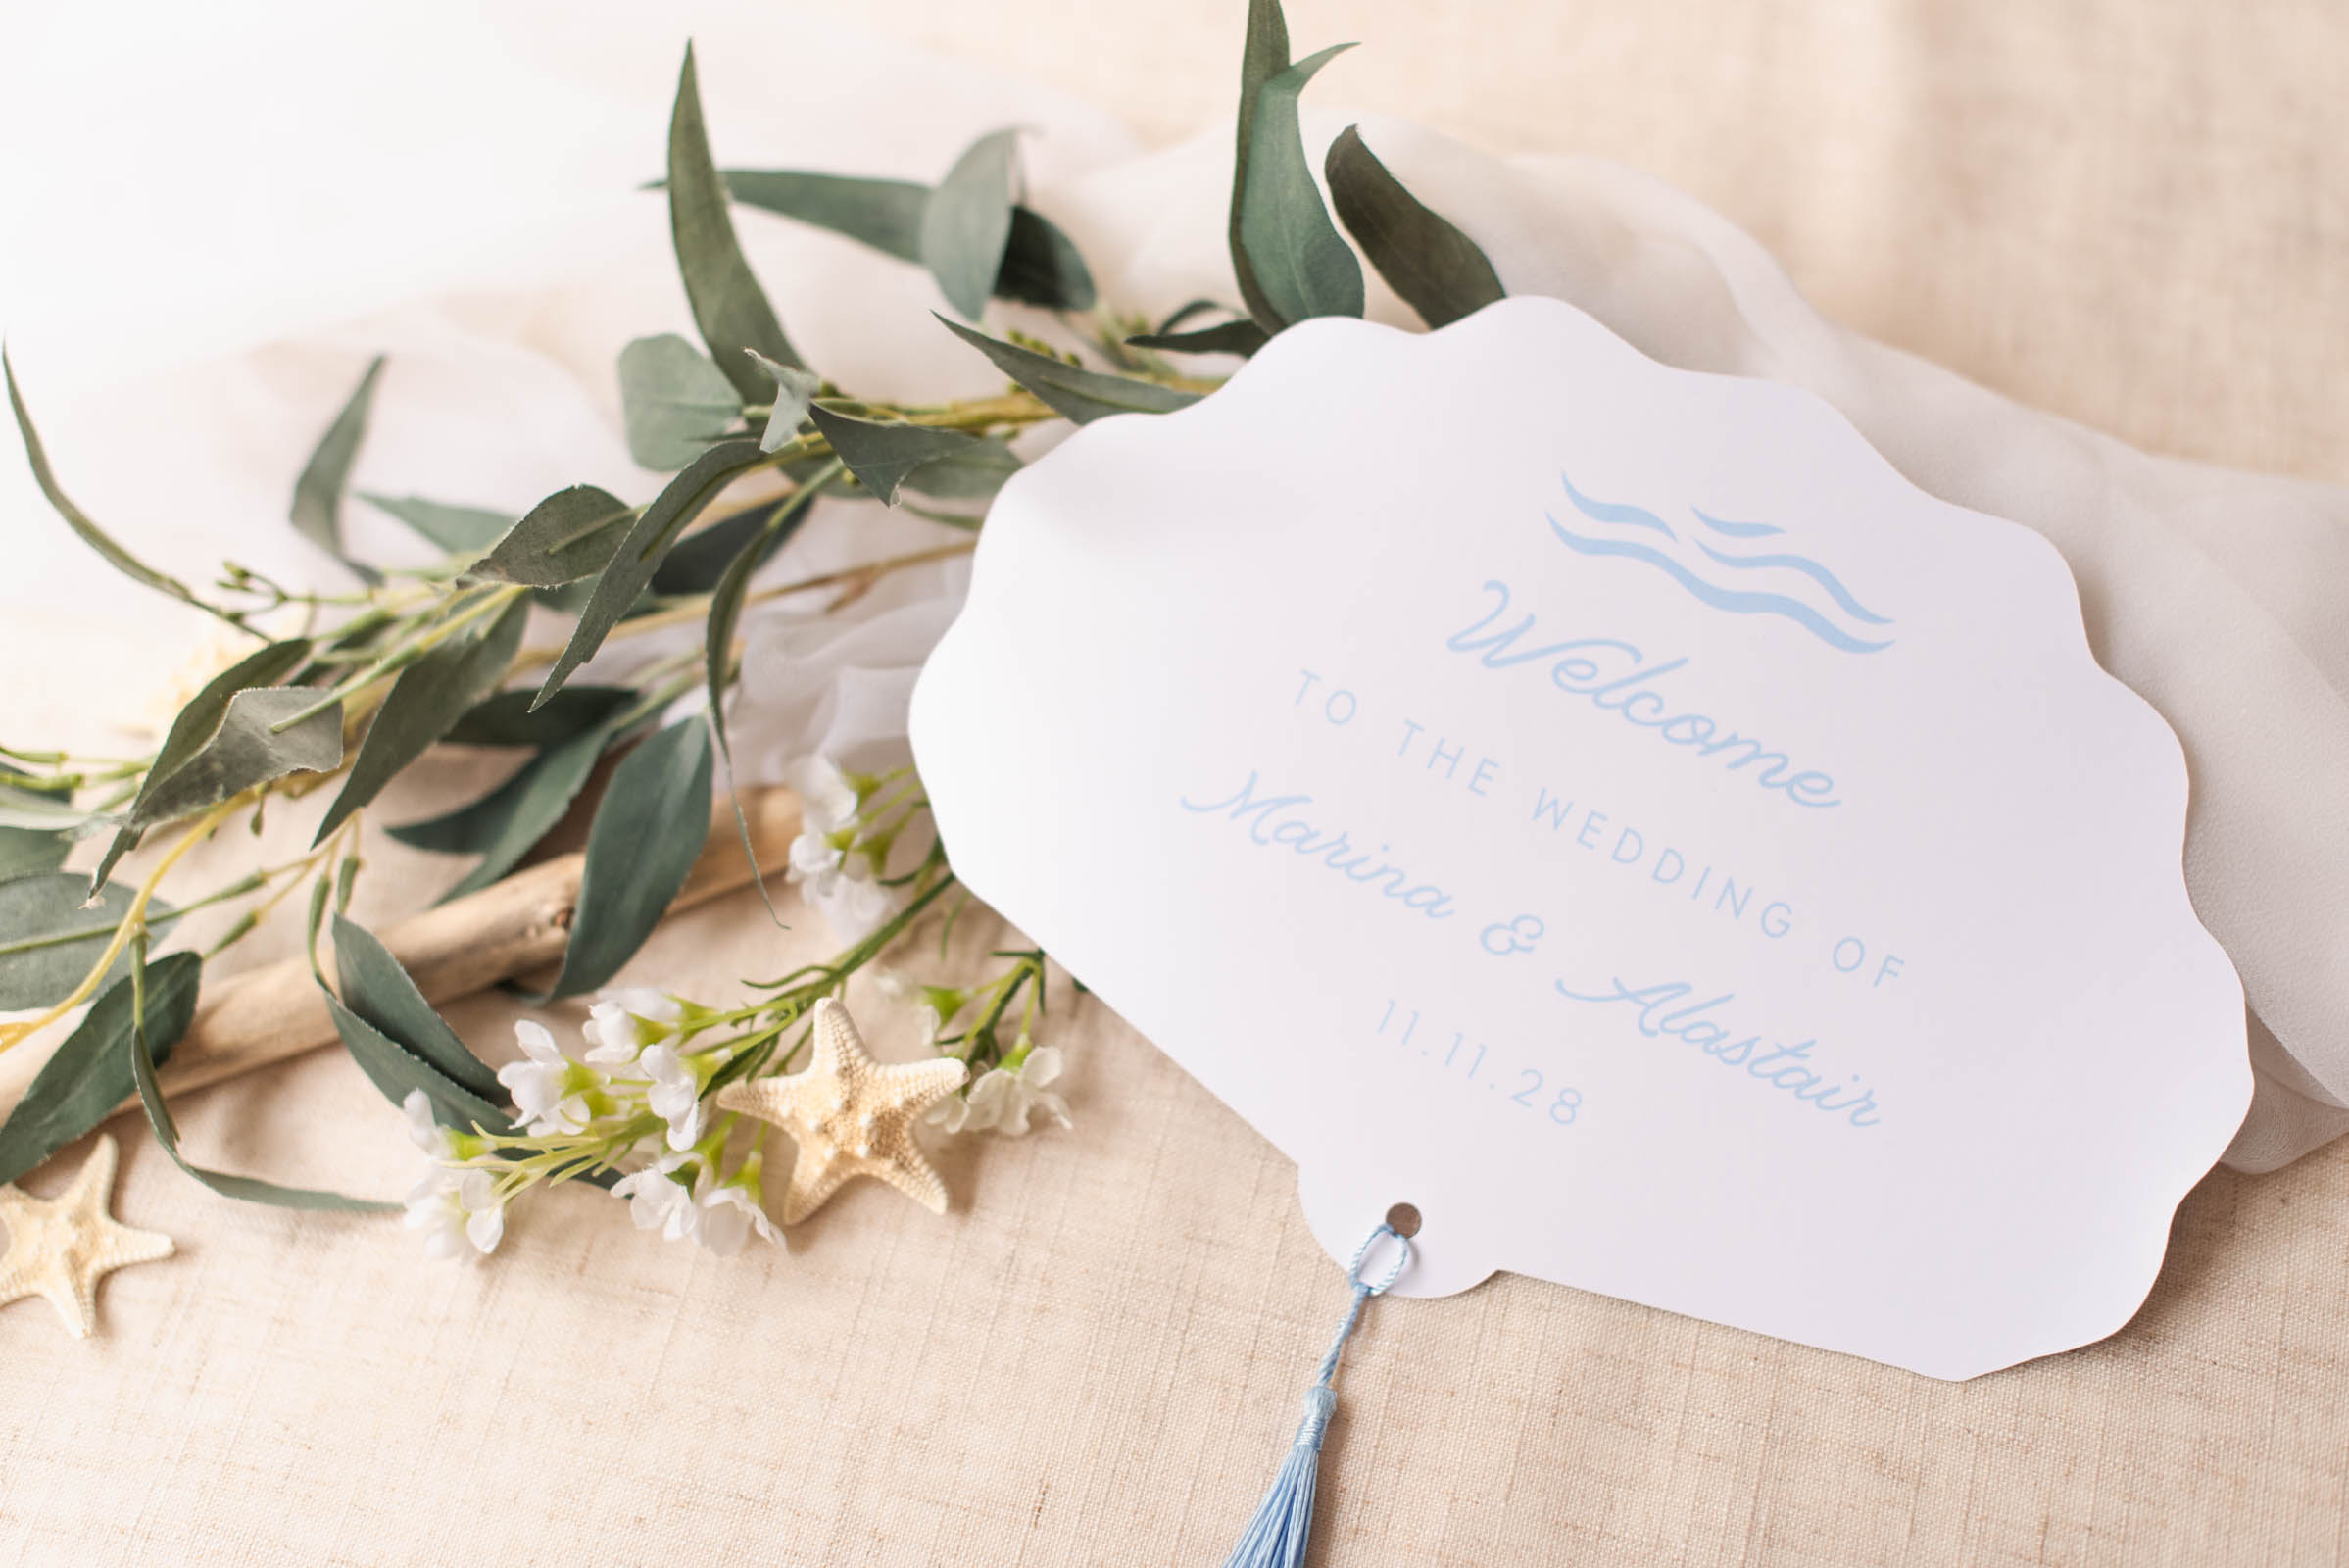
How to Make a Double-Sided Wedding Program with Your Cricut
Skill Level: BeginnerSupplies Needed for This Cricut Wedding Program Fan
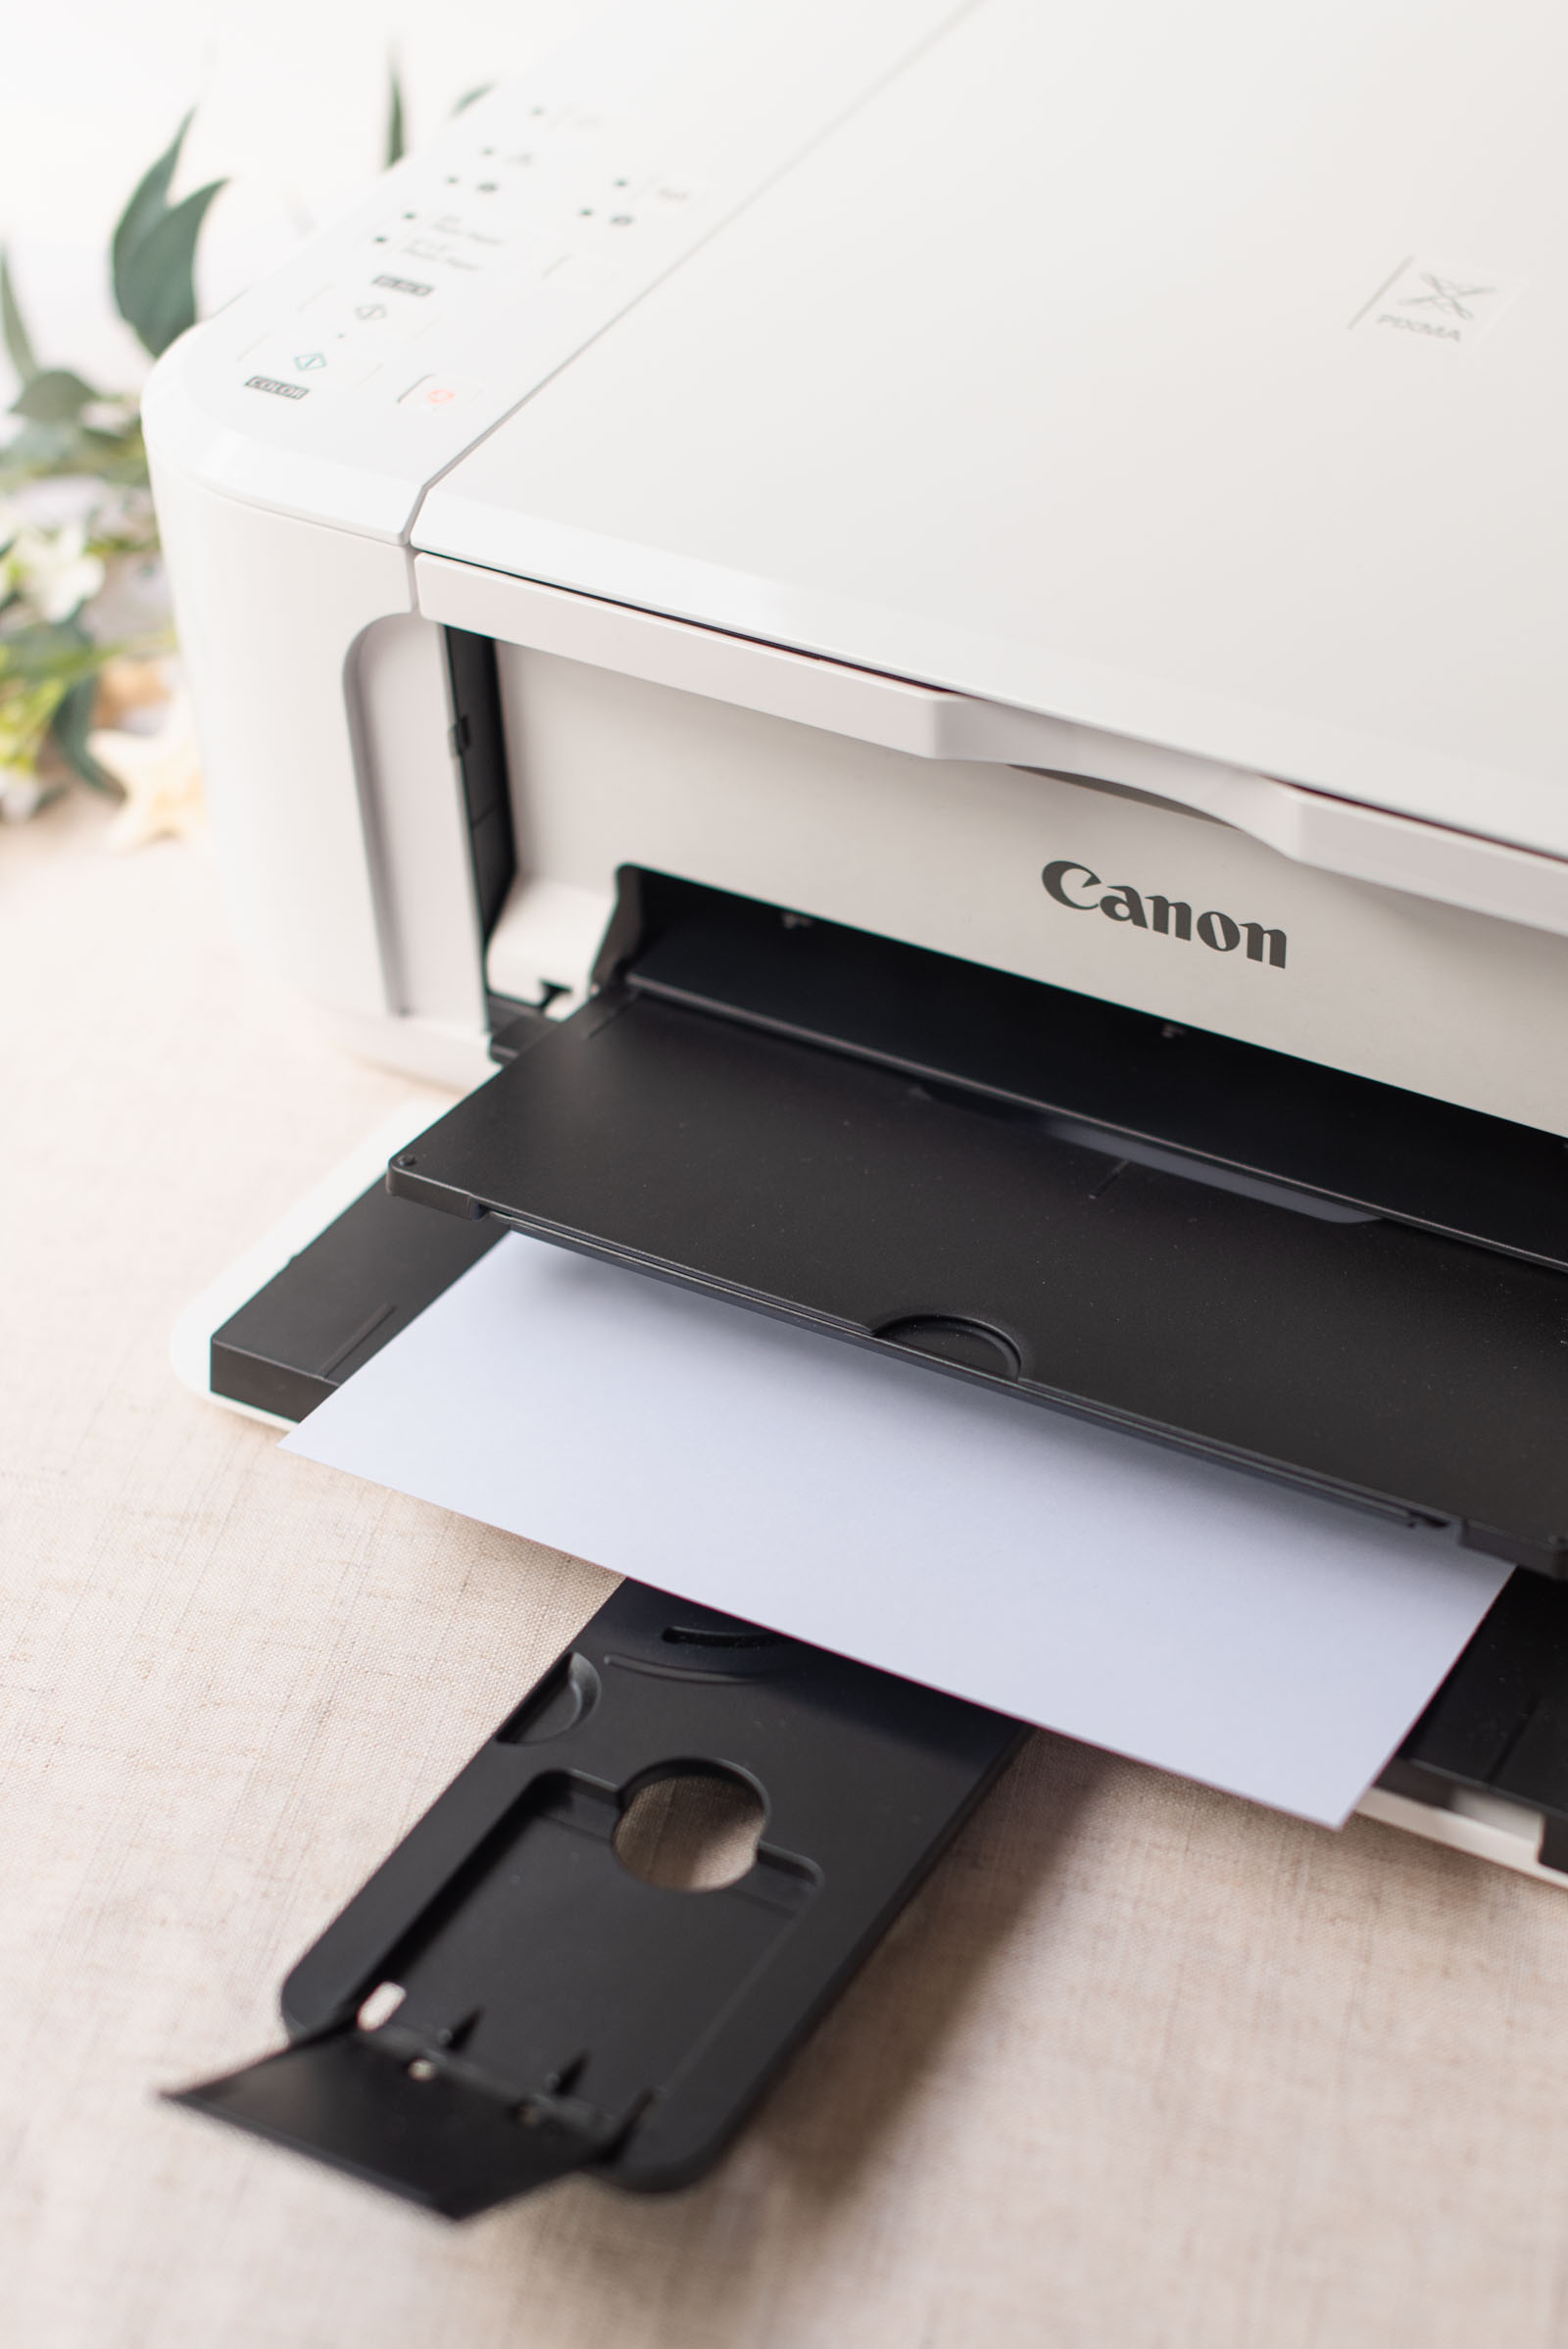
• Cricut cutting machine + fine-point blade• Home printer (we use a Canon Pixma inkjet)
• 80lb-110lb (216-300 gsm) white cardstock (U.S. Letter/A4 size)
• LightGrip cutting machine mat
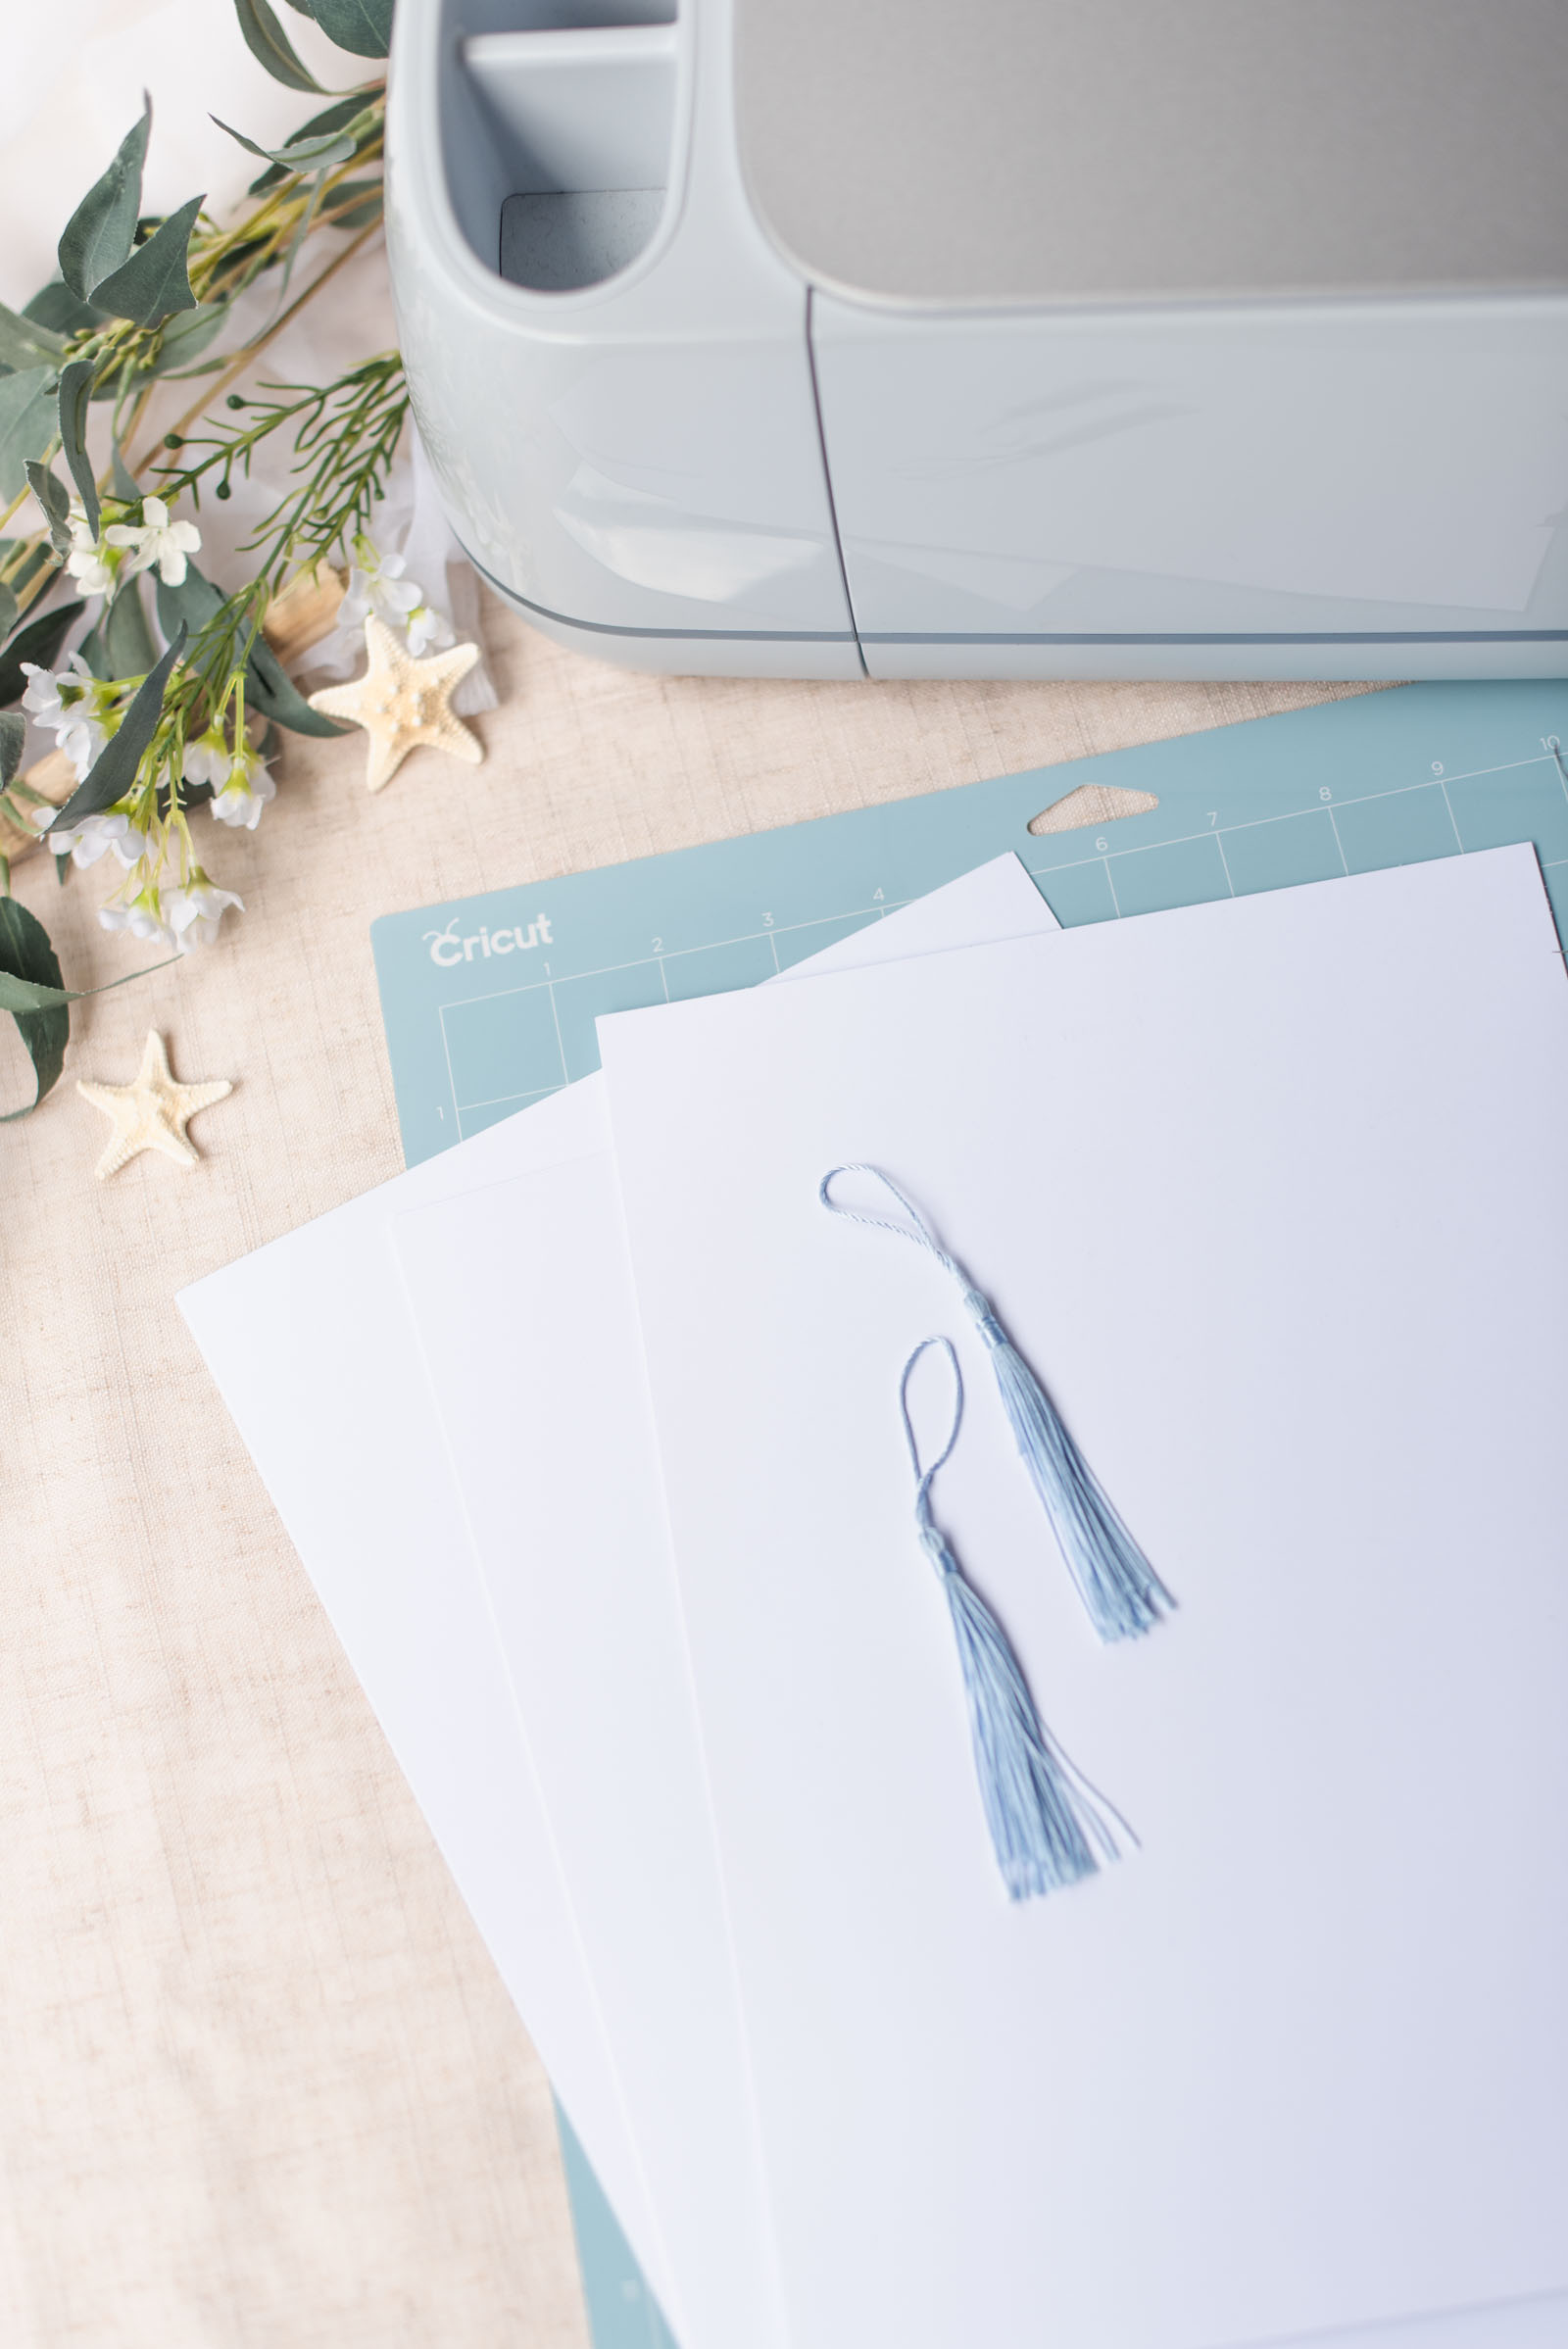
• Tassels (optional)
• Metal eyelets + grommet tool (optional)
• Our blank wedding program fan shape for you to personalize in Canva (available in our DIY shop!)
• ... or for those with Cricut Access, our Wedding Fan Cricut Design Space project
DESIGN NOTES: For this template, we used a Cricut Access-sourced fan image and fonts which means you will need a Cricut Access subscription or purchase the fan image as a one-off to make as is. You can also swap out and use your own computer's images and fonts as you wish.
Compatible Cricut Machines
• Cricut Joy Xtra• Cricut Explore family
• Cricut Maker family
NOTE: Due to size of the printed fan, only Joy Xtra, Explore, and Maker can make as is; it uses U.S. Letter or A4 sized paper. Alternatively, you could resize to make tiny fans on a Joy 2 machine since it has Print Then Cut capabilities.
Step-by-Step Tutorial: Double-Sided Print Then Cut on a Cricut
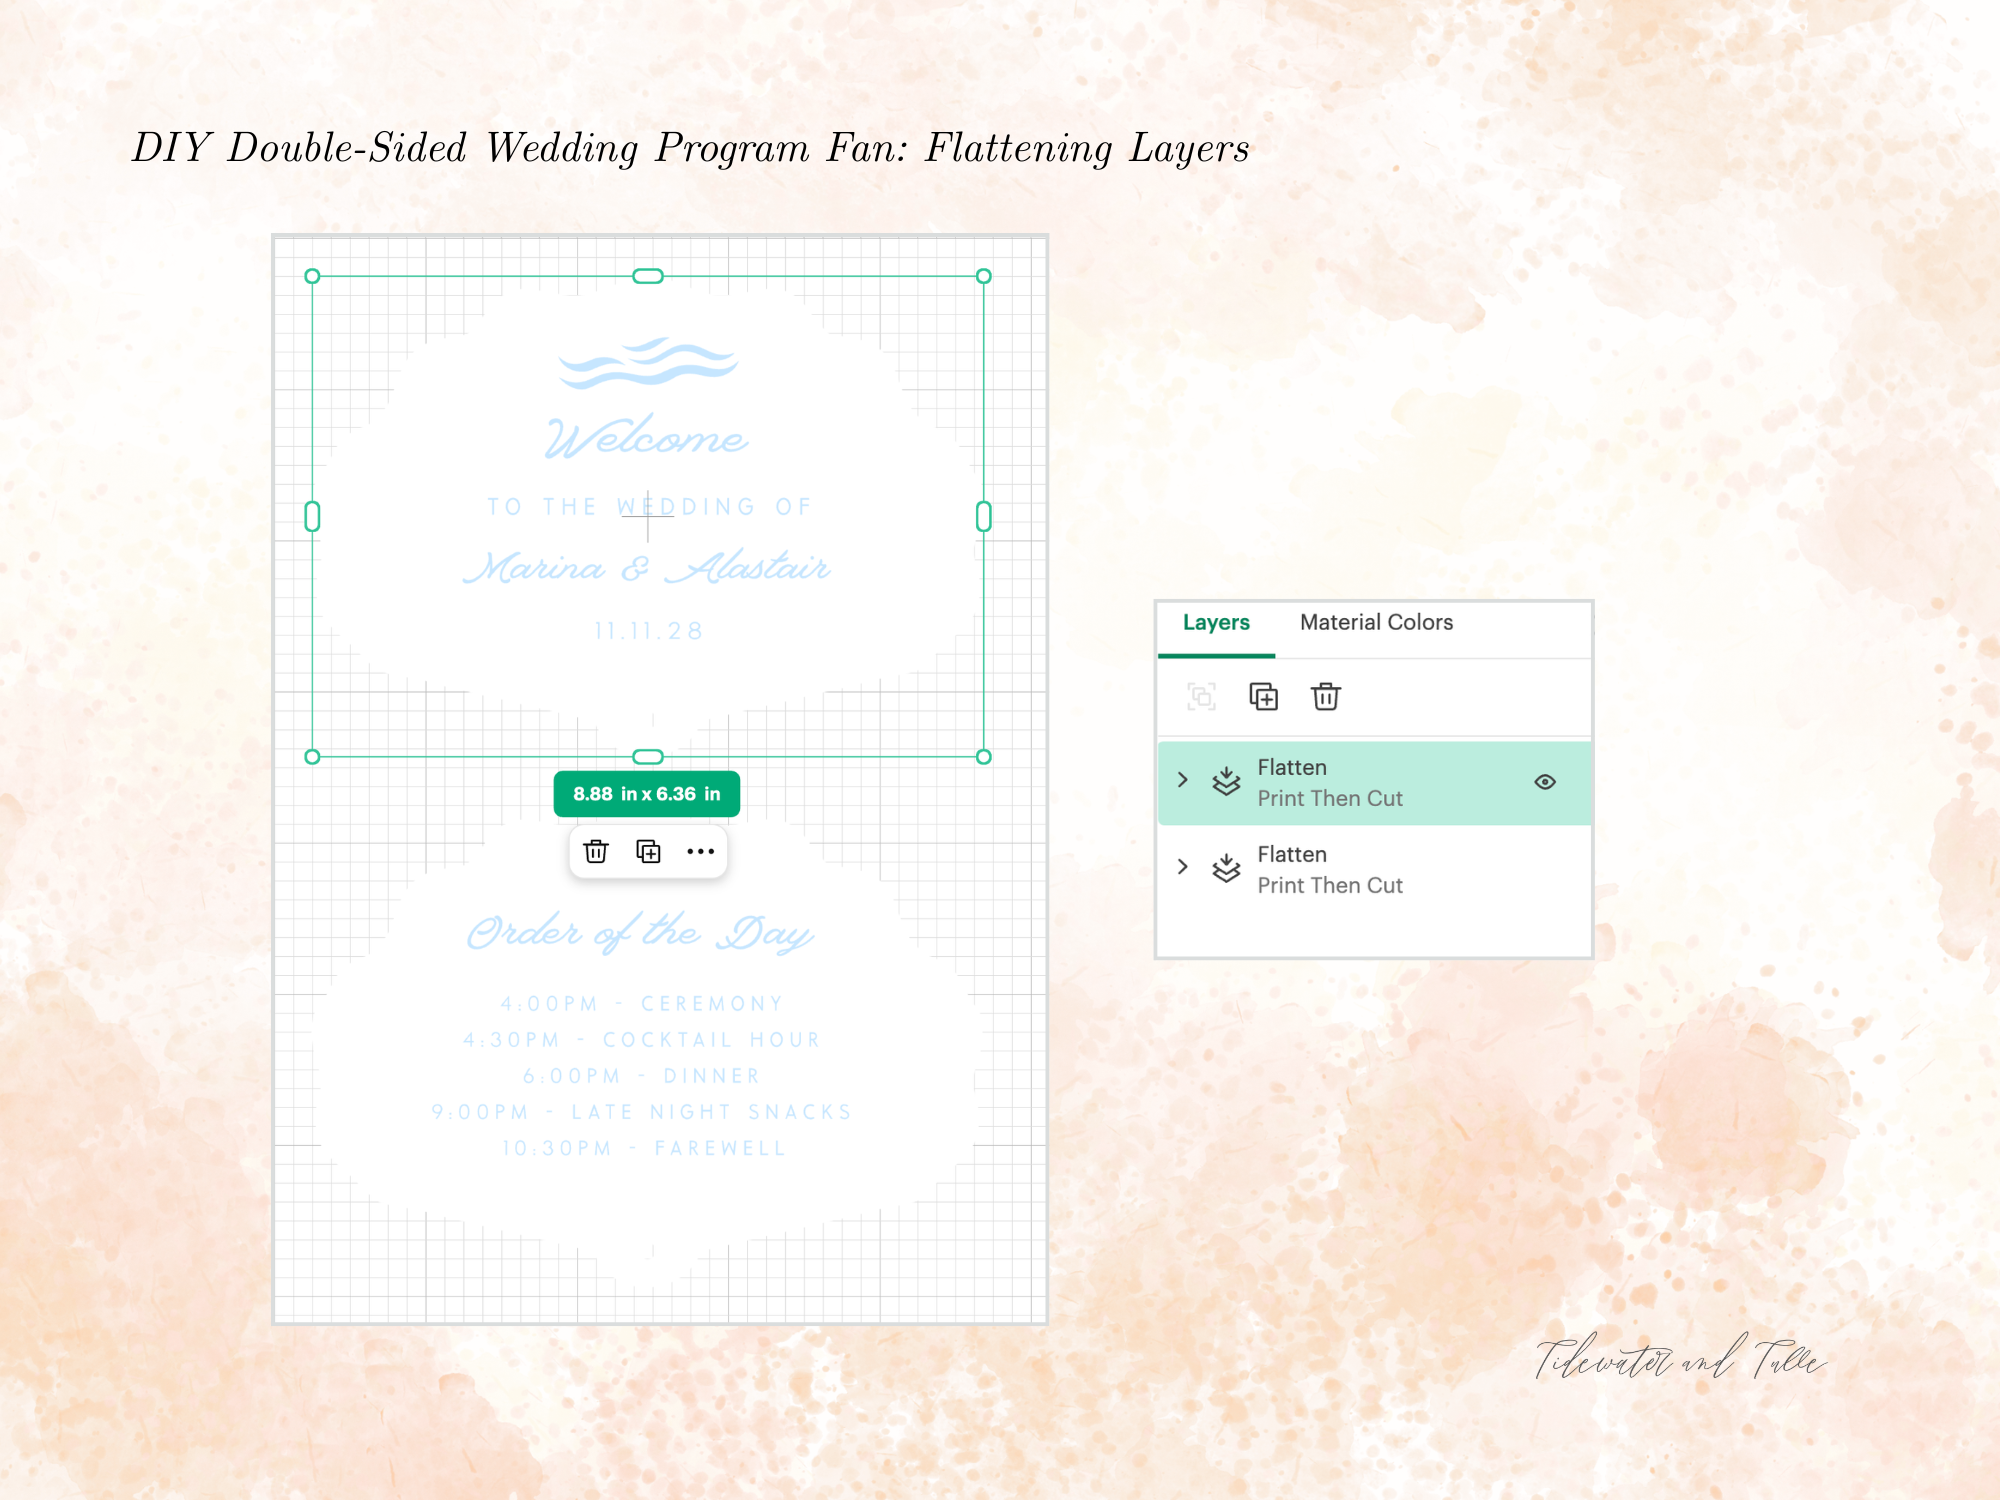
1. Design and Flatten Your Images. In Cricut Design Space, open our pre-made Design Space project. Click "Unflatten" for each layer and then edit with your names, dates, and information on both the front and back layers of the fan. Ensure both the front and back fan shapes are the exact same dimensions.Once you are finished editing, select all the layers for the front side, and click Flatten at the bottom of the Layers panel. Repeat this by selecting all the layers for the back side and clicking Flatten. You should now have two distinct "Print Then Cut" layers!
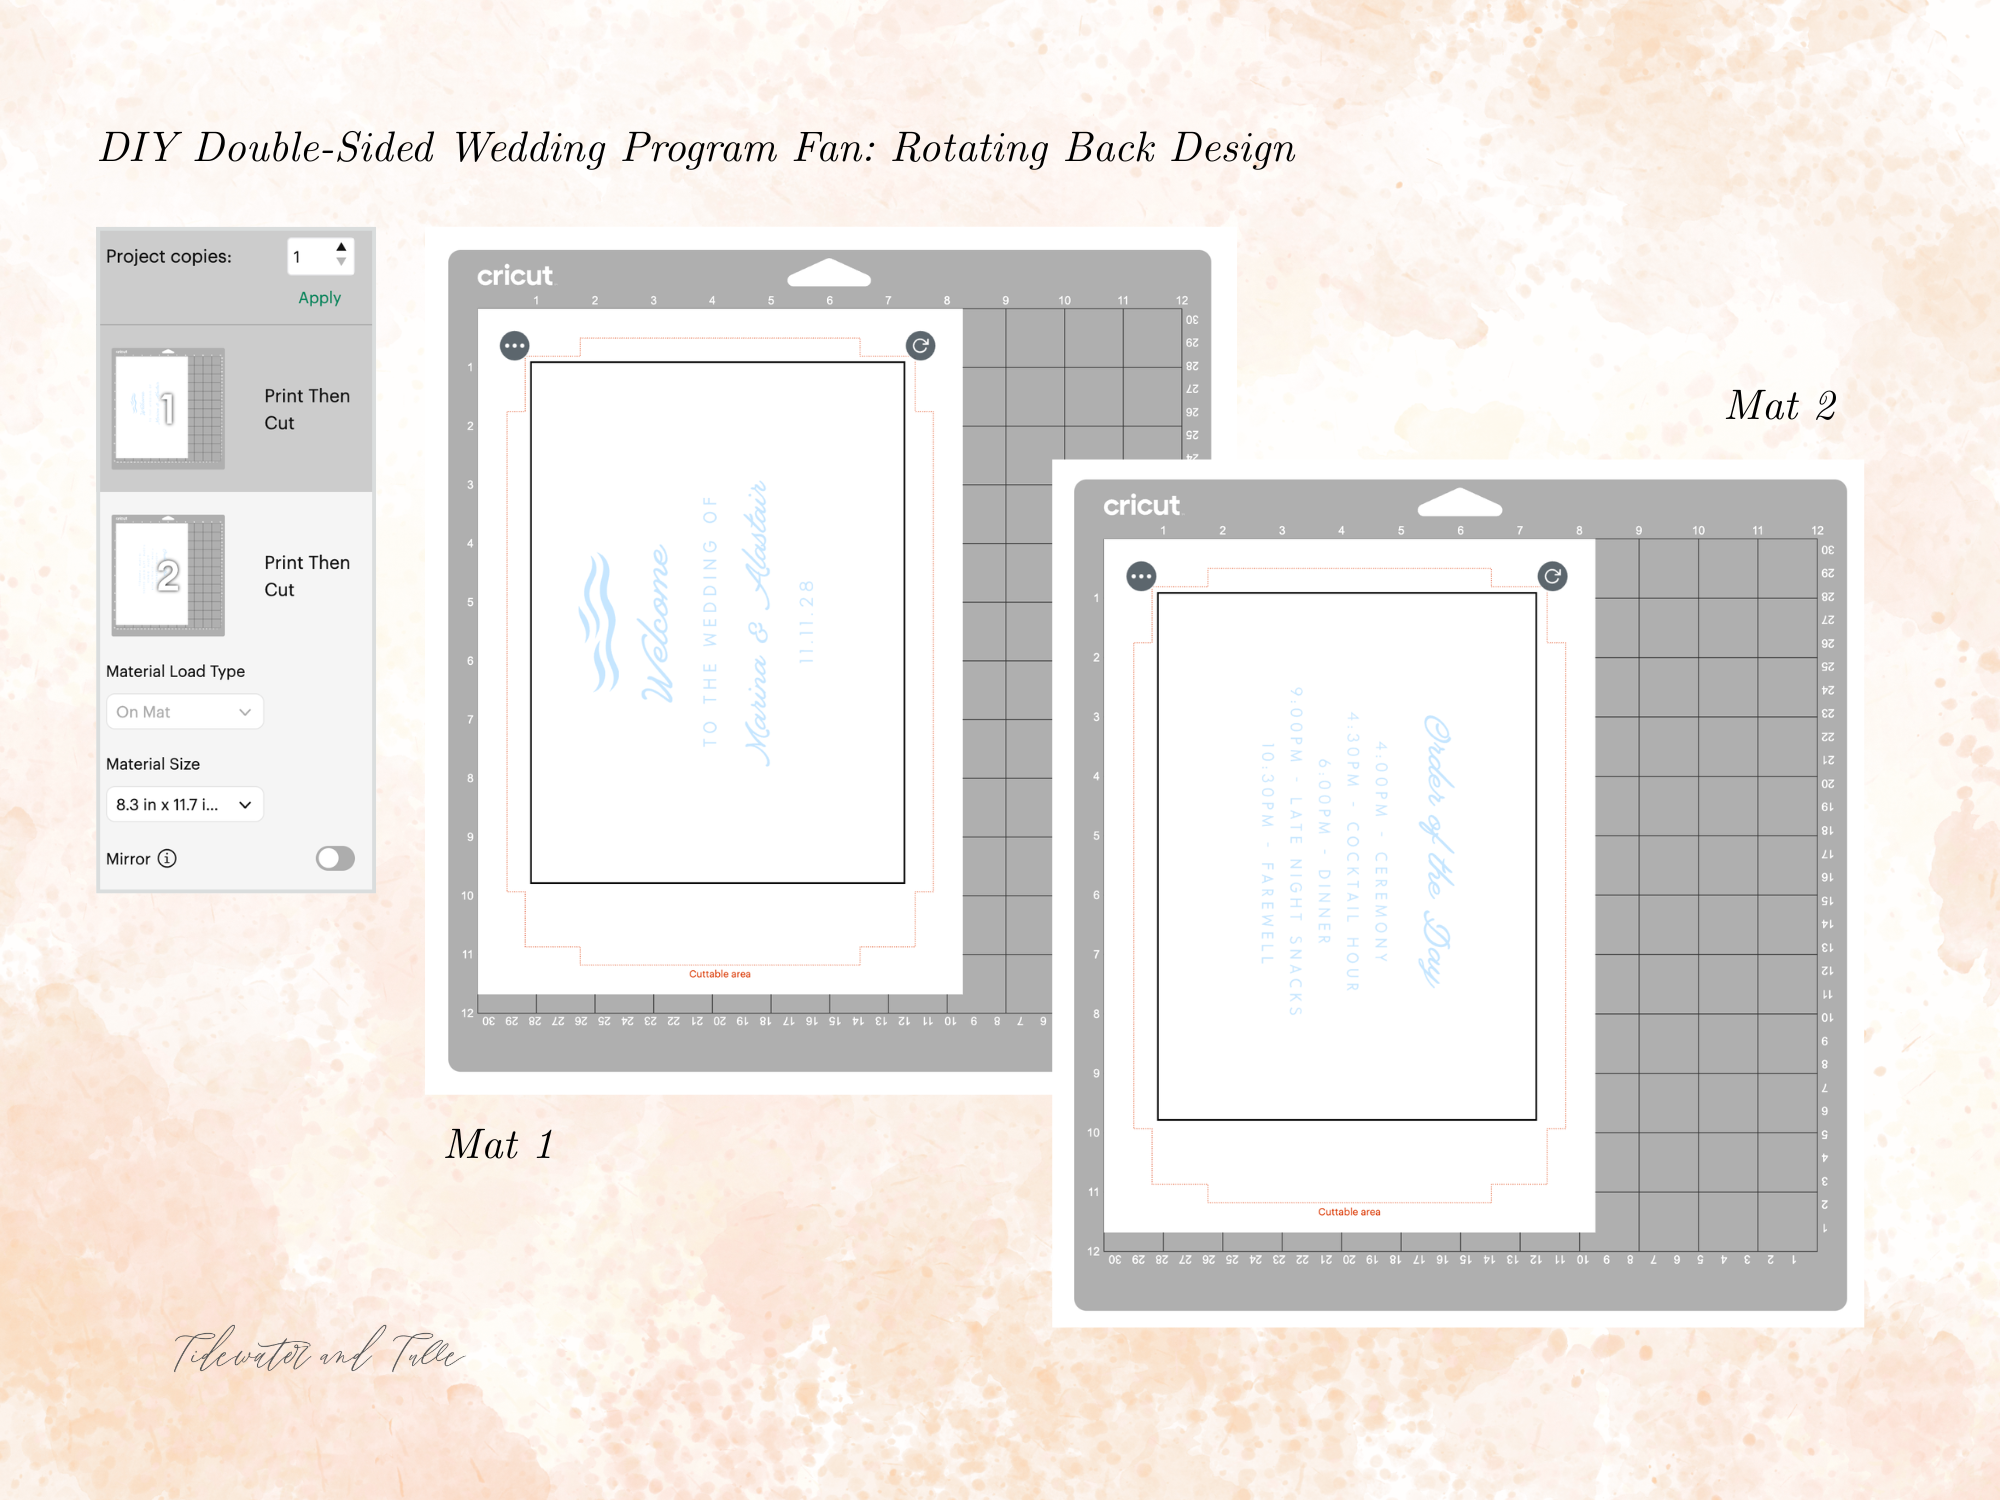
2. Setup Your Prepare Screen. Click Make It. Now it’s time to orient your designs so they line up perfectly when printed back-to-back!
➤ MAT 1 (Front Side): You'll notice your "Welcome" text is on the left side of the page. Leave this exactly as it is.
➤ MAT 2 (Back Side): Now select your second mat from the left sidebar. Click directly on your design on the virtual mat. A bounding box will appear. Click and drag the Rotate icon (the curved arrow at the top right corner of the box) clockwise. Rotate the design a full 180 degrees until it flips completely upside down, and your "Order of the Day" text is on the right side of the page.
3. Send to Printer. Click Continue and Send to Printer. Turn off "Bleed" for both mats unless you have created a full-color fan. For white fans like ours, it's not needed. It's recommended to use plain printer paper to test how your printer handles printing first. Once you're happy that everything's printing as it should, then use your more expensive cardstock or papers.
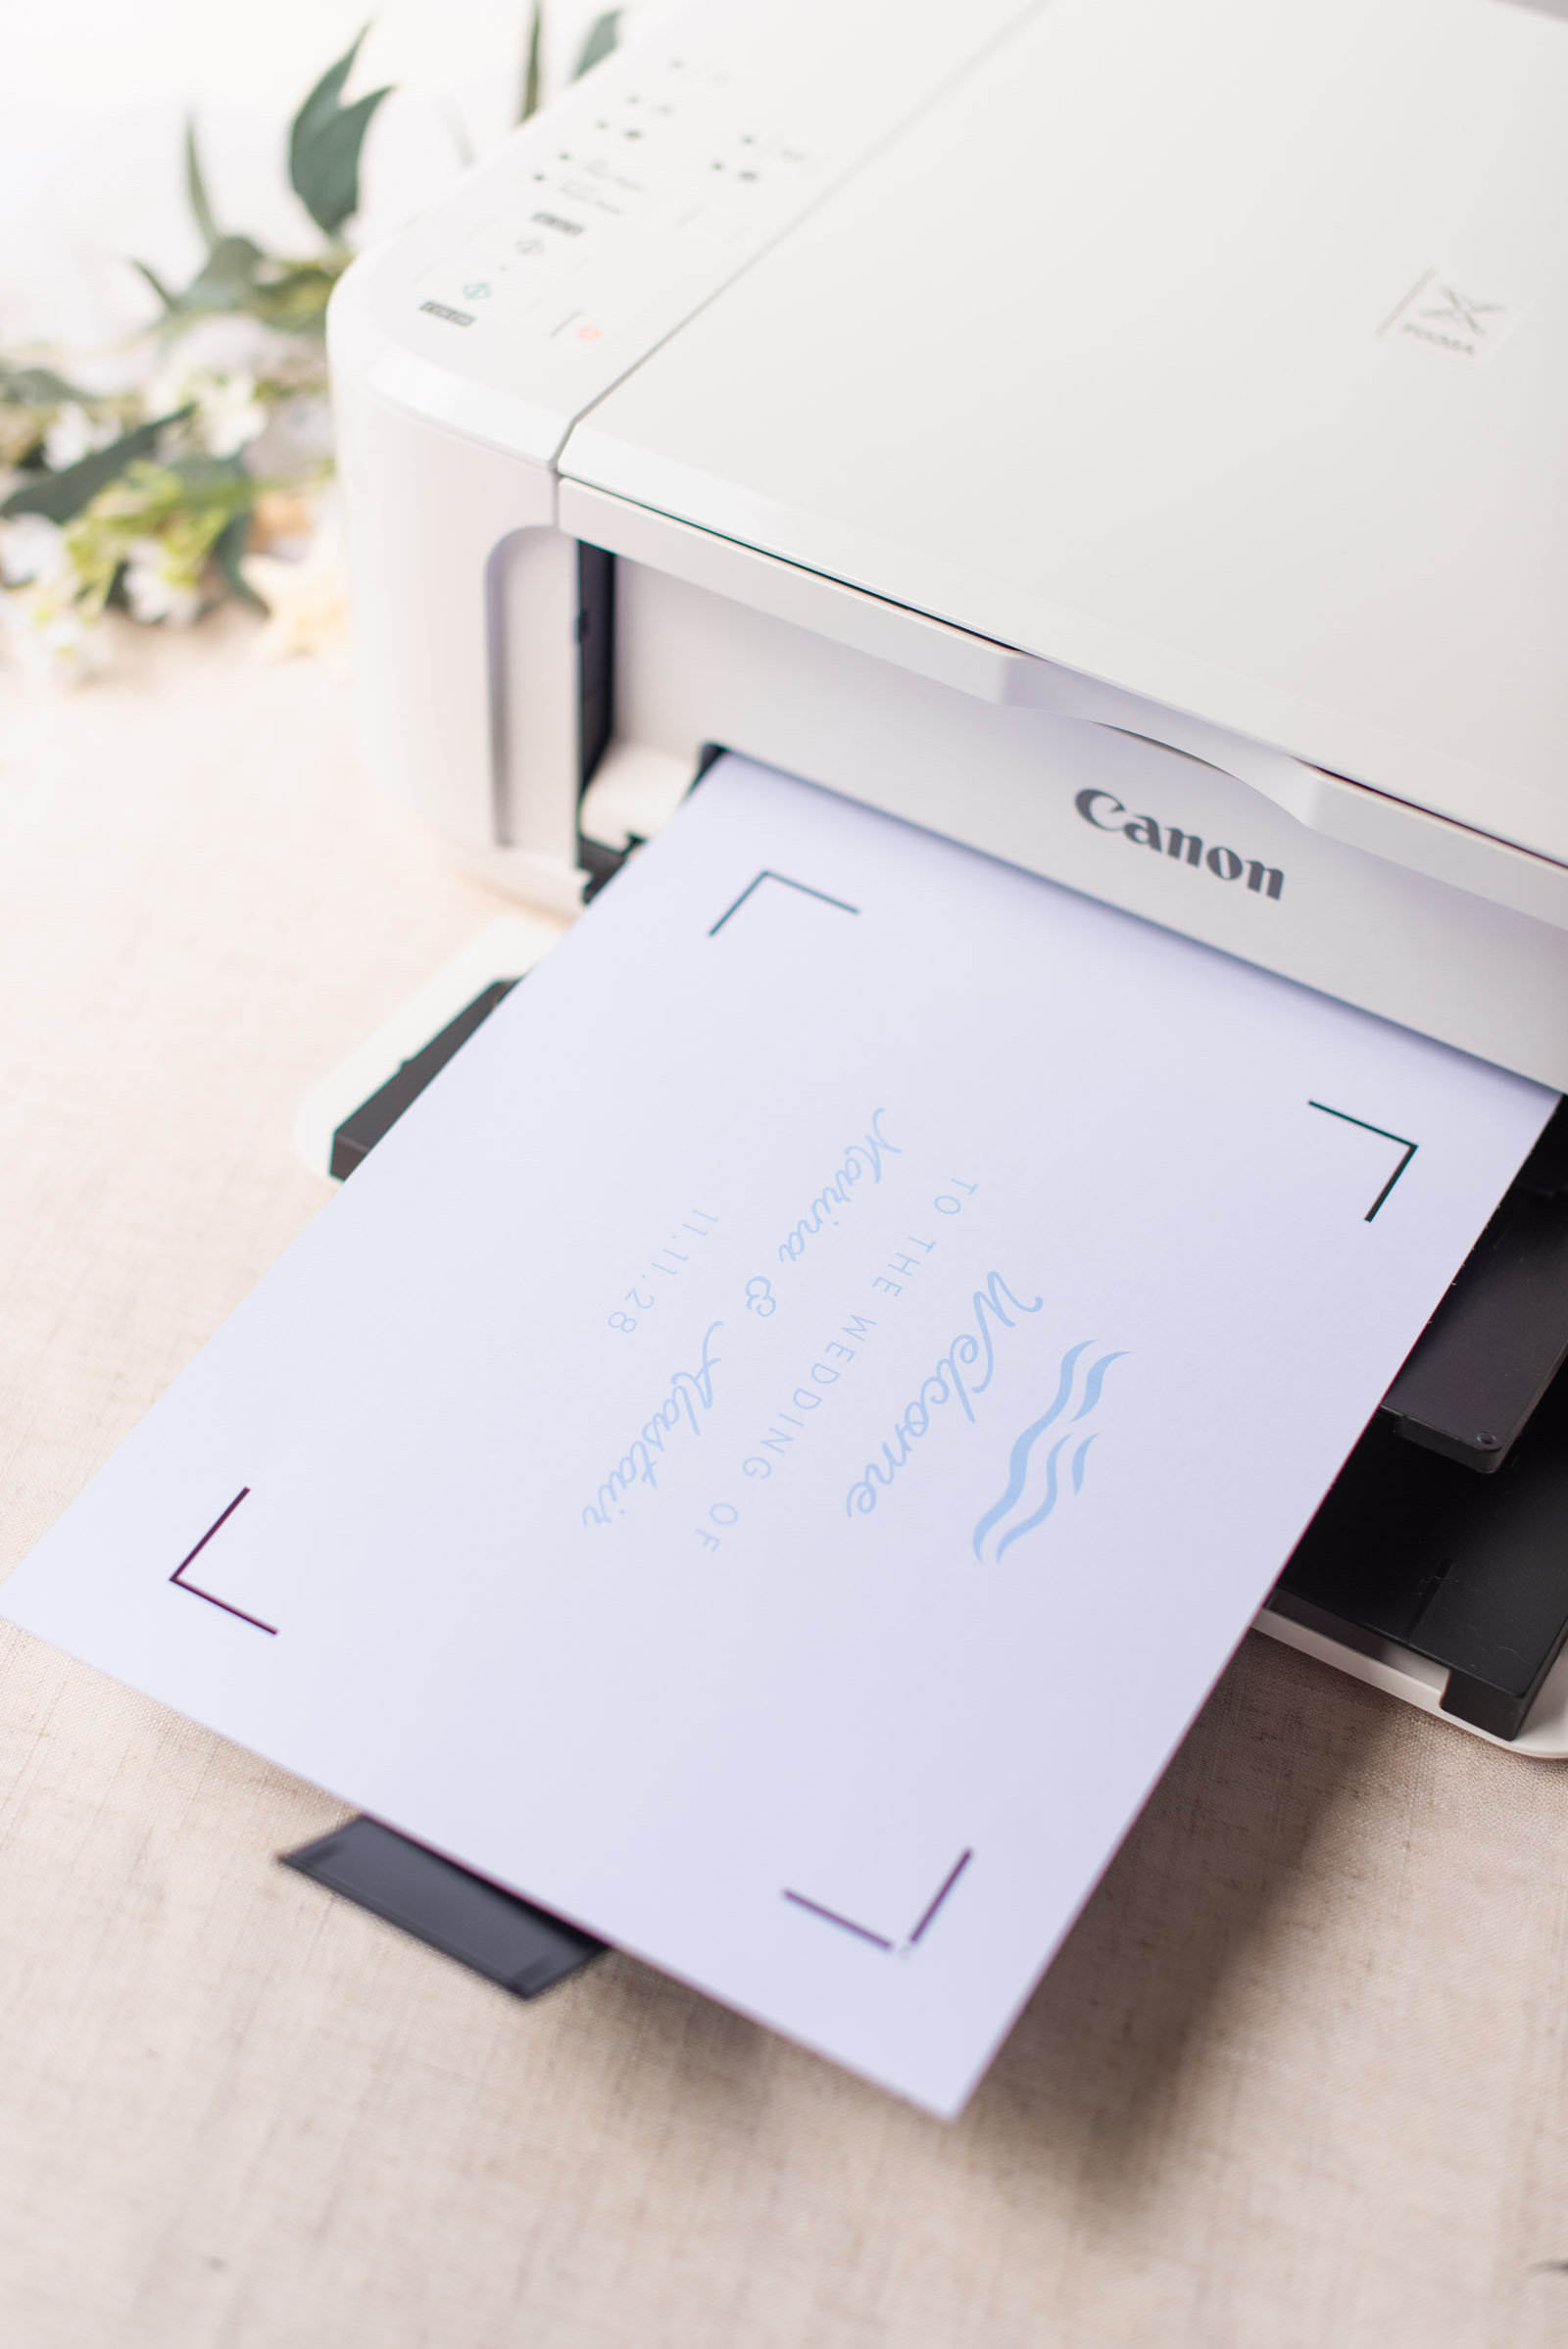
➤ MAT 1 (Front Side): Click Print exactly as is. Pay attention to how your first print comes out of your printer. After printing, click Done on your DS screen and then click on Mat 2. Do not follow through with a cut yet.
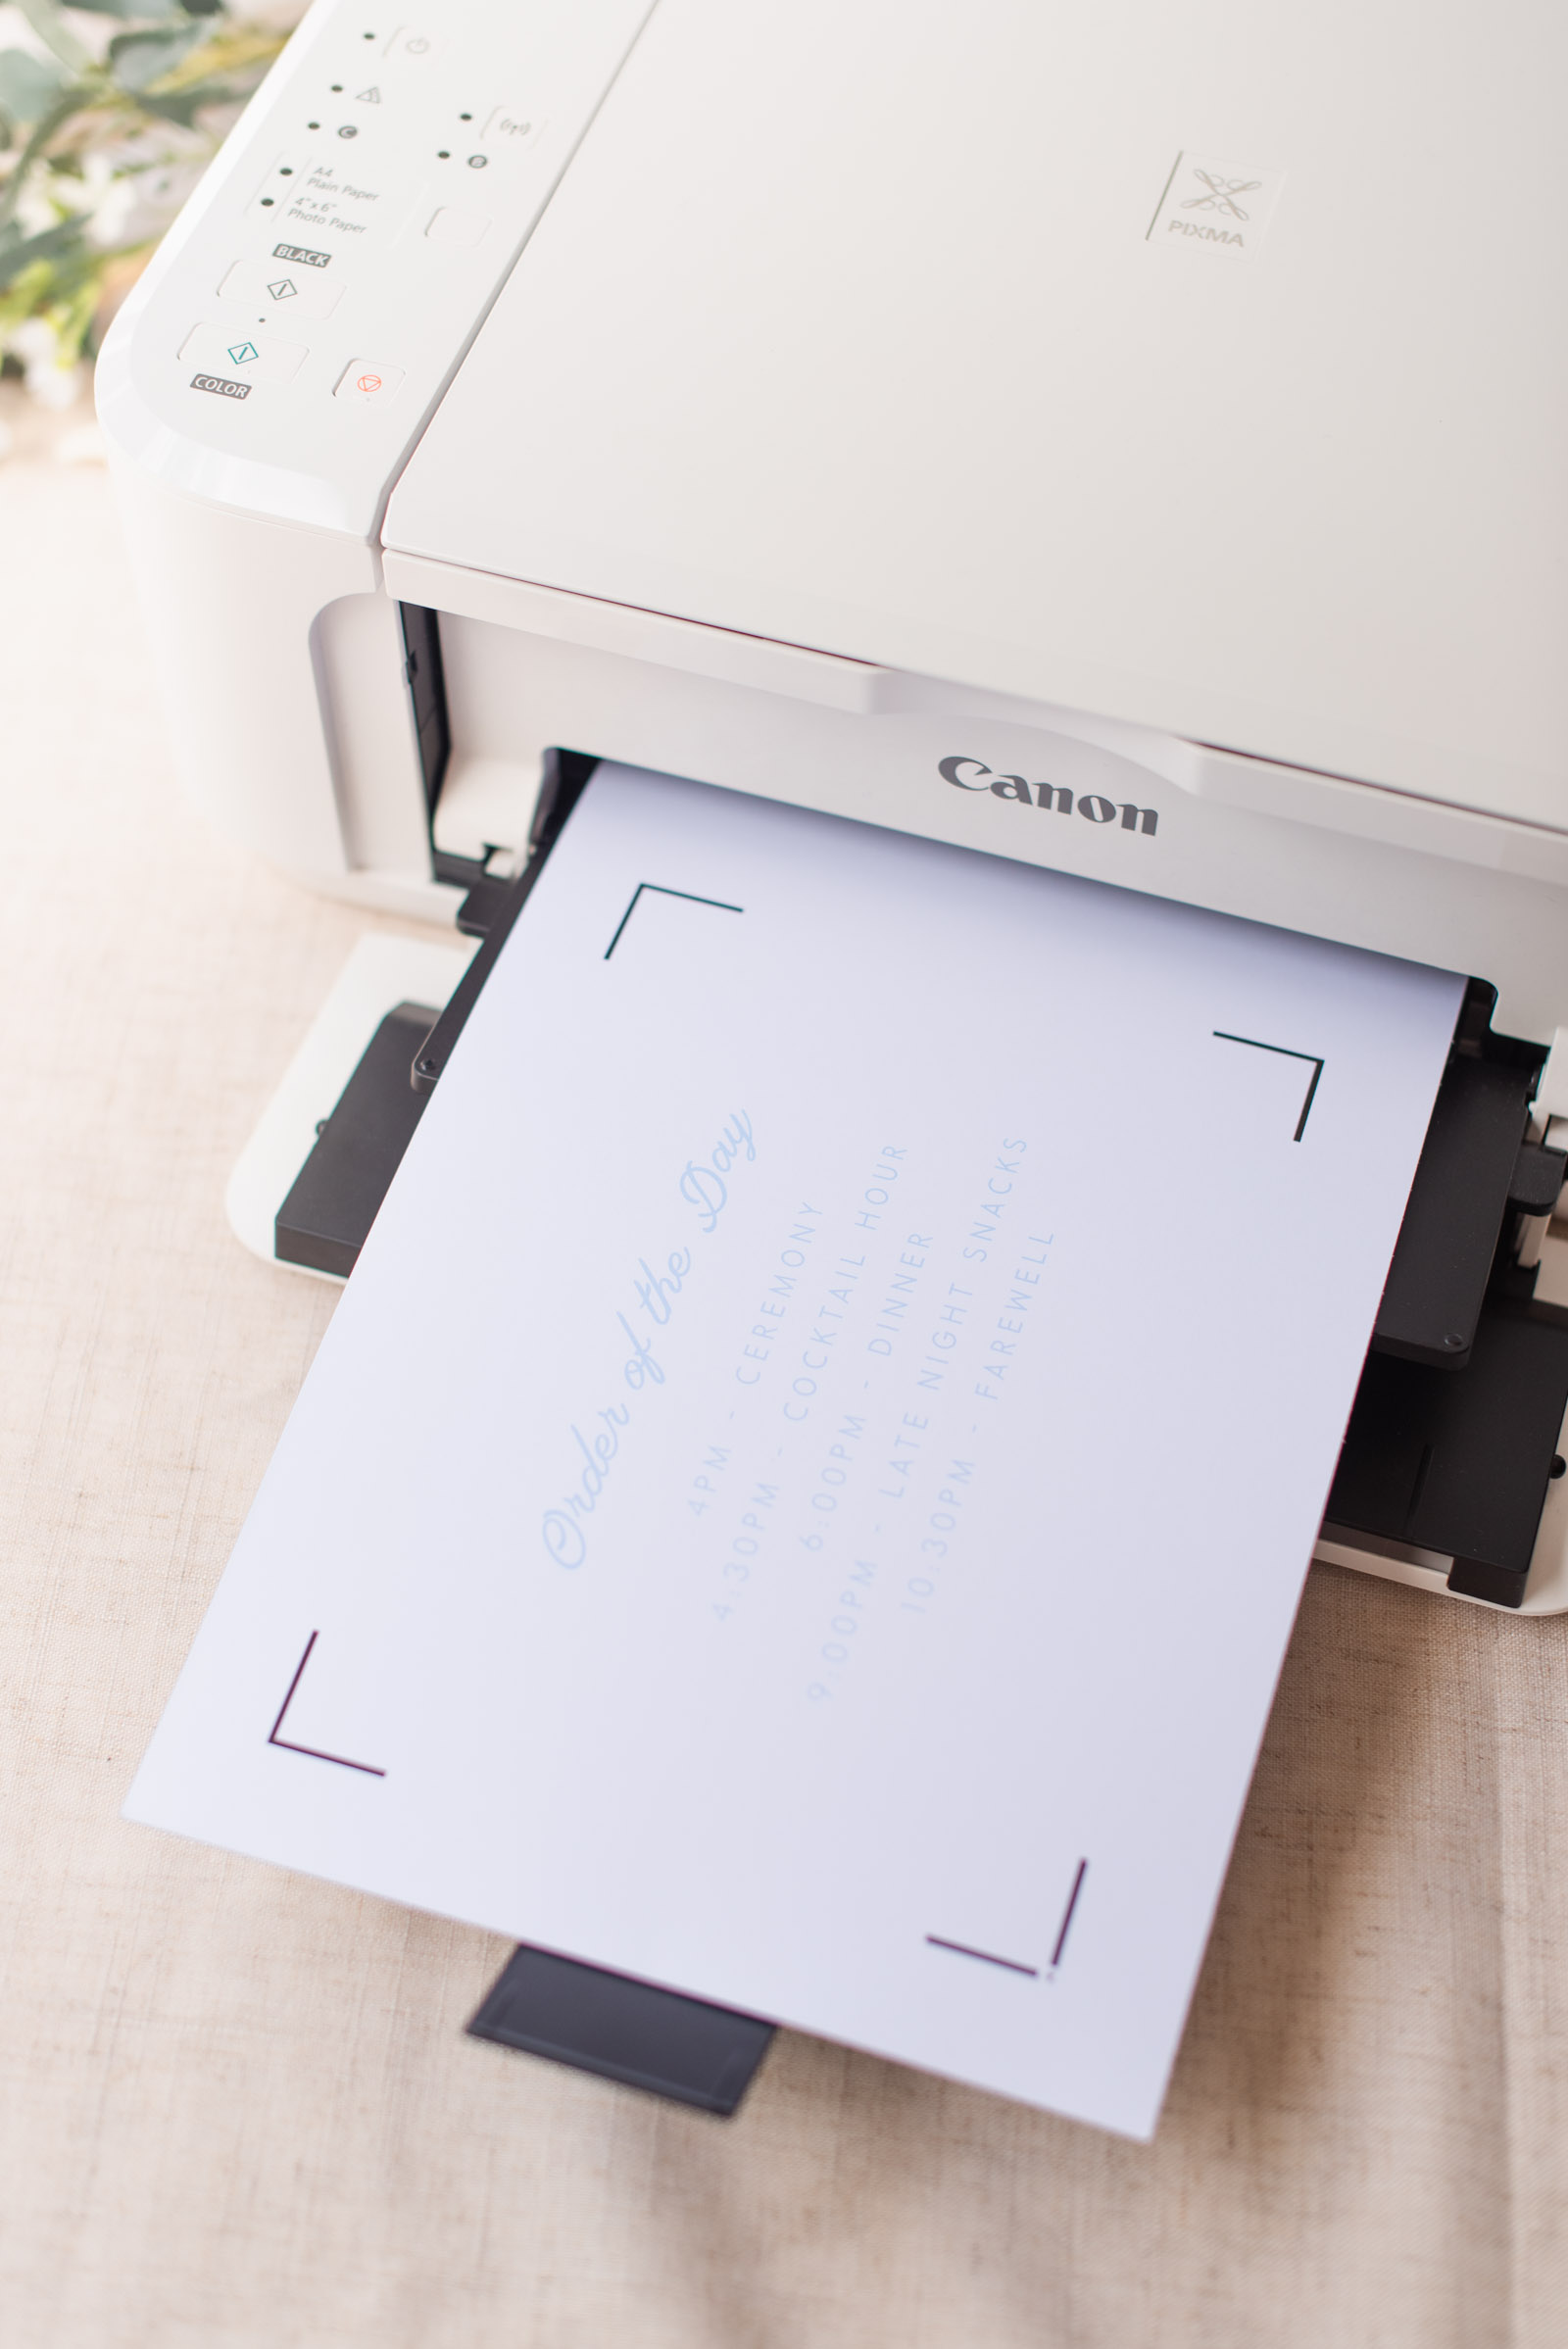
➤ MAT 2 (Back Side): Once the second mat is selected, click Send to Printer. Now insert your paper into your printer again (ours is printed side up) – the top end inserted should have the Cricut black registration marks with a little arrow in the upper left hand corner. The little arrow should be facing in towards the printer for most all printers.
IMPORTANT PRINTER NOTE: All printers have different ways of inserting paper. Our printer is a front tray feed, so we've printed with printed side up as it rolls to print on the blank side.
For rear tray feeds, you usually just flip your paper over and insert your paper blank side up. These printer feeding steps will vary depending on the type of printer you have.
If your printer doesn't print like ours, we hope this tutorial gives you the confidence to experiment to find what works for yours! All printers can do this project.
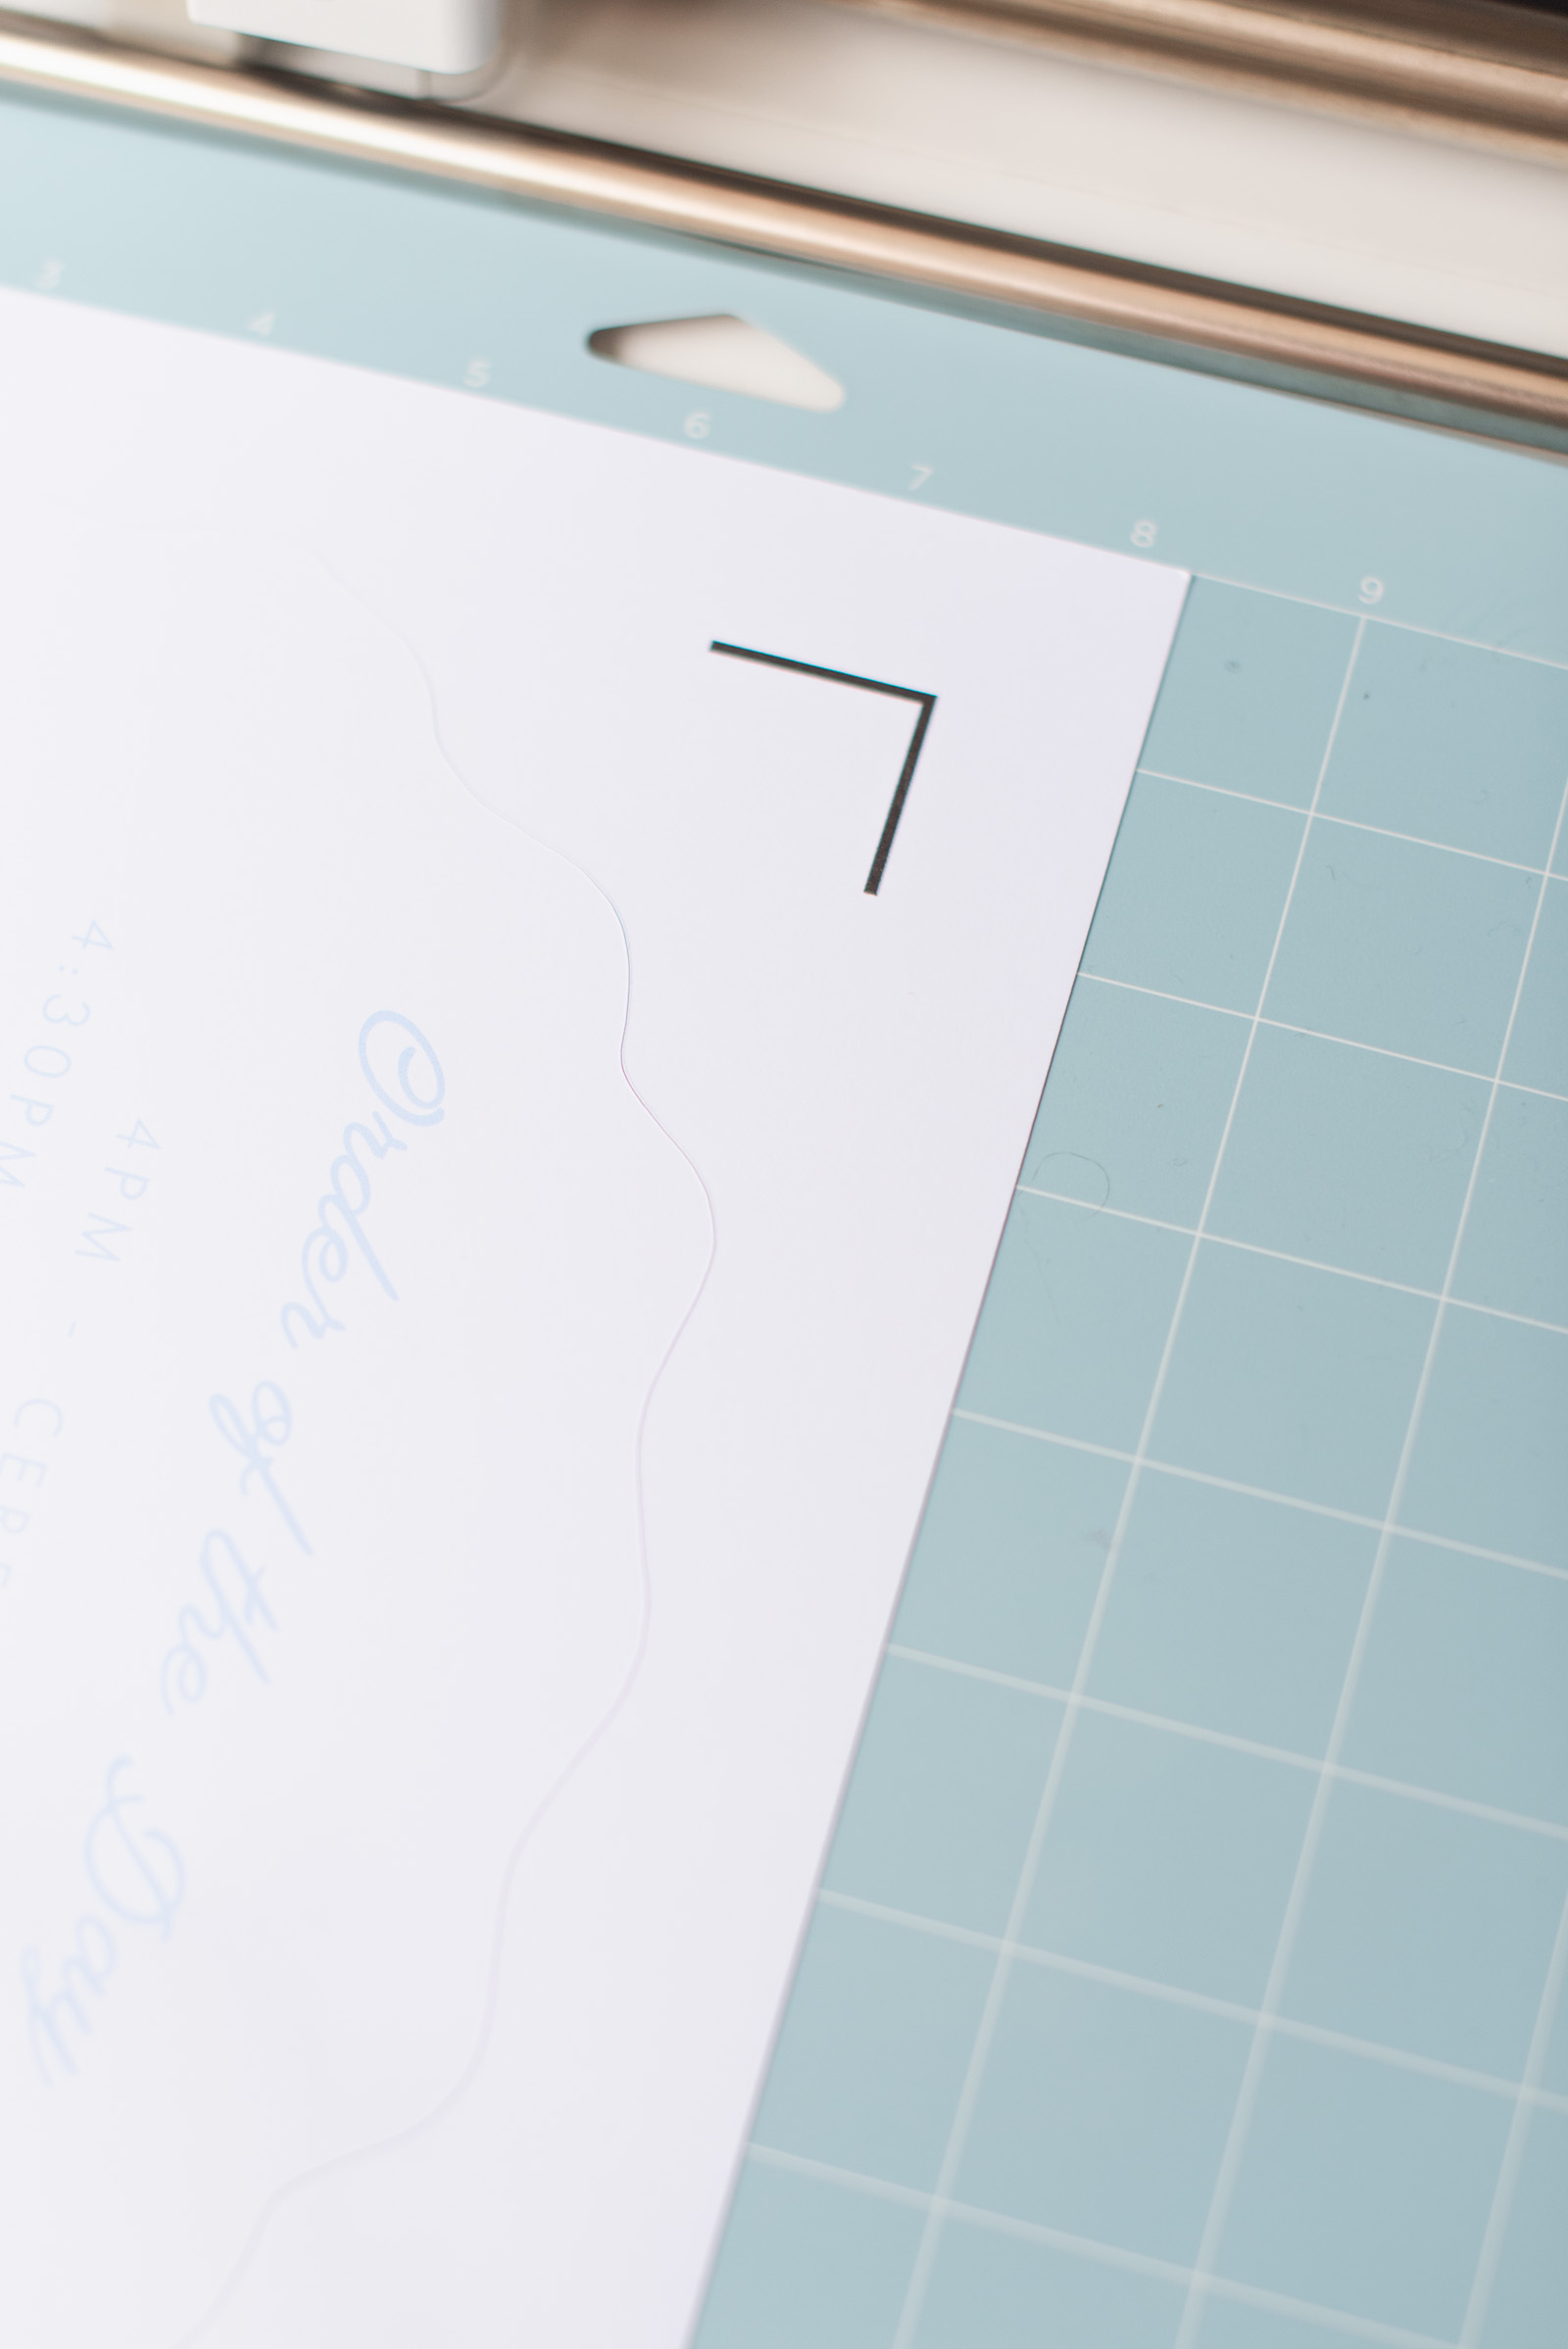
4. Cut your fan. Now that both sides have printed, all you have to do is make one single cut! With Mat 2 already highlighted on the left hand side, now select your Base Material so your machine knows how deep the blade needs to cut – ours cut best on Heavy Watercolor Paper (140lb / 300gsm).

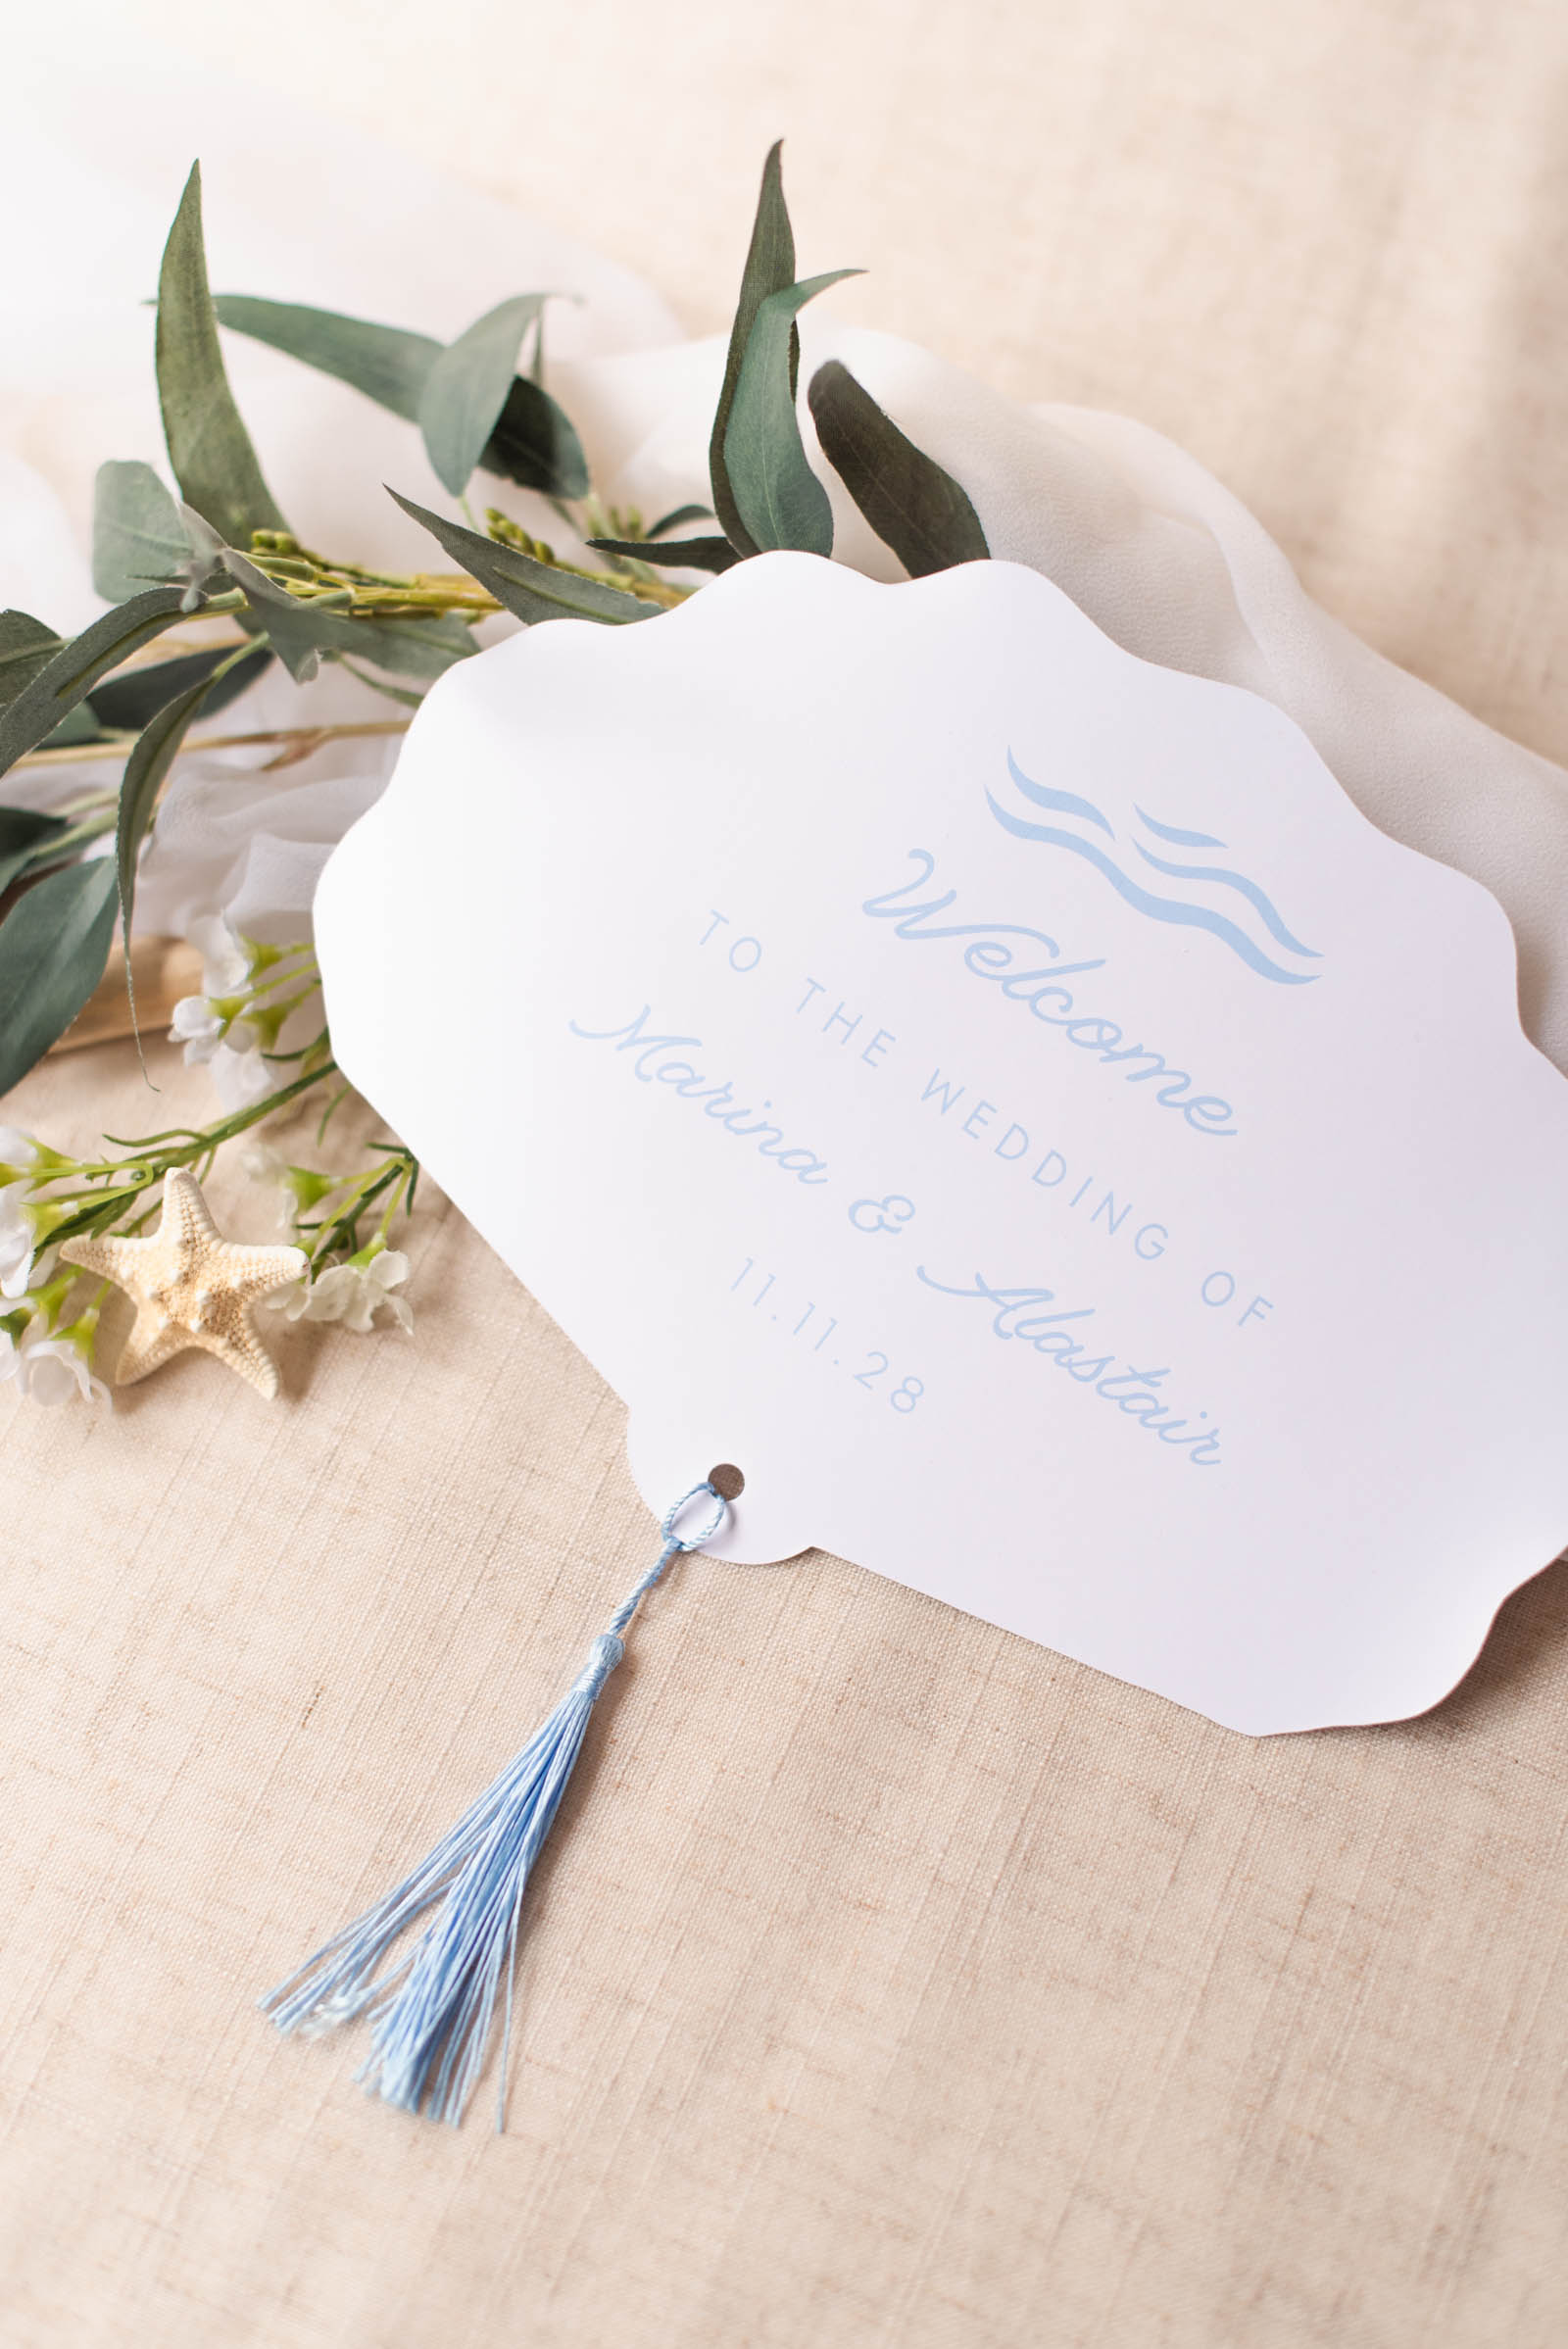
5. Peel and repeat. Once cut, peel the machine mat away from your cardstock. Repeat the above steps to match the numbers of programs you need for your wedding day. Add any optional embellishments like tassels or eyelets to finish off your fan. Now they're ready for the big day!

Frequently Asked Questions: Cricut Wedding Program Fans
How many wedding program fans should I make?
Consider making one program fan per couple or family, plus a few extras for your photographer to take photos of or to have as keepsakes after the wedding. If you're having a warm weather or summer wedding, you may want to make more so that each guest has one. If you are on a tight DIY timeline, one program per couple placed on the seats is perfectly acceptable!What is the best paper for double-sided Print Then Cut?
To make the fans sturdy enough to actually wave, use a heavy cardstock between 80lb and 110lb (216 to 300 gsm). Just make sure your home printer can print on cardstock before buying in bulk! Not all home printers handle thick paper the same. If in doubt, do an internet search for your printer's make and model + maximum paperweight.Why is my Cricut misaligning the cut on the second side?
Most misalignment issues come from how the paper is re-fed into the printer or your Cricut needing to be calibrated. If you haven't calibrated in awhile, try that first. Try also holding your printed paper up to a window or light source to check the alignment before cutting your final cardstock to rule out any printer-specific issues. And during the editing/designing stage, it helps to leave a healthy bit of empty blank space around your text as it gives you some wiggle room for any slightly off cuts. Shh, no one will tell!
WRITTEN BY
Chelsea Barton
Founder & Wedding DIY Expert
A former wedding photographer, the founder of Tidewater and Tulle, and author of Cricut Weddings, Chelsea Barton has been helping couples bring their dream weddings to life through creative, approachable ideas since 2009. Her insight and work have been featured in Martha Stewart Weddings, Southern Living, and other top publications around the world. She combines editorial expertise and real-world insight to inspire meaningful celebrations.
PHOTOGRAPHY CREDITS
Tutorial Photography and Video: Chelsea Barton
Editor's Note: Some above product links may be partner-connected and purchasing through these links means we get a small commission from those brands that helps support this website. You can find our full affiliate disclosure policy here on Tidewater and Tulle.

