
While we have upcycled a thrifted chiffon blouse for this DIY tutorial, you can use fabric from an heirloom wedding dress or a blouse from a loved one who has passed for an even more meaningful way to tie in the past with the present.
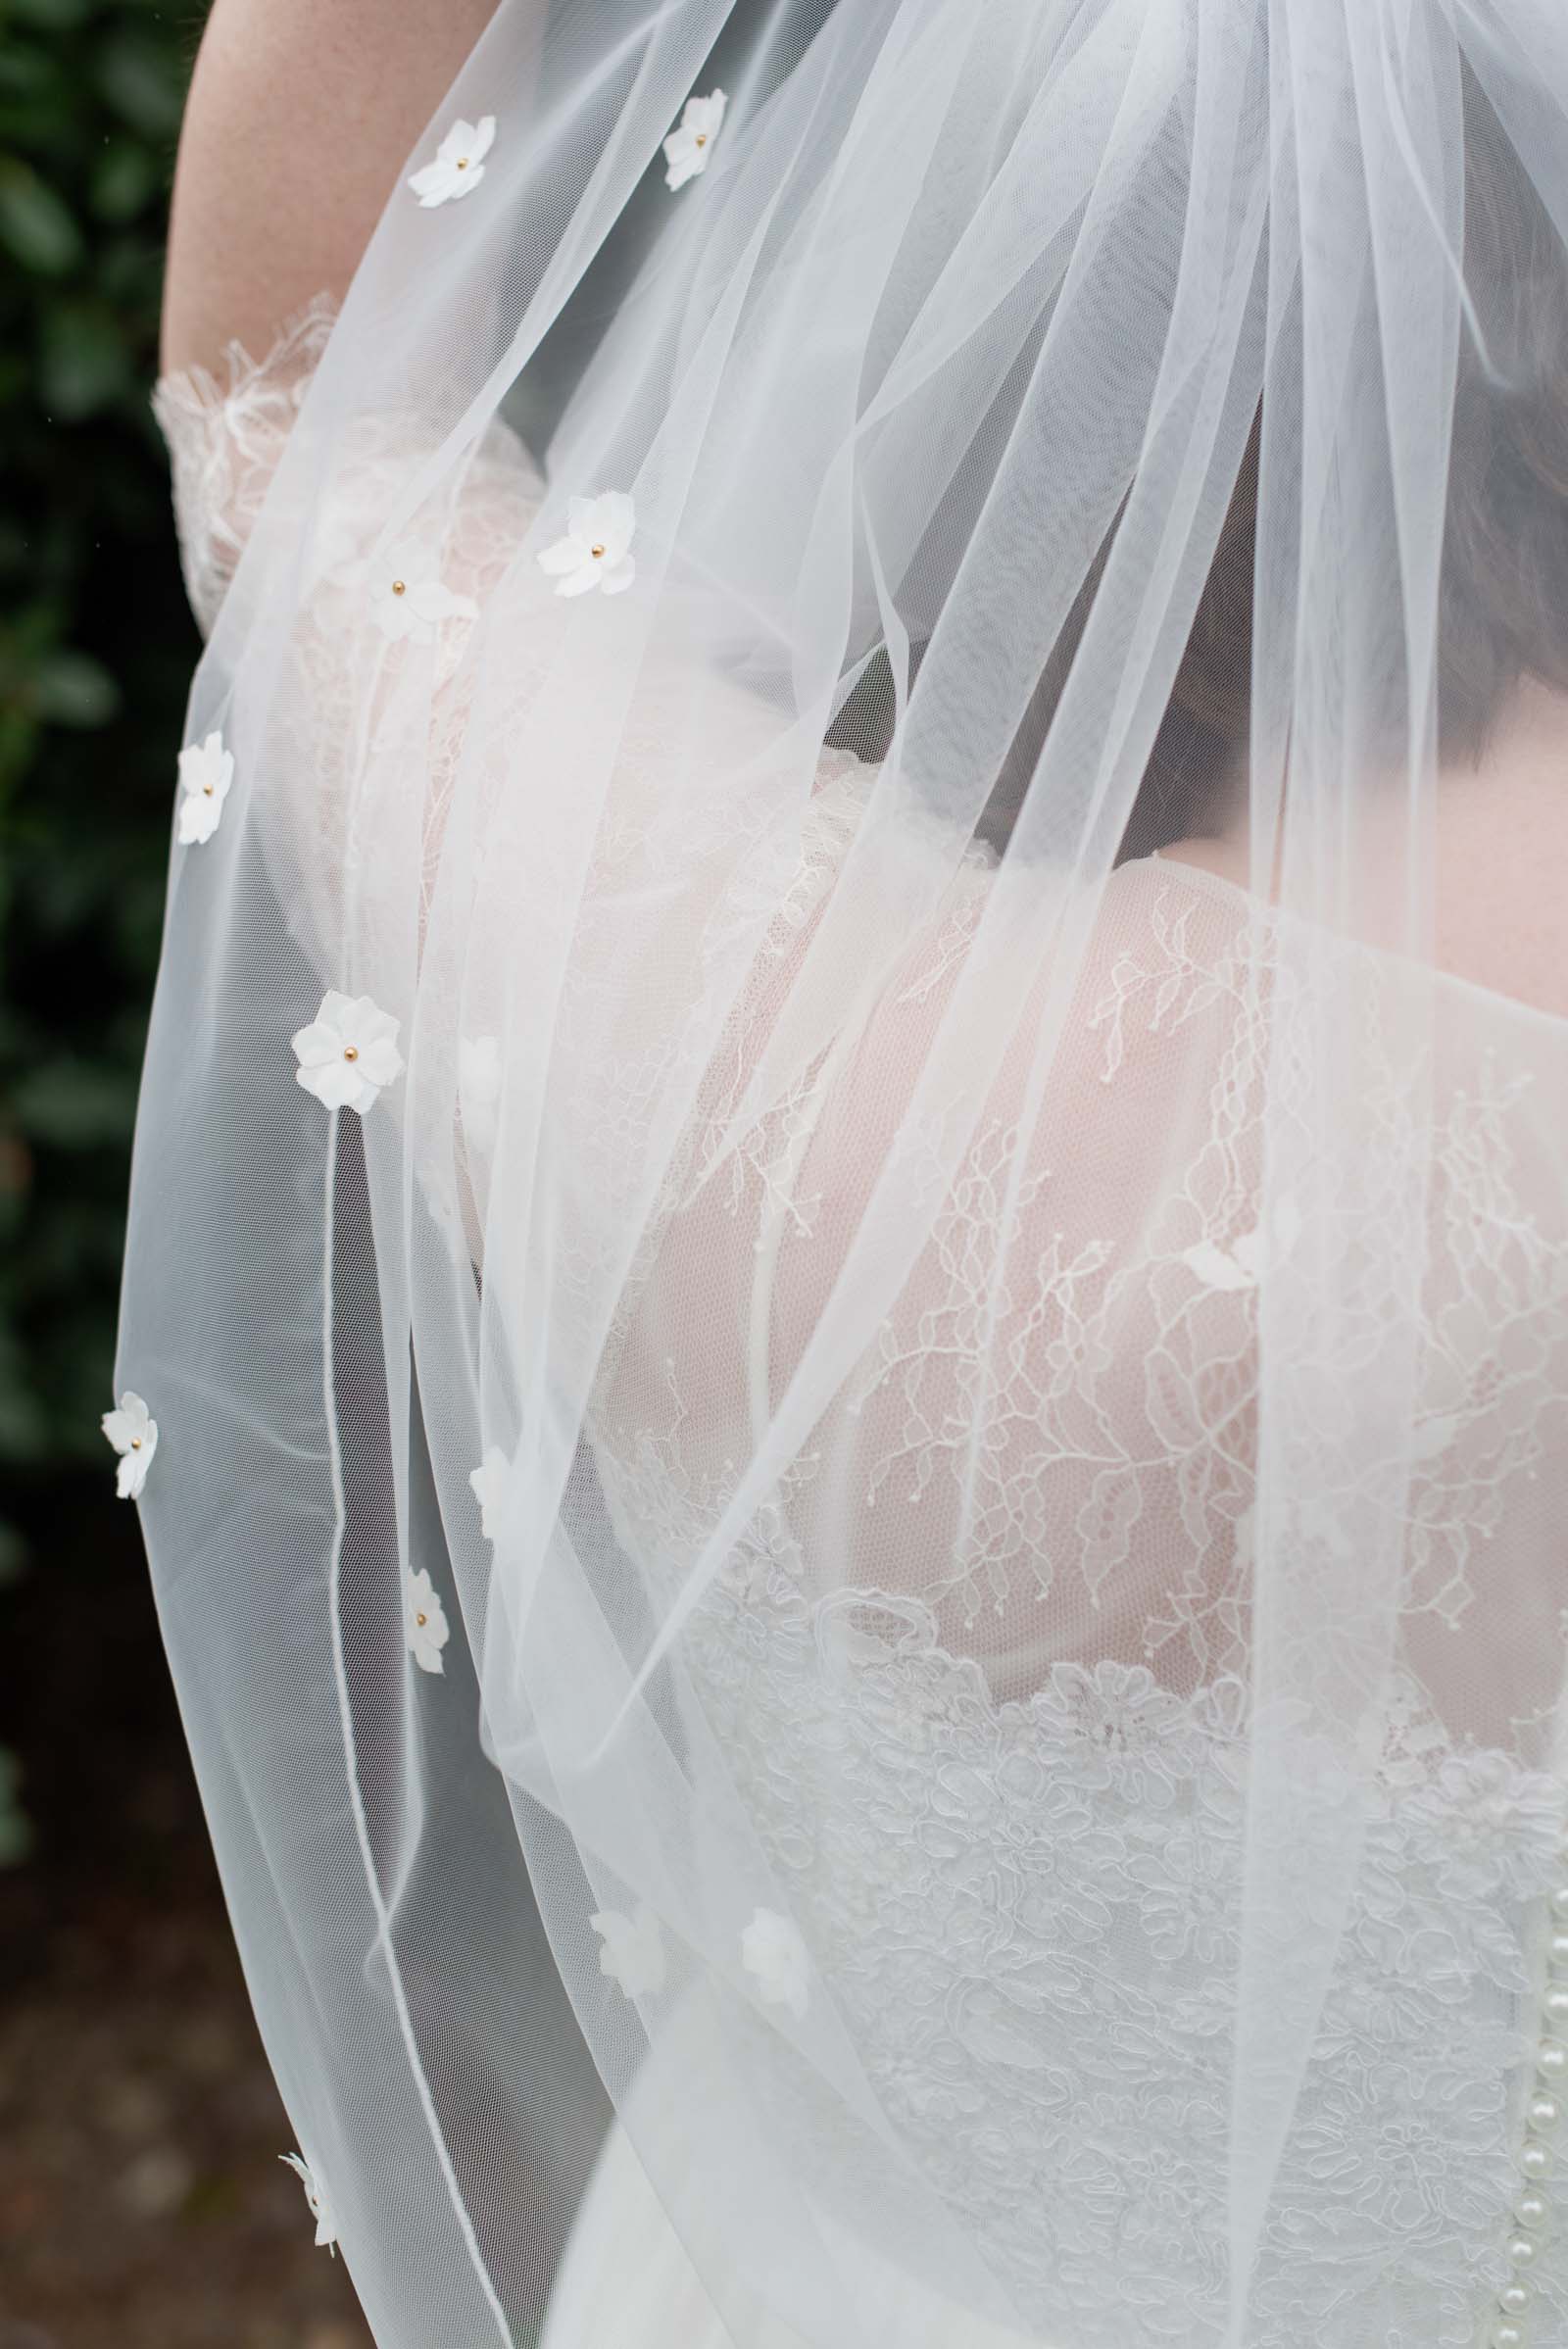
With using the fabric precision cutting power of a Cricut Maker machine, you can create a bespoke veil layered with delicate, fluttering florals. The result is romantic, high-end, and entirely your own. It's proof that thoughtful design and sustainability can go hand in hand!
Ready to transform pre-loved fabric into airy 3D appliqués for a veil that feels both modern and heirloom-worthy? Let's do this!
How to Make a 3D Bridal Veil with Cricut Maker
Skill Level: BeginnerProject Materials
• White chiffon fabric (ours was thrifted)• Secondhand fingertip-length veil (ours was thrifted)
• Cricut Maker
• Rotary blade
• FabricGrip cutting mat
• Brayer
• Scrap paper
• Fabric glue
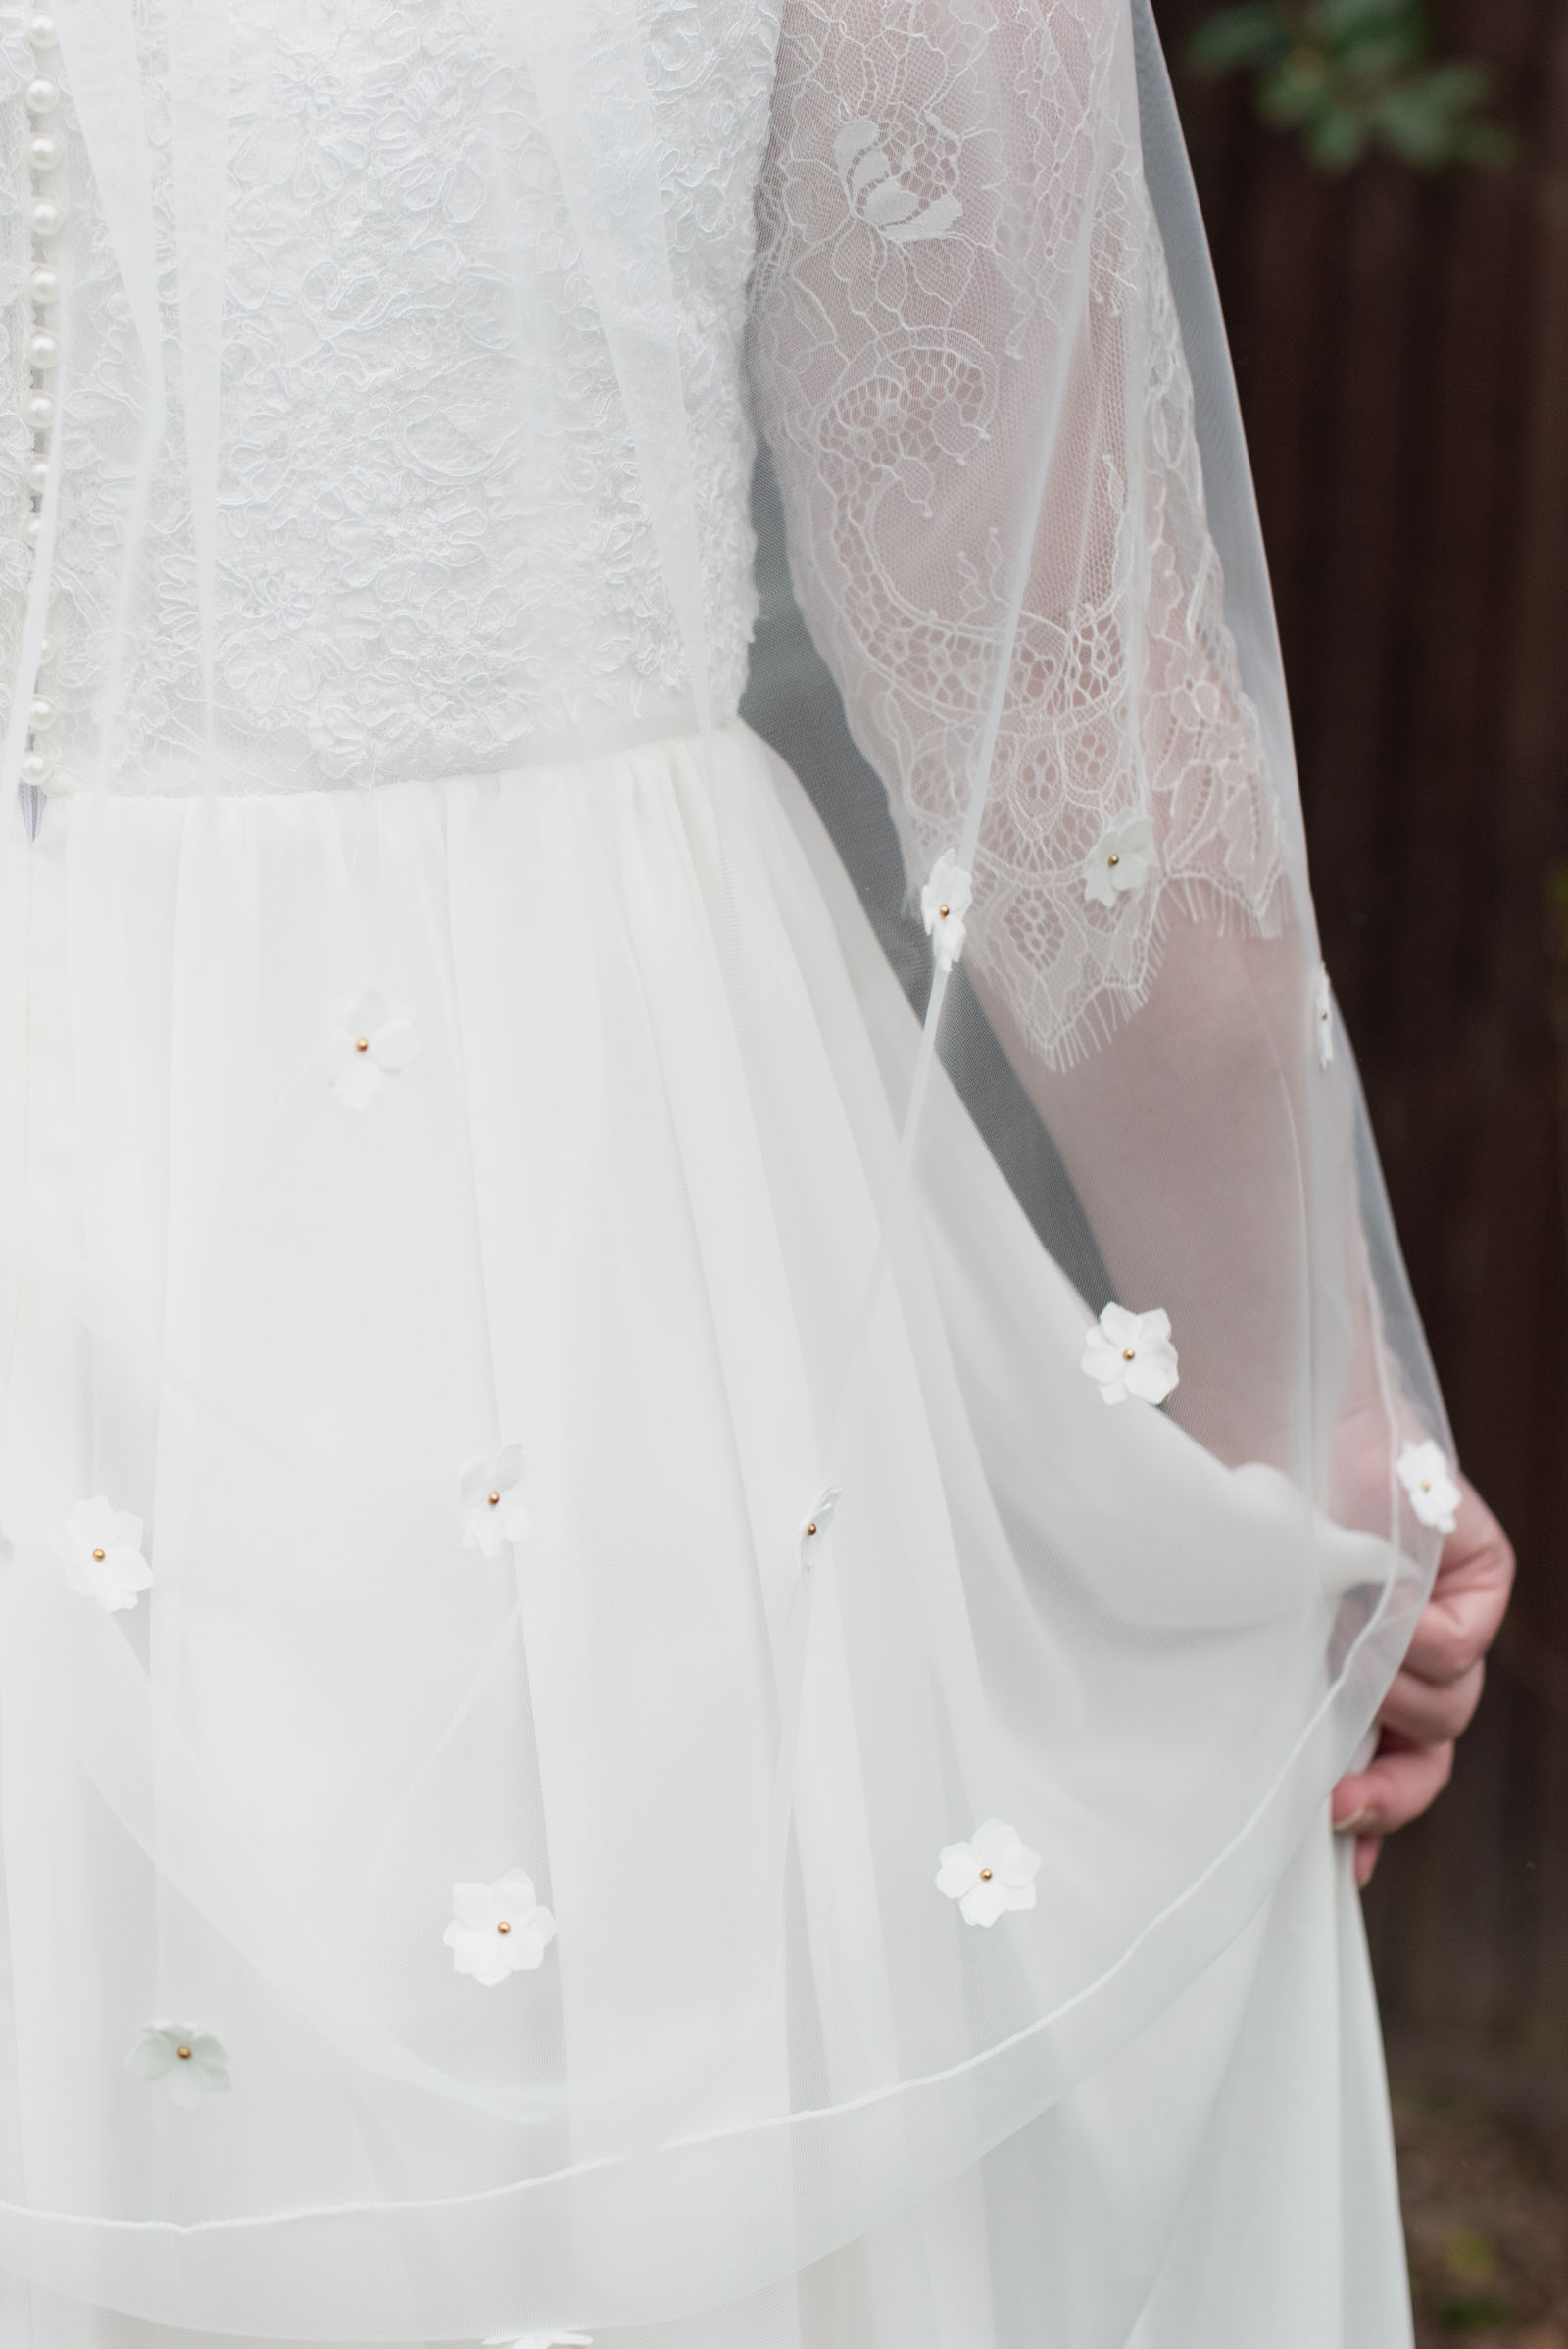
• 3mm flat back pearl beads (ours were in Champagne Gold)
• Wax pen commonly used for diamond art (optional)
• Our Cricut Design Space project (bookmark or make it right now!)
DESIGN NOTES: We used a Cricut Access flower image which means you will need a Cricut Access subscription or purchase the image as a one-off to make as is. You can also swap out and upload your own flower shape as you wish.
Compatible Cricut Machine
• Maker family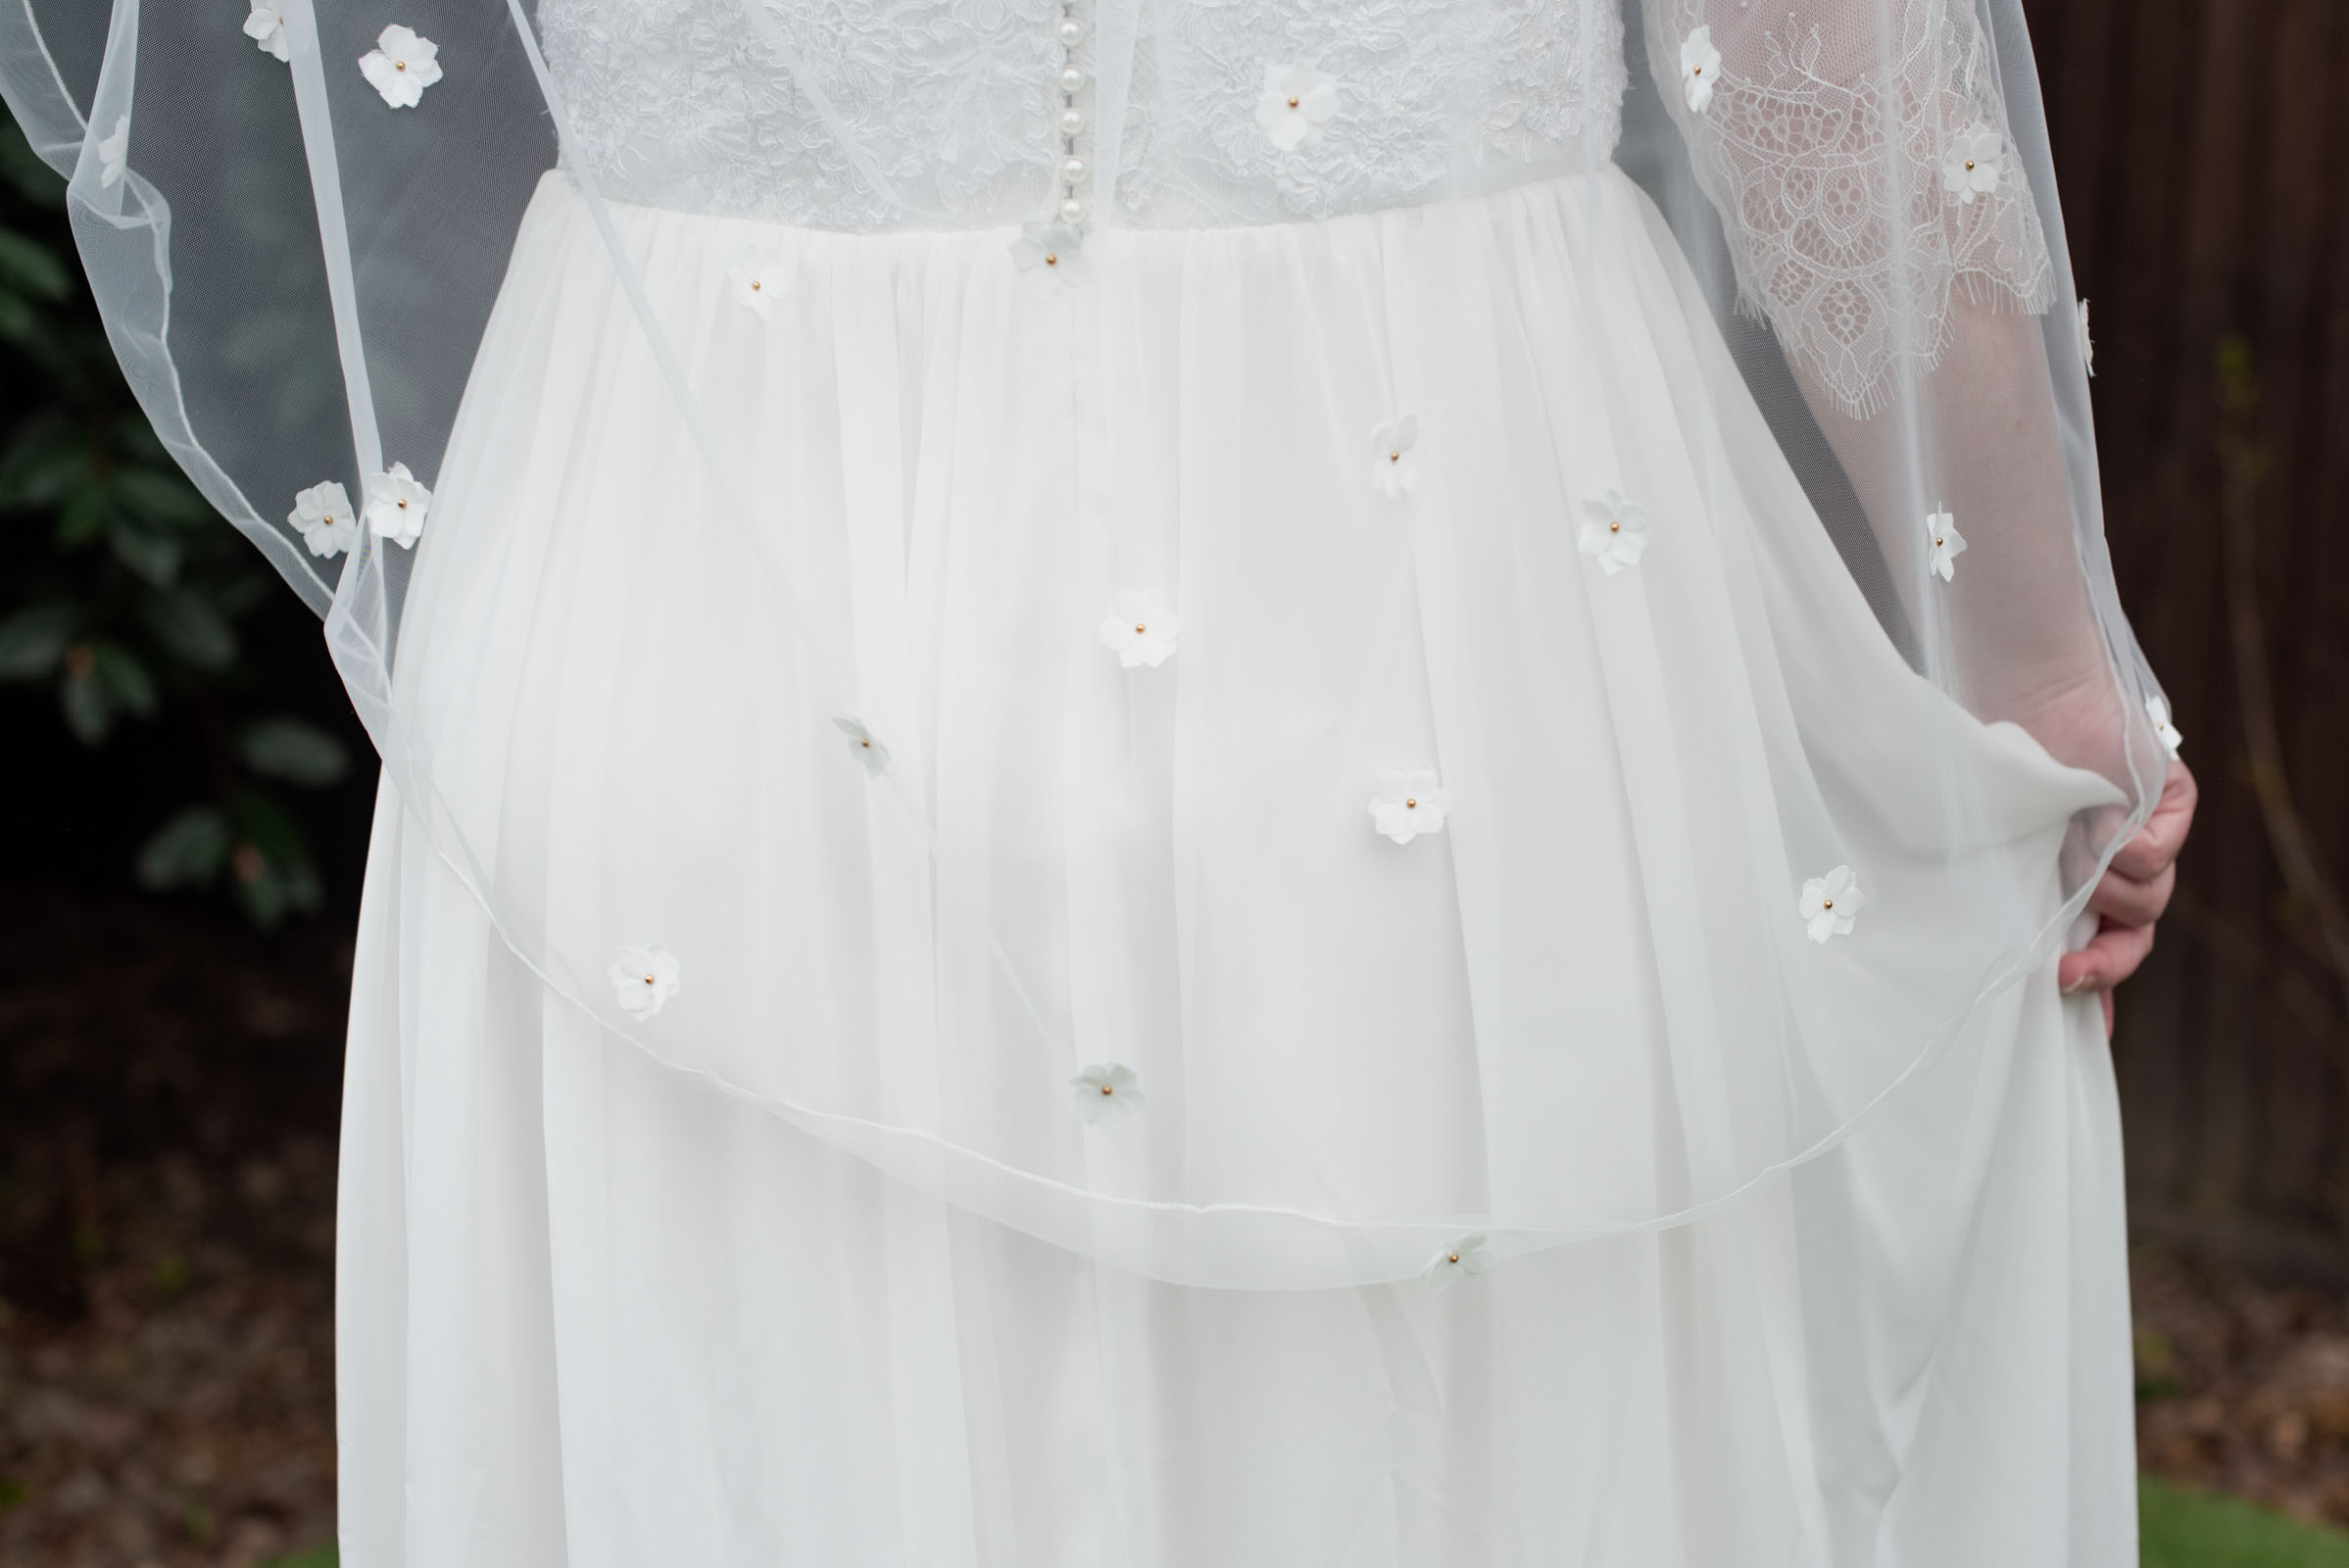
Step-by-Step Instructions
1. Source and prep your upcycled fabric. Look for a secondhand blouse with high-quality chiffon or your chosen heirloom fabric from your loved ones. Next, deconstruct the blouse by carefully removing seams. If needed, wash the fabric gently and iron it flat (using a low heat setting) to ensure your Cricut can cut accurately. This is also the time to steam your veil as you will want no creases when you get to the final steps!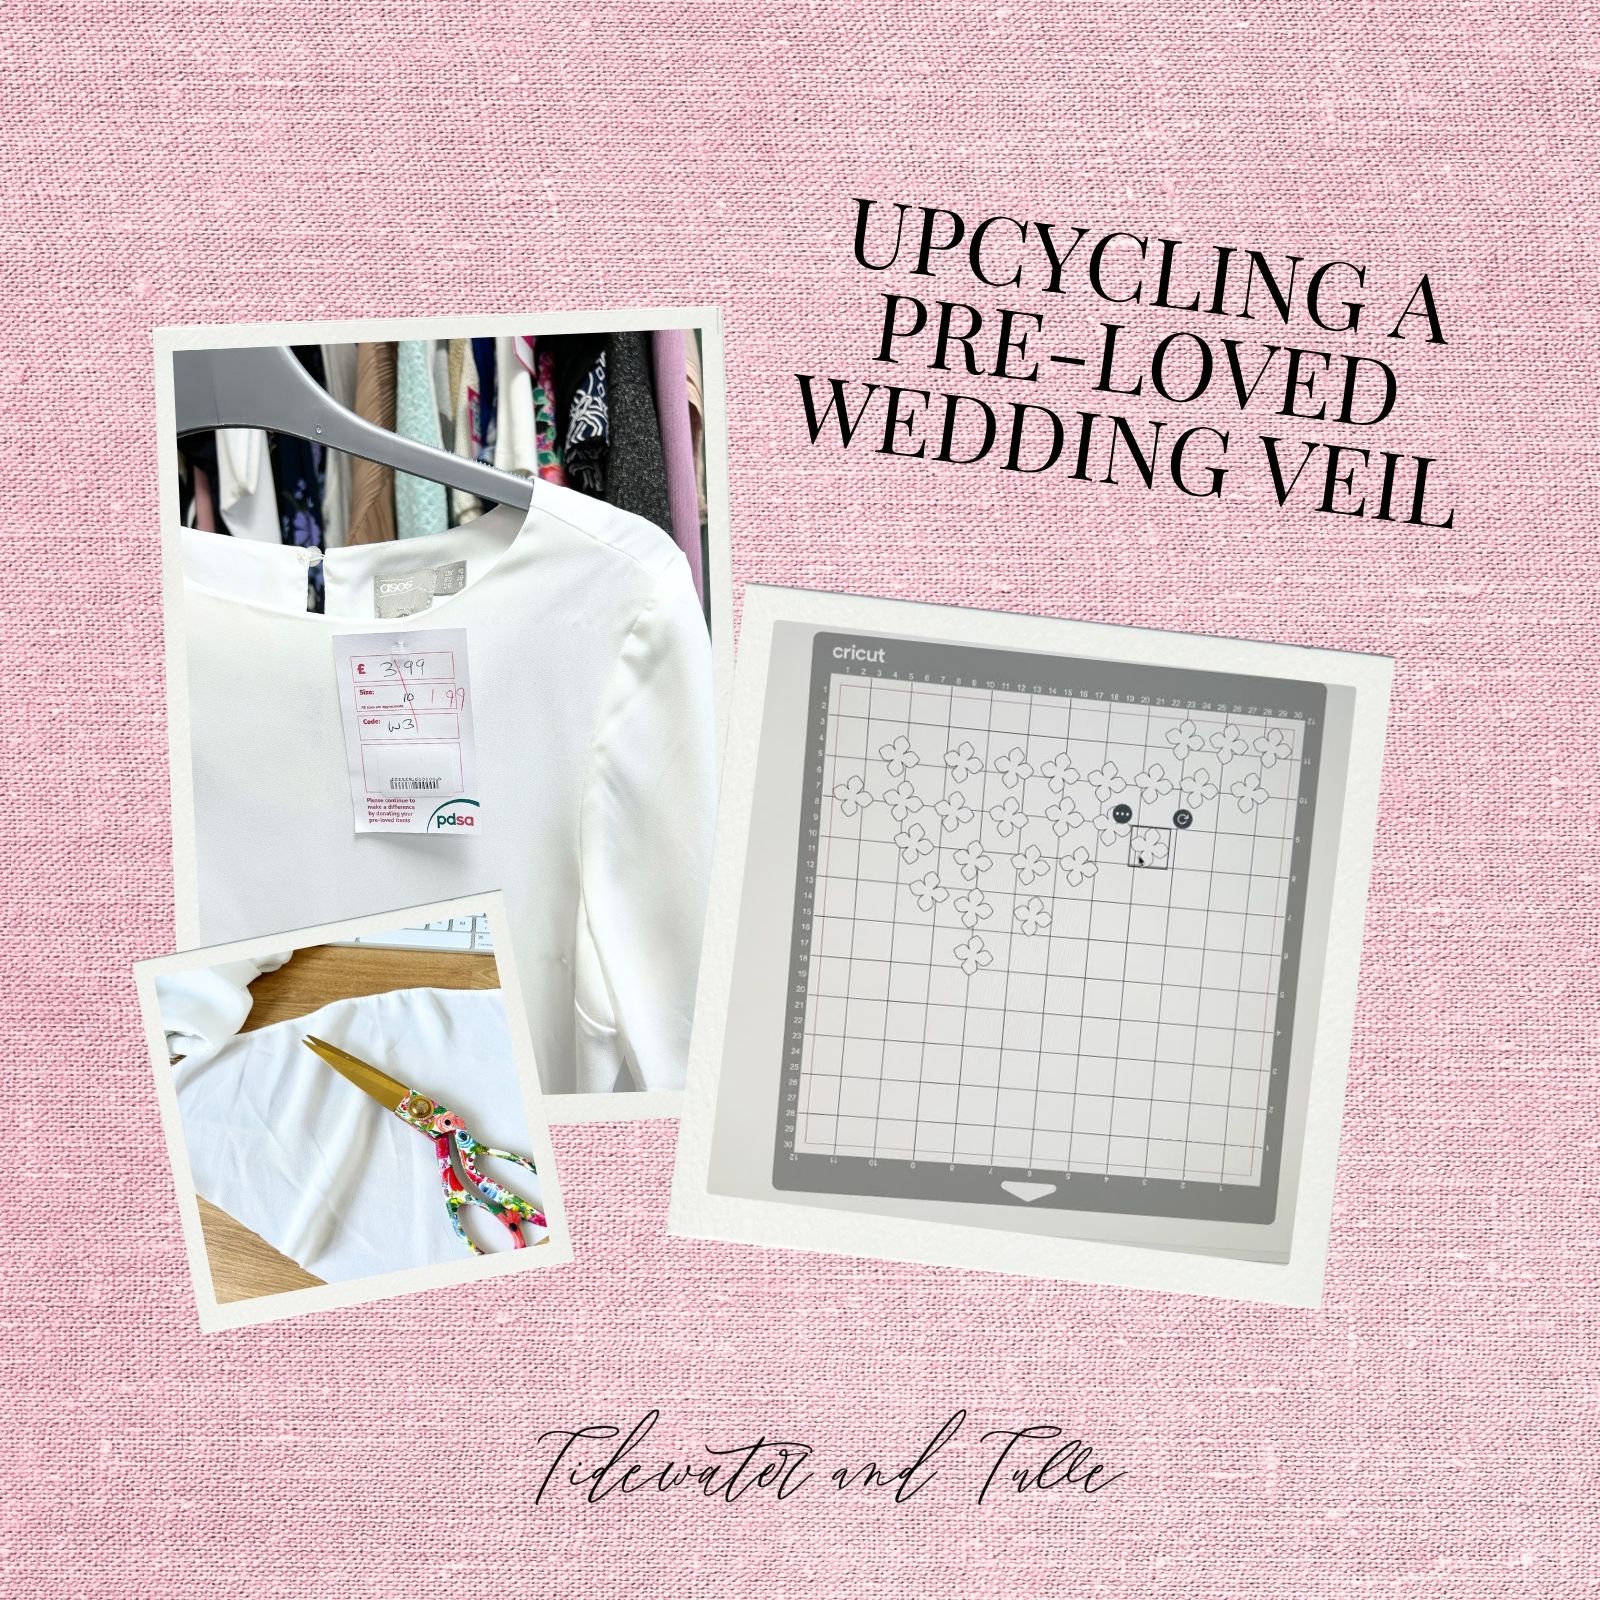
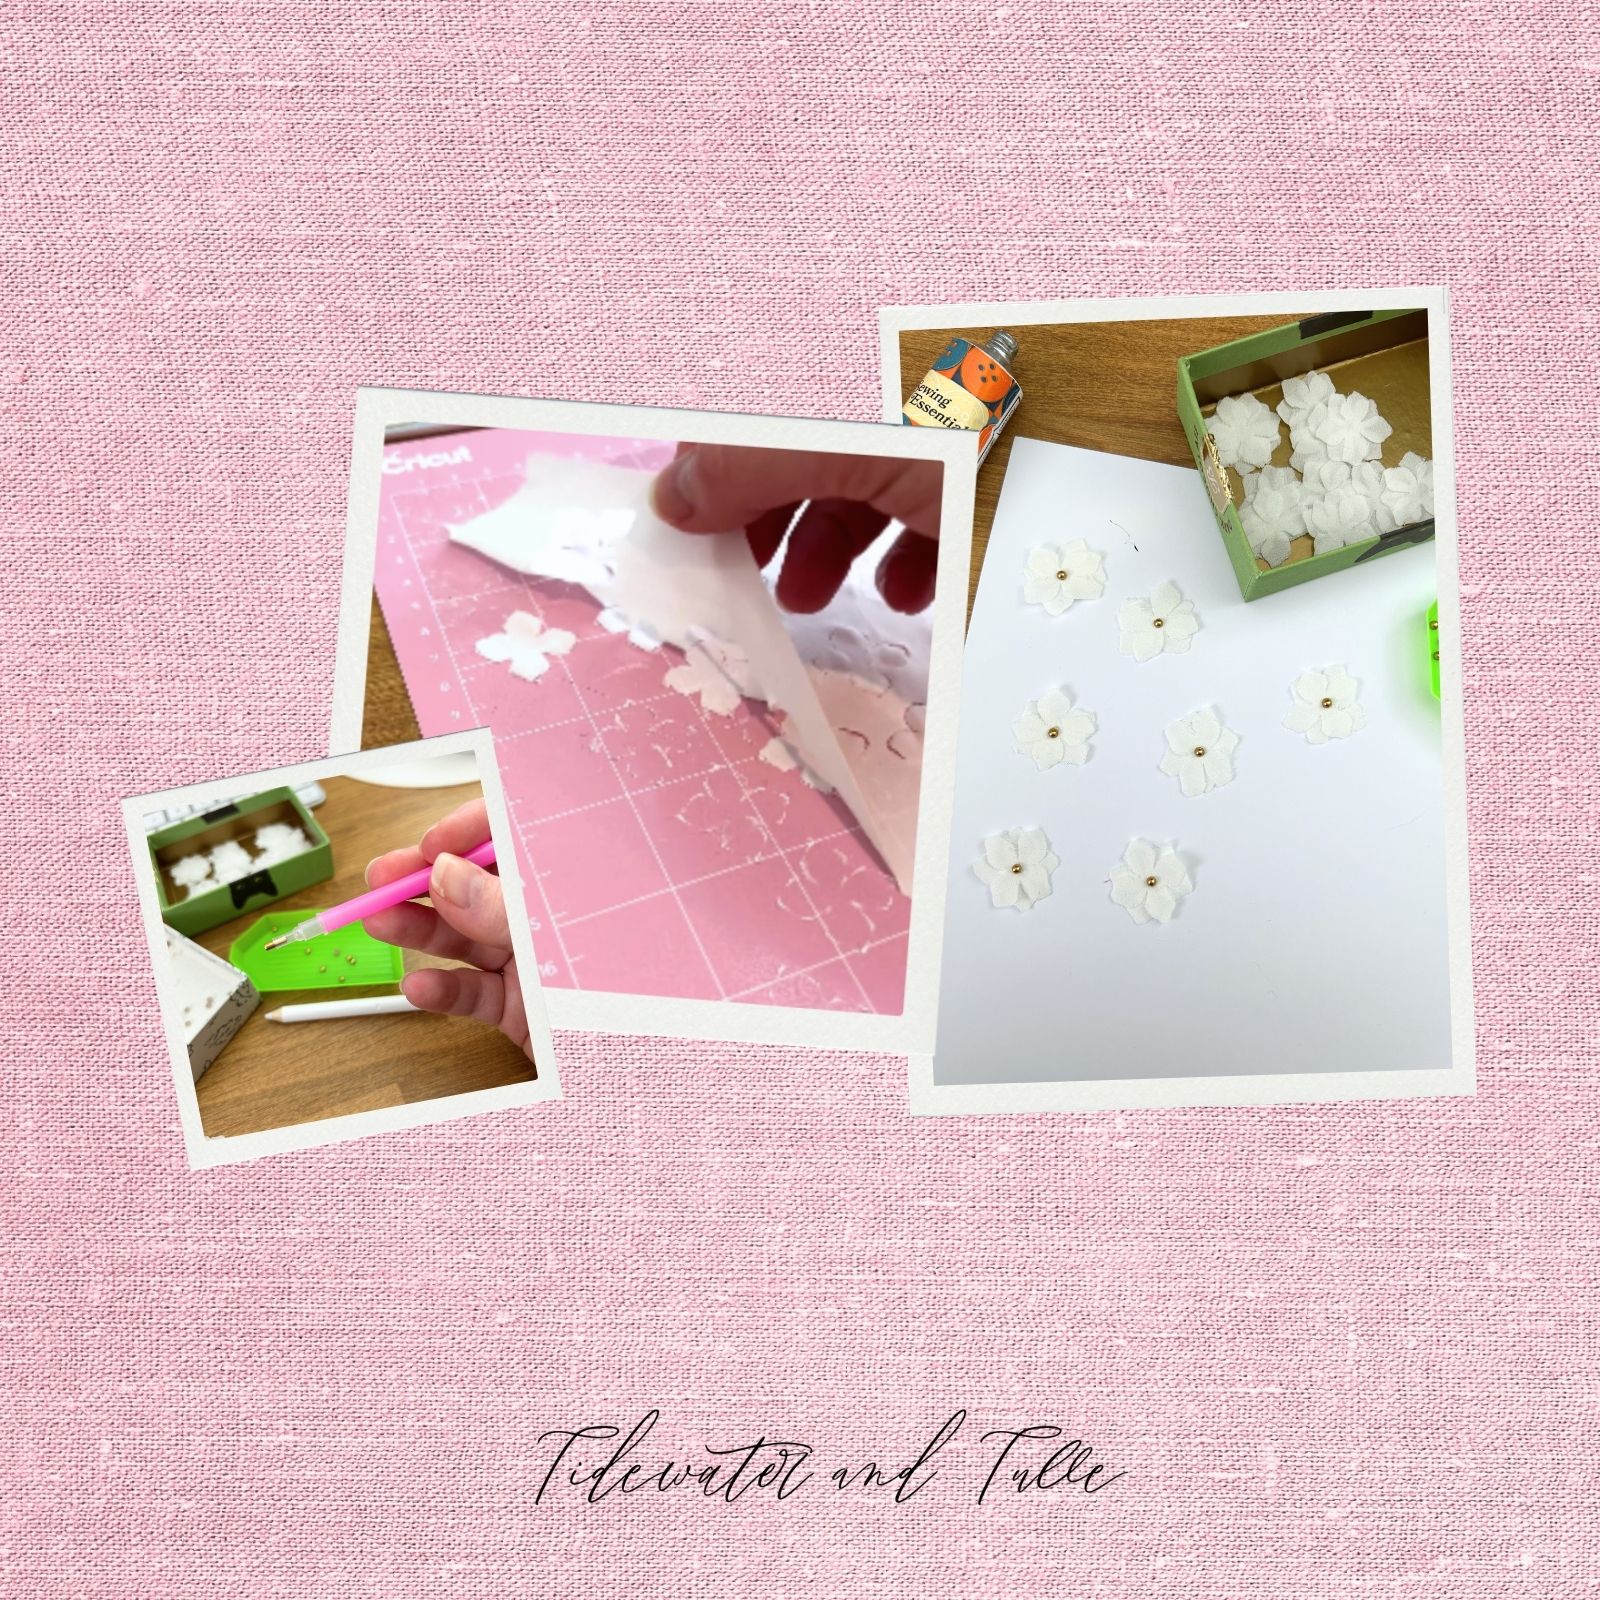
2. Design your 3D appliqués. In Cricut Design Space, use our pre-made Design Space project or search for "flower petals" for a different look. Size your blooms and duplicate on your Canvas screen as needed. We cut over 76 petals (to make about 36 complete blossoms), but we did so in batches as our chiffon was in awkward asymmetrical shapes.
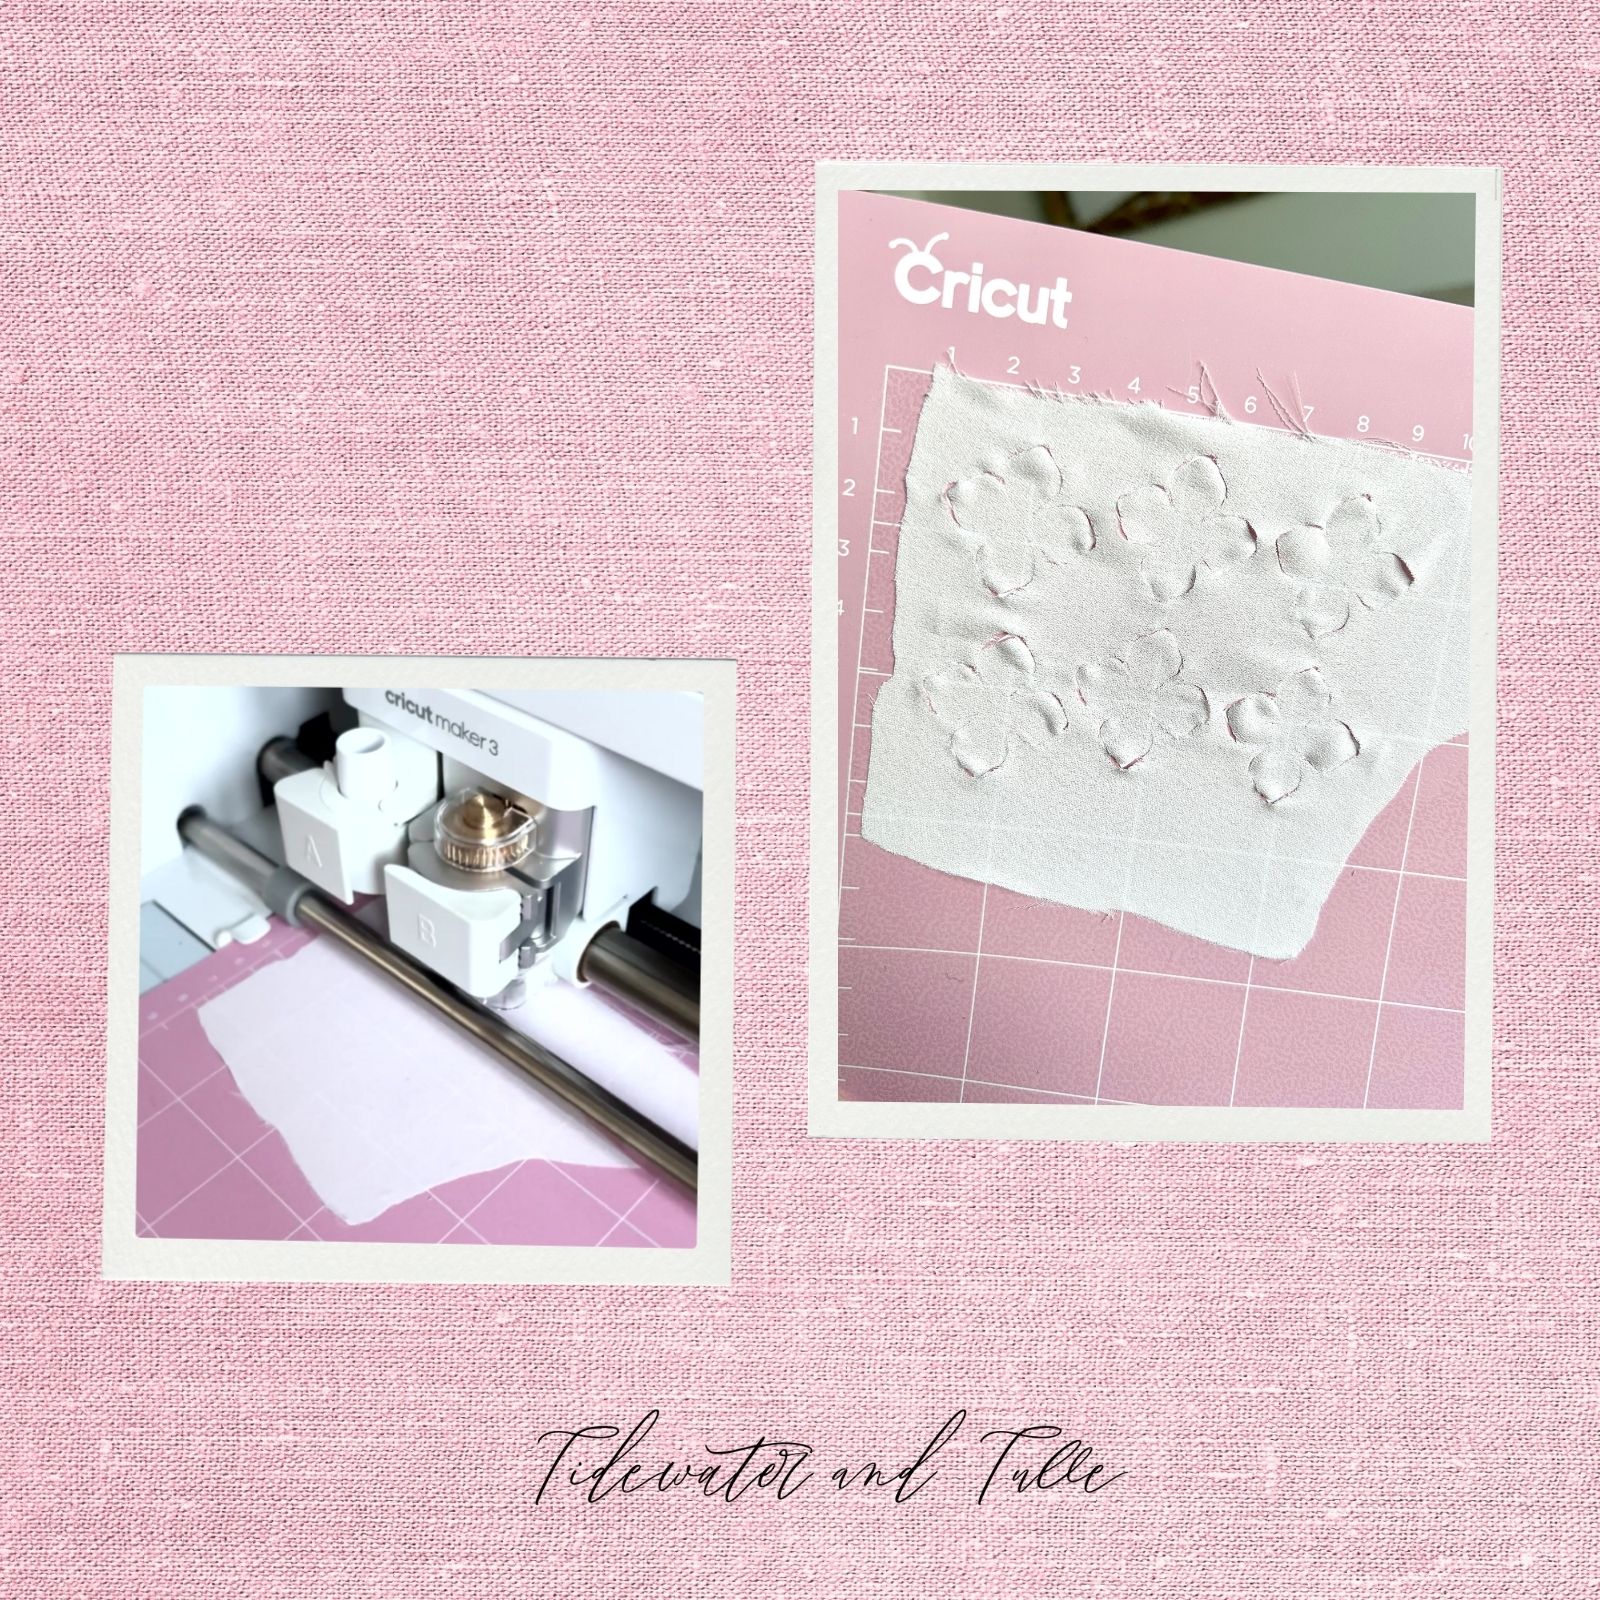
3. Cut with the rotary blade. Place your upcycled fabric onto the pink FabricGrip mat. Use a brayer to ensure there are no bubbles or wrinkles. Load your rotary blade into your Maker if not done already. Depending on the fabric you're using, you may need to do test cuts to ensure you have the proper base material setting.
SETTINGS NOTE: For our type of chiffon fabric, we found the "Chiffon" Design Space setting didn't cut through our fabric well enough and got most success with the "Light Fabrics (like Silk)" setting.
4. Assemble petals. Using a toothpick, apply a tiny dab of fabric glue to the center of one petal. Place a second petal on top, slightly offset so the petals don't align perfectly. This allows both layers to remain visible and creates a more natural, dimensional effect! Repeat until all petals are paired, then set aside to dry completely.
PRO TIP: Use scrap paper to protect your work surface as chiffon is quite delicate and fabric glue will seep through.
5. Decorate assembled petals. Using a toothpick again and a tiny dab of fabric glue, adhere a bead in the center of your petals. We highly recommend using a wax pen to help you pick up these small beads.
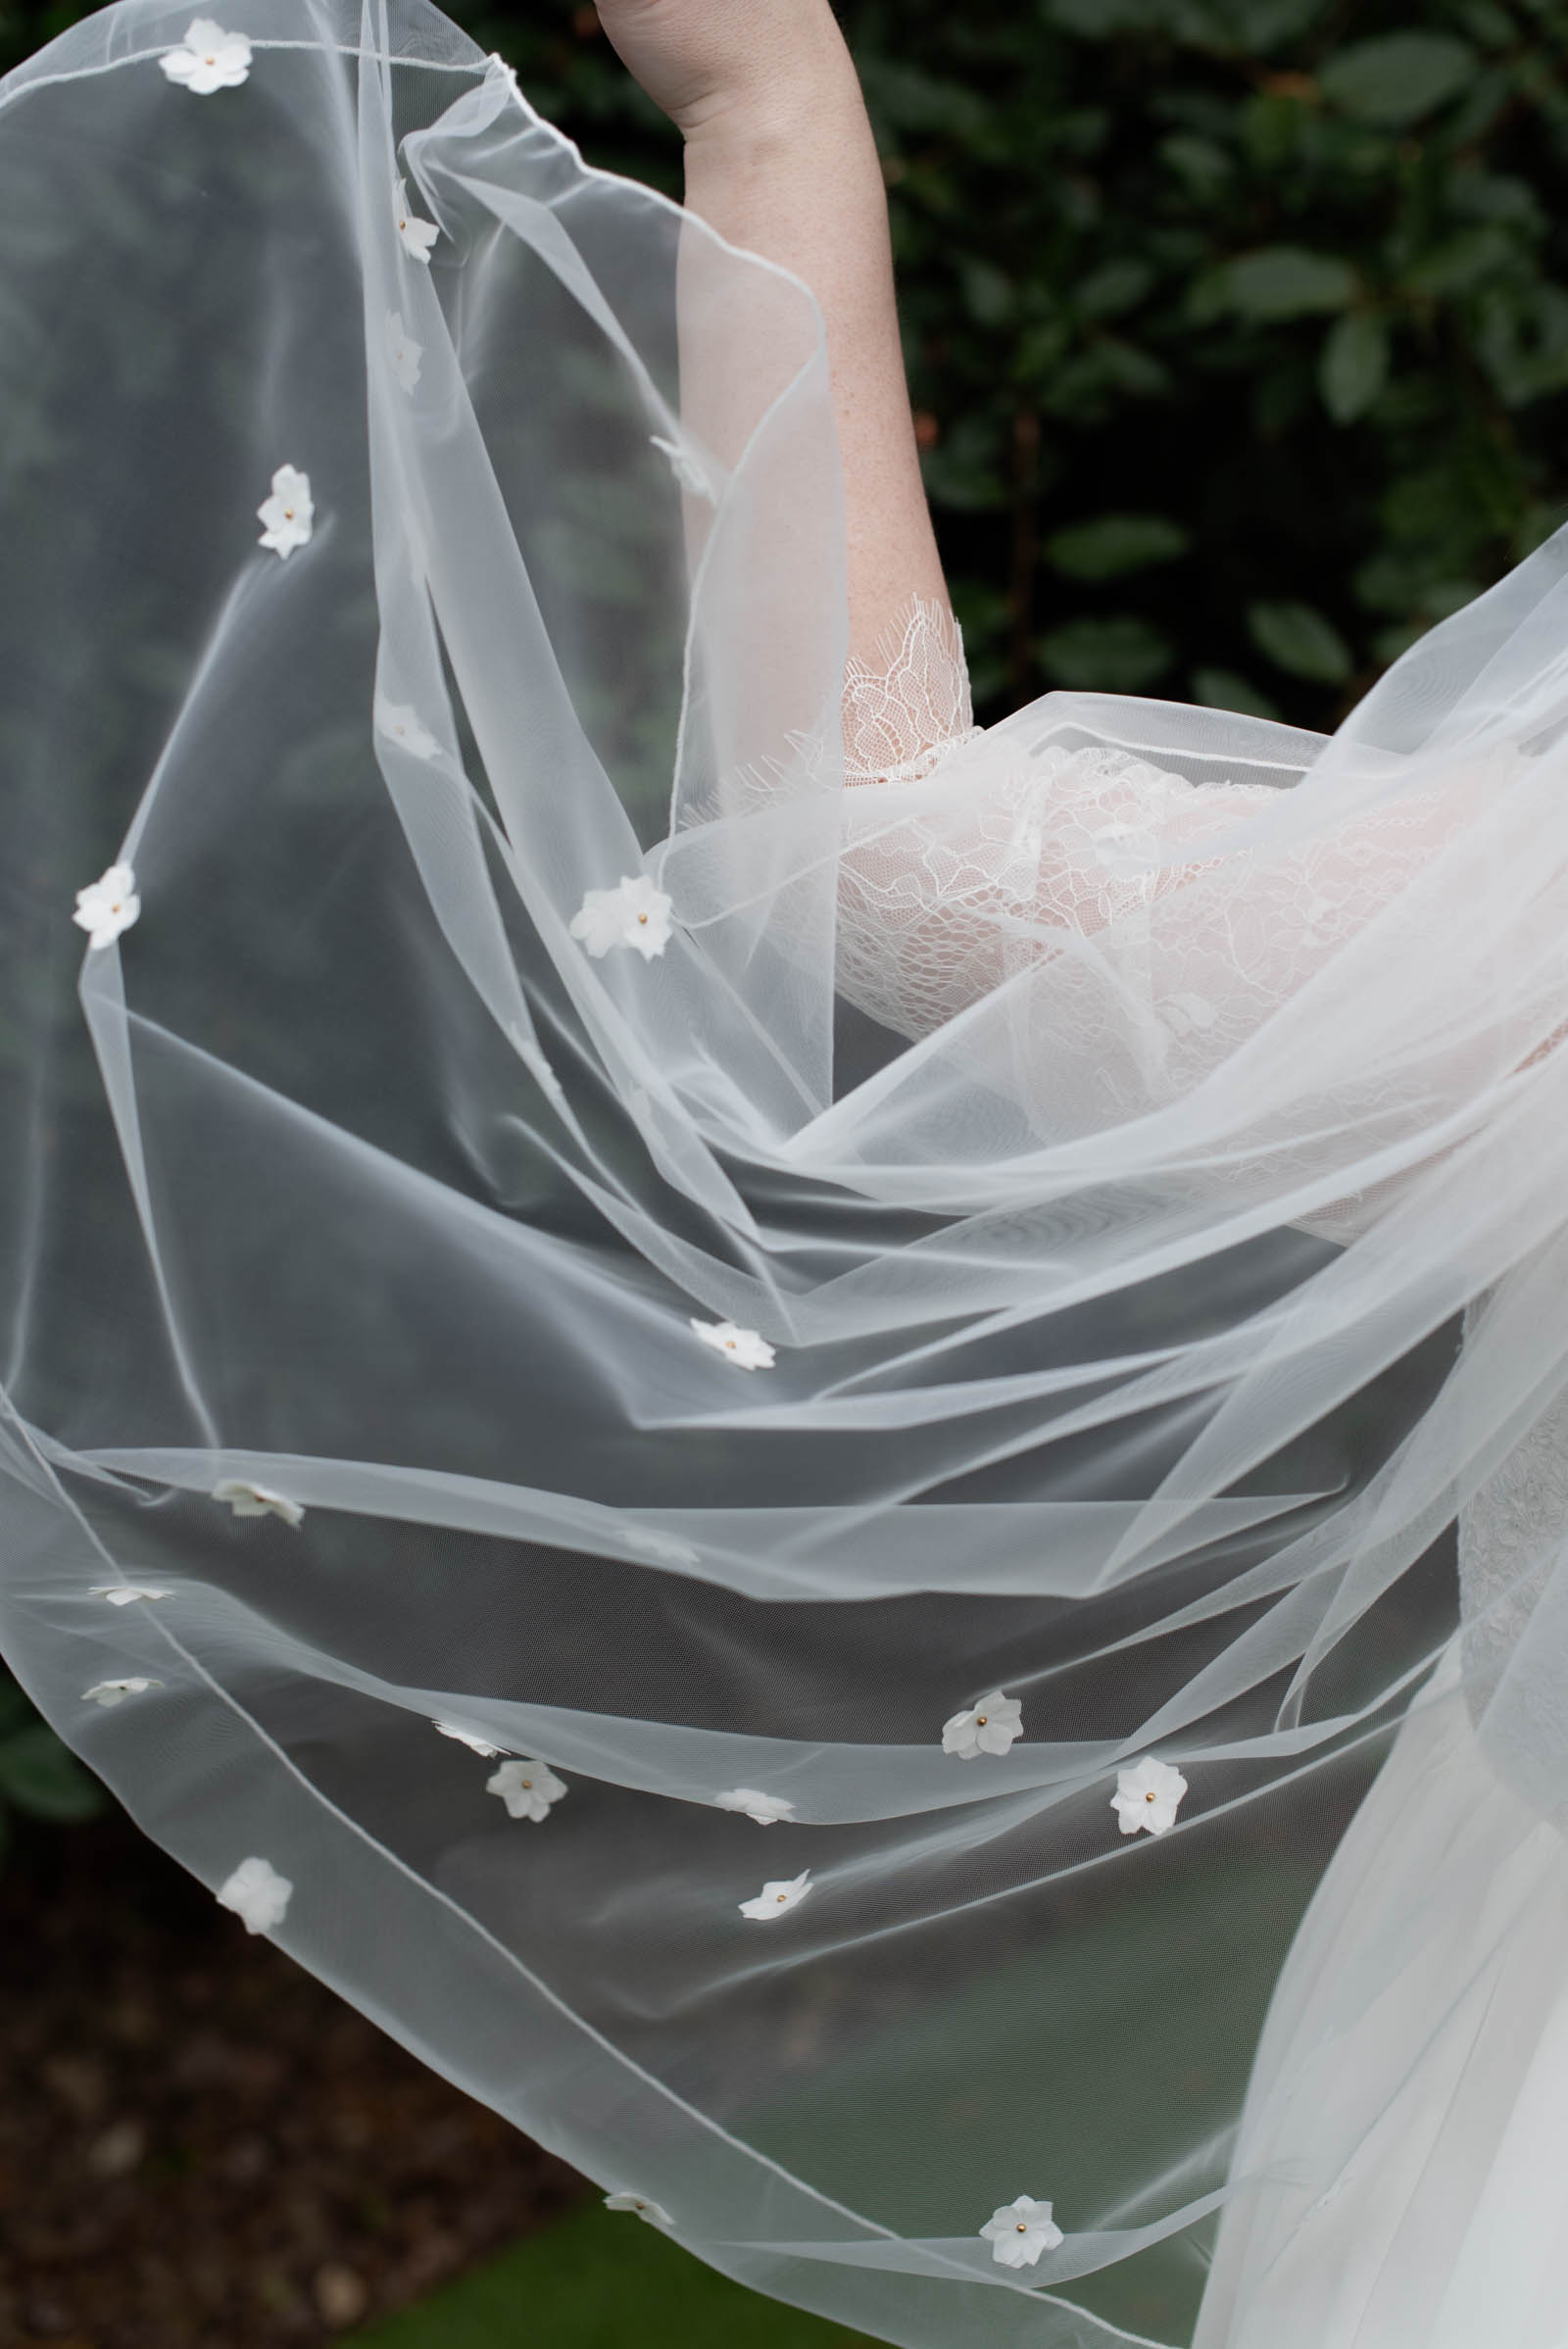
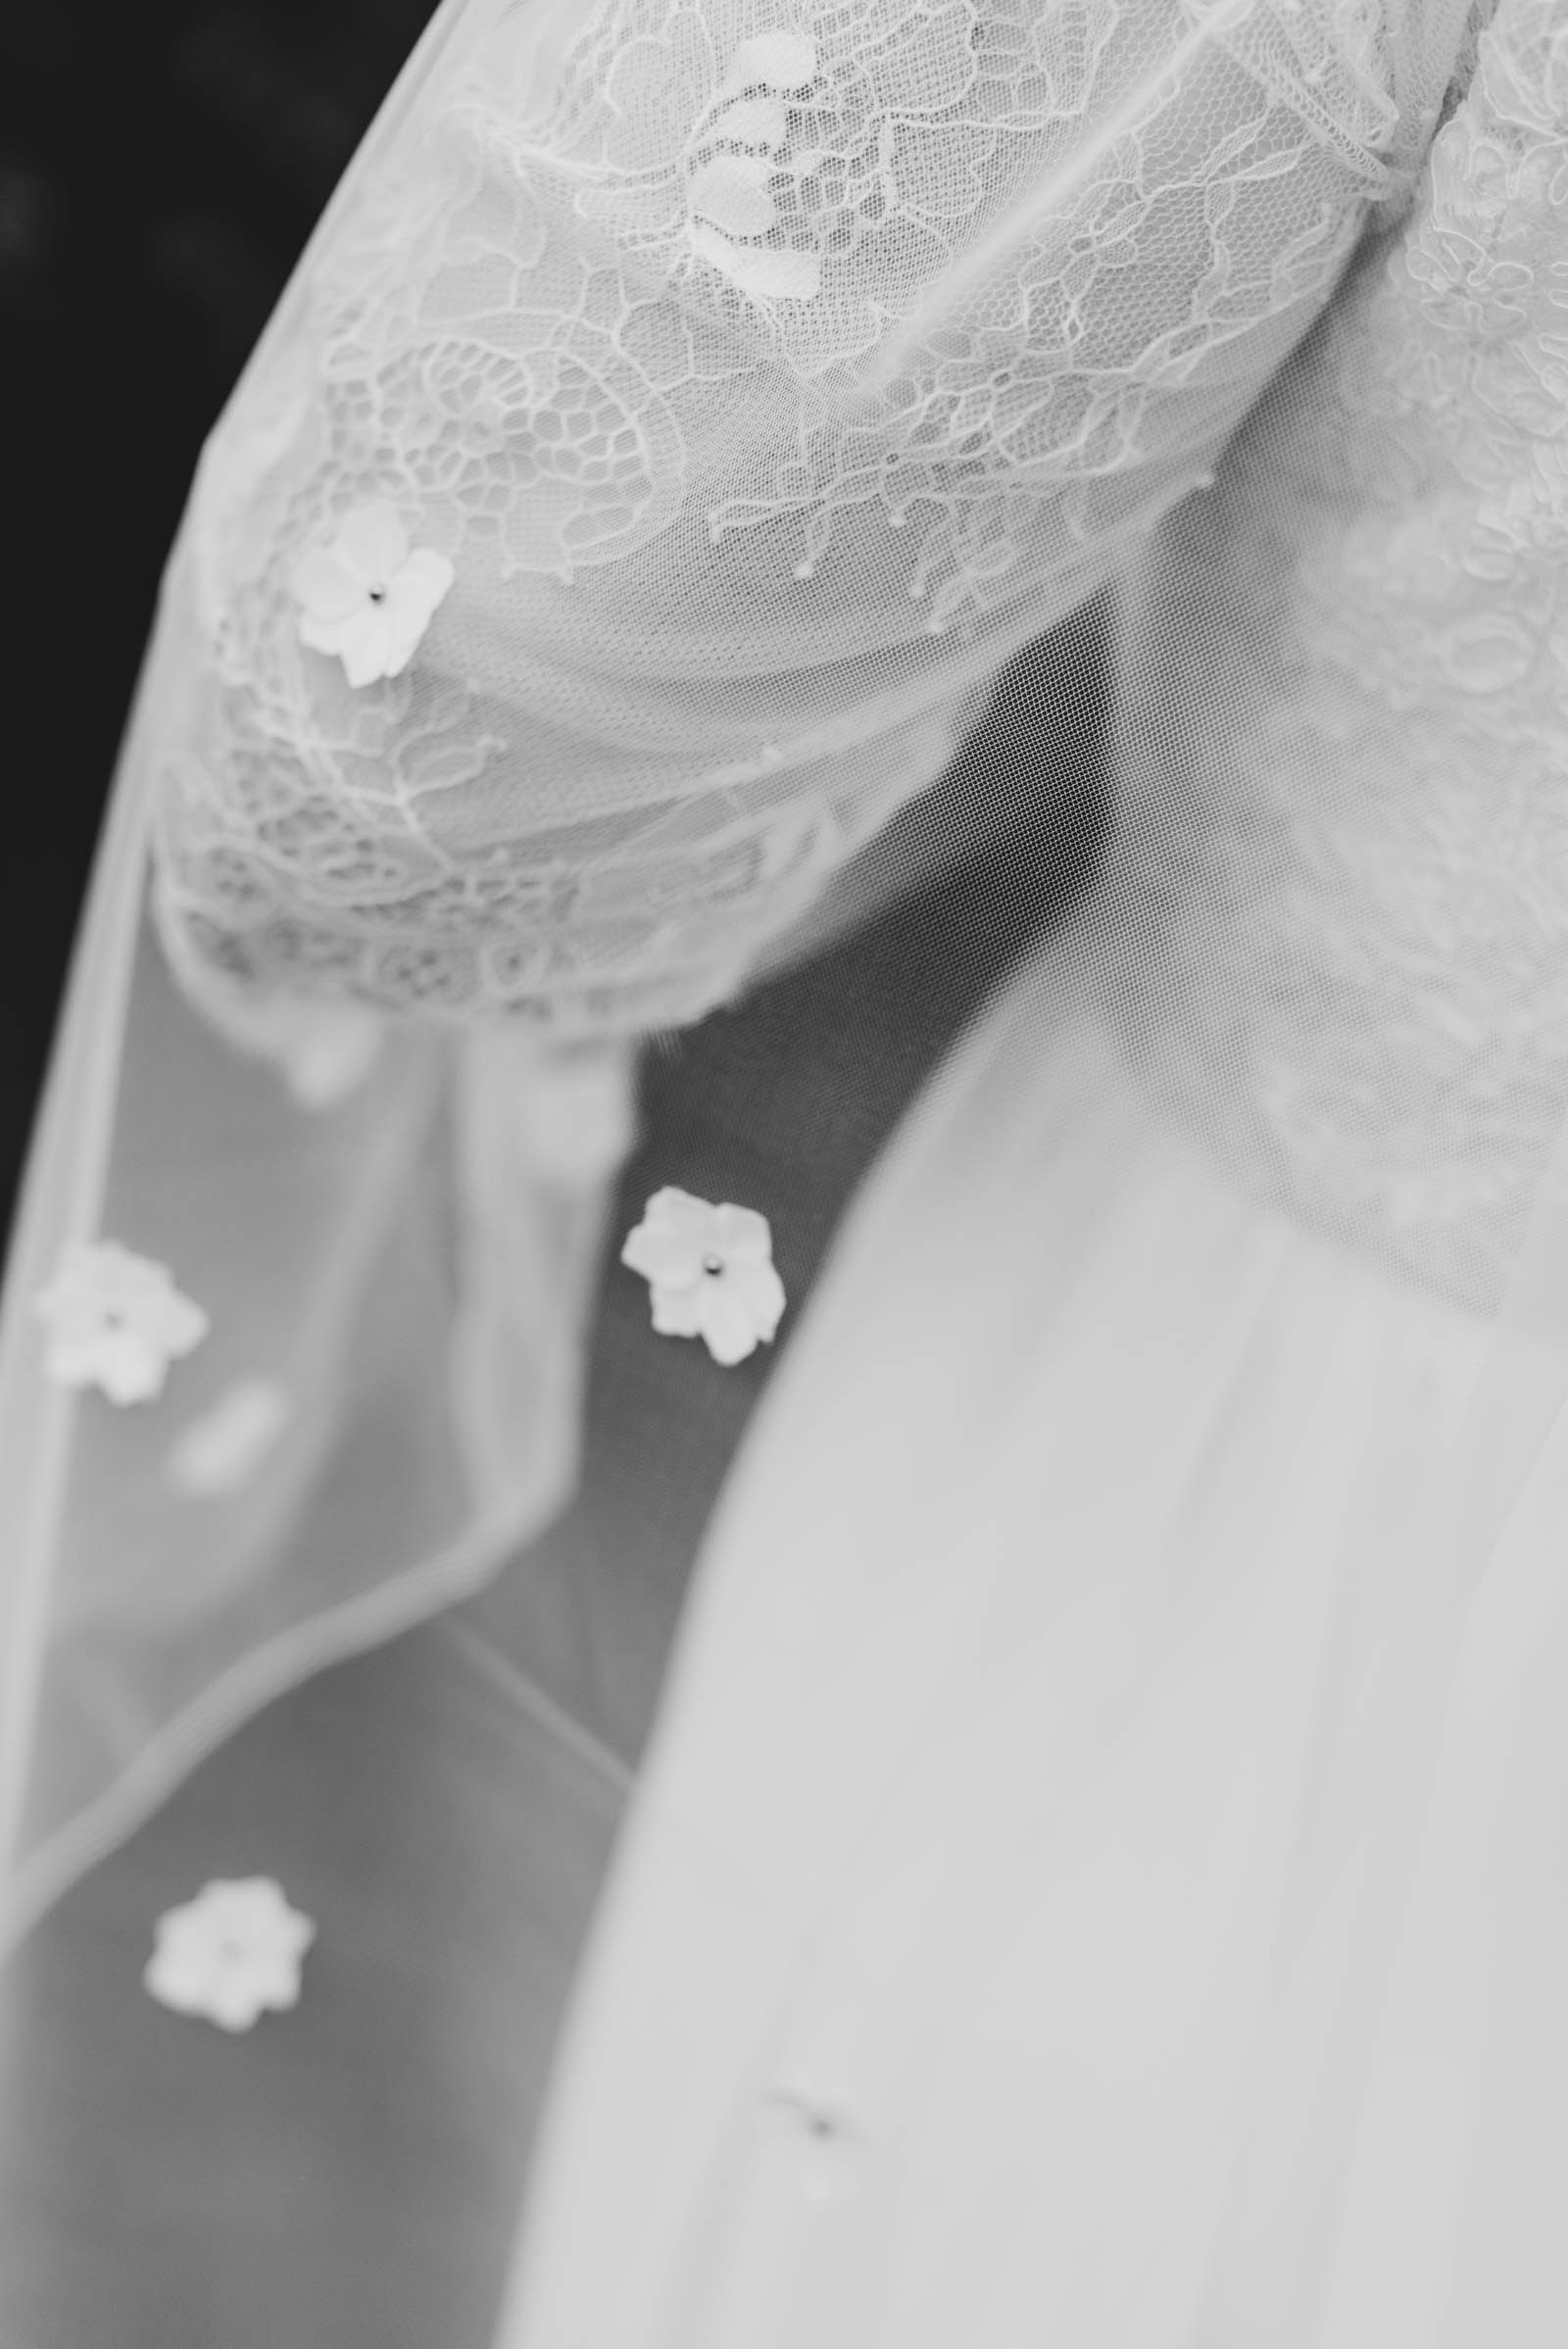
6. Layout and arrange. Begin positioning your 3D flowers from one side to the other, working in sections. By scattering them across the veil rather than placing them in straight lines or tight clusters, you'll get a more organic, uneven spacing so the design feels light, airy, and naturally placed. Step back occasionally to check visual balance as you go.
7. Secure the 3D flowers. Once happy with your placements, apply a very small dab of fabric glue (with a toothpick) directly to the veil and adhere each flower. Allow to dry completely before moving so the glue finds its bond with the veil netting. You may need to gently lift your veil after each placement so the veil doesn't get stuck to your work surface. Hang to prevent creases and enjoy your latest beautiful DIY creation!

Frequently Asked Questions
Can I use a Cricut Explore instead of a Maker?
You can use a Cricut Explore, but you'll need to take extra care when working with fabric. This typically means stabilizing the material and using a bonded fabric blade.The Cricut Maker, however, is designed for fabric cutting and uses a rotary blade that glides through unbonded materials like chiffon with far more ease. Think of it as a tiny rolling cutter rather than a dragging blade. This helps create cleaner edges and reduces the risk of fraying or fabric bunching during cutting.
What is the best tulle for a DIY veil?
"Illusion bridal" tulle is the standard. It is soft, sheer, and drapes beautifully. If you want a more vintage look to match your upcycled blouse, look for "English silk tulle," which has a heavier, more luxurious drape. We found our pre-made veil secondhand, so sometimes feeling the fabric is all you need to know. If you like it, get it!How do I stop the 3D flowers from fraying?
Since we are using upcycled chiffon, fraying will happen. As you can see from our photos, you can't even tell! Using a sharp, fresh rotary blade helps significantly though. If you'd like a more tidy edge, consider choosing fabrics like organza that can be lightly heat-sealed.
TUTORIAL CREDITS
Photography and DIY Tutorial: Chelsea Barton
Editor's Note: Specially curated by us, the above product links may be partner-connected and purchasing through these links means we get a small commission from those brands that helps support this website. You can find our full affiliate disclosure policy here on Tidewater and Tulle.

