
Oh, hello, this weekend's crafty project! These chic and easy napkin rings made out of FIMO polymer clay are just the gift or hosting idea you need, and they're so mindful and fun to make! With your choice of clay color and some gold leaf metal, you can make some fabulous details for your table settings. So preheat that oven, and let's find out how to create these stylish napkin rings for your festive gathering!
And because we're all about upcycling and designing multi-purpose crafts, having a ribboned napkin ring means you can swap out the ribbon according to the occasion! You won’t have to tuck away these rings in that wedding or Christmas box! They're even great for everyday use should you like a styled meal. Embrace that little bit of extra!

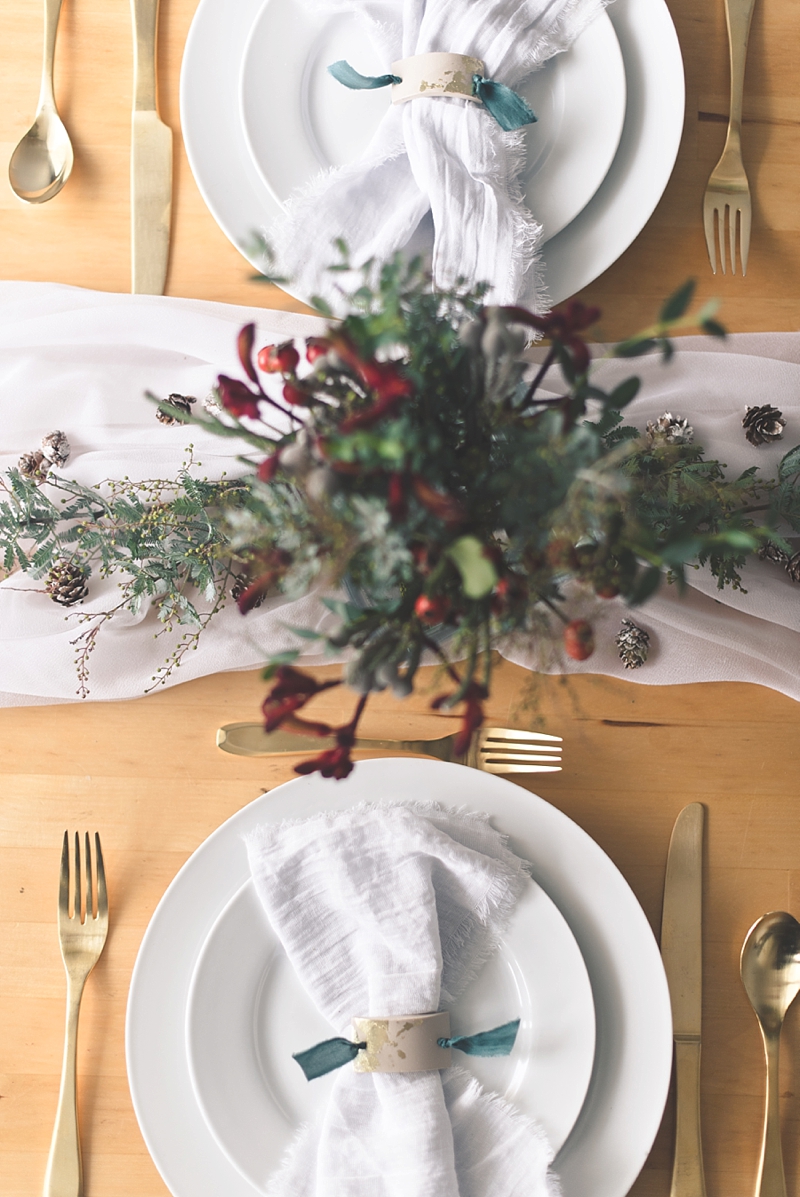
How to Make DIY Napkin Rings Made of FIMO Polymer Clay
Difficulty Level: Easy
PROJECT MATERIALS
• Polymer clay (e.g., FIMO Soft in Sahara)
• Acrylic roller
• Clay tools
• FIMO cutter blade
• Baking/parchment paper
• Oven
• Small paintbrushes
• Metal baking/pastry rings or foil-covered cardboard tube
• Metal baking/cookie sheet
• Gold leaf metal
• Adhesive for gold leaf (aka size — we personally use FIMO's brand, but know it’s not widely available in certain countries!)
• Thin silk ribbon (we used 1/2" width)

PROJECT NOTE: There are so many ways you can make polymer clay napkin rings, so have fun and explore your favorite options! We love the versatility and color variety of FIMO, and while FIMO Soft is what we used for this project, these would be equally beautiful and chic when made with FIMO leather-effect. You can get about 6 clay napkin ring tags per FIMO block, so consider mixing and matching depending on your theme and quantity needed.

1. Preheat your oven to 230°F / 110°C and prep a metal baking sheet with aluminum foil. Clean your surfaces so they are ready for clay handling and lay down baking paper for your clay making. Be mindful of fuzzy sweaters or furry friends because this easily can get onto your clay!

2. To make rolling out your clay easier, break up and divide your block into chunks. Using your acrylic roller, roll out your FIMO clay until it's about 1/8" thick. Once you have the proper thickness, use a clay cutting blade to shape out rectangles of about 1.5" long. Choose the size that's best for you, but avoid making your napkin rings too thick for baking or too wide as a standard dinner plate is only 10.5" to 12" wide.


3. After cutting to your desired size, use a pointed clay tool to pierce a hole on each end of your rectangles. You want each hole to big enough to push your ribbon through, so gently widen as needed.
4. Drape your pieces gently on a metal pastry ring (or foil-covered cardboard tube) to give your napkin rings a soft curve. Place your rings on your baking sheet and bake for 30 minutes as stated on FIMO's packaging. (Important: Always follow your polymer clay’s guidance on its wrapper when it comes to temperatures and baking times!) To prevent your pastry rings from rolling around while baking, use an ovenproof item like a metal fork to weigh them down.


BAKING CLAY TIP: If you have a fan-assisted oven, you will need to watch your clay as it bakes since your baking time may be shorter. You don't want your clay to burn or turn brown so keep a close eye while it's in the oven! Our napkin rings were baked in a fan oven for about 25 minutes. If you have never worked with polymer clay before, your polymer clay will be done when it has some bendiness to it. It will harden more as it cools, but under-baked polymer clay is brittle and apt to crumble. Give your napkin rings a gentle tug after the 20 minutes' mark to determine if further baking time is needed.


5. Once your napkin rings have fully cooled, it's time for the details like the shimmery gold leaf! “Size” is an adhesive for delicate leaf metals and will be how you get your gold leaf to stick onto your napkin rings. So to achieve a metallic detail on your napkin rings, apply a thin layer of size with a small paint brush to where you would like to have some shimmery gold spots. Leave to dry for about 10-15 minutes.

6. Tear off small pieces of your gold leaf metal and press on carefully using a soft, dry paint brush (a different one from your adhesive brush!). Use circular motions, and don't worry about perfection with gold leaf! The organic look is gorgeous, so apply to what you like best. If your napkin rings are being handled often, you may also want to apply a varnish on top.

7. Cut 1 ribbon piece for every napkin ring you have. My ribbons were about 7.5" long each. Use your pointy clay tool to help push your ribbon through each hole and make a simple knot to create a completed napkin ring. Adjust tightness to however thick your typical linen napkin is. And happy hosting!


Want some DIY napkin inspiration to put into your new napkin rings? Check out our DIY modern tie dye napkins and our DIY hand-stamped napkins tutorials!
TUTORIAL CREDITS
Photography and DIY Tutorial: Chelsea Barton | Polymer Clay and Supplies: FIMO courtesy of Staedtler UK
Looking for Wedding Style Ideas? Shop These Inspiring Looks!
Editor's Note: Specially curated by us, the above product links are partner-connected and purchasing through these links means we get a small commission from those brands that helps support this website. You can find our full affiliate disclosure policy here on Tidewater and Tulle.

