


How to Upgrade an IKEA Bekvam Stool
Difficulty Level: Easy-Medium
Color Inspiration: Espresso and natural
PROJECT MATERIALS
• IKEA Bekvam step stool and its included hardware
• 1 yard of vegan upholstery leather (or your choice of leather)
• Staple gun
• 1/4" 6mm hardware staples
• Fabric scissors
• Rotary cutter
• Metal T-square ruler
• Scrap of cardstock (at least 3"x3")
• Paper clips
• Self-healing cutting mat
• Long hardware nail
• Hammer

INSTRUCTIONS
1. Unpack your Bekvam stool and get familiar with IKEA's assembly instructions and included parts. Be sure to know which pieces are which and how they will be installed after you finish transforming your stool.
2. Using your T-square, measure all of the edges of both stool boards (which we will call "Top" and "Bottom" in this tutorial). To determine the length of your leather strips, you will add 3 1/2" to each of your Top measurements and 4" to your long Bottom measurement and 6" to your short Bottom measurement.
NUMBERS CHEAT SHEET: Though we recommend measuring yourself especially if you've never done any upholstery before, we love shortcuts, too! For the Top, the long side is 14 1/2" and the short side is 9 1/2". For the Bottom, the longest side is 16" and the short side is 5". (The second longest side's measurement is not needed as you can trim down once you start stapling.)

3. Now that you have your board measurements, prepare to cut your leather. Your leather strips will all be 1" wide regardless of length. To help you cut straight lines, using a cutting mat with a ruler on it and a T-square are vital!
EDITOR'S PEP TALK: I can't hang, cut, arrange, anything straight. It's my Achilles' heel. And somehow even I managed to cut all of these strips perfectly and successfully! Use all of your tools meticulously and reset as needed. As long as you take your time and figure out your personal workflow, you can totally do this! Make sure your rotary cutter is sharp and new-ish, so there is no need to back track your cut. That leaves room for wonky leather bits.
4. For the Top, you will need to cut 7 long strips measured at 20" each in length and 13 short strips measured at 14" each in length. Cut and set aside. It's helpful to label each pile for reference.
5. For the Bottom, you will need to cut 4 long strips measured at 20" each in length and 15 short strips measured at 12" each in length.

6. To properly cover your stool's corners, you will also need to cut out "butterfly patches." Cut 10 patches sized 3"x3" (4 for the Top and 6 for the Bottom). Take your scrap of cardstock paper to create a template to help you cut the triangle spaces out of your patch. Test out this template on your Top piece before cutting into your leather (especially if you have limited leather!).
HELPFUL TIP: The middle of your butterfly patch should cover the corner's edge. Once folded so the "wings" touch, there should be no gap, and the corner should be completely covered.


7. Fold and staple a butterfly patch on every corner of the Top. Pull the "wings" tightly together so there is no gap. Staple once on the front and once on the back of the Top.


8. To start the weaving process, always begin with the longest strips. We'll first work on the Top. For the Top, lay out all of your long strips along the board to ensure you have enough strips. Each strip should be right next to each other with no space in between. As pictured, leave some empty space on each long side as these will be covered up by short strips afterwards.

9. The first long strip should cover the staple on the front. Once in position, staple the first long strip on the back of the Top board and wrap the strip towards the front. Begin weaving and stick with the weaving pattern of "over, under, over, under" and so forth.
10. Once your first strip is woven, wrap the rest of the strip to the back of the board and staple tightly. With your second strip, do the opposite pattern of the first with "under, over, under, over" and so forth. Repeat steps #9 and #10 until the entire Top is woven.


11. For the Bottom, you have two additional corners to work with before you can start weaving! Follow step #7, but when you get to the tiny corners, you will need to trim down your butterfly patch to adjust for the smaller space. Don't alter the butterfly's middle! Only the edges of your butterfly's "wings" will be cut.


12. Just like the Top, follow steps #8-#10 for the Bottom.
HELPFUL TIP: Be sure to be careful to not staple over the IKEA-installed assembly holes on the back of the boards. Trim your leather strips as needed since this will be important when you're ready to put the stool together! If you have stapled over it, good news! Just take out the staple, trim the strip, and re-staple. Vegan leather and wood are forgiving for this project.

13. Now that all of your boards are woven prettiness, it's time to assemble the stool! Before you can follow IKEA's Bekvam instruction booklet, you will need to open two holes on your Bottom board since your leather strips covered them. Feel where the holes are, use a thick nail to puncture through the strips, and then use your scissors to help widen the holes in your leather. Take the IKEA wooden dowels and hammer them into place.


14. Assemble the rest of the stool according to IKEA's instructions. And revel in your handmade masterpiece!
HELPFUL TIP: It will be a tight squeeze putting the Bottom onto the stool since you have added materials on a stool that wasn't accounted for in the original IKEA design. As long as your dowels are properly in place, once you screw all of the hardware on the stool and tighten, everything will fall into place perfectly.


Ideas for Using your Woven Stool
Think outside the box! A stool isn't just meant for standing on to reach something. Think of it as a versatile decor piece in your home. They're so easy to make that you can create a little collection of these for around your house. Change them up with paint, other materials, and accent details.
Some ways you can use a Bekvam stool:
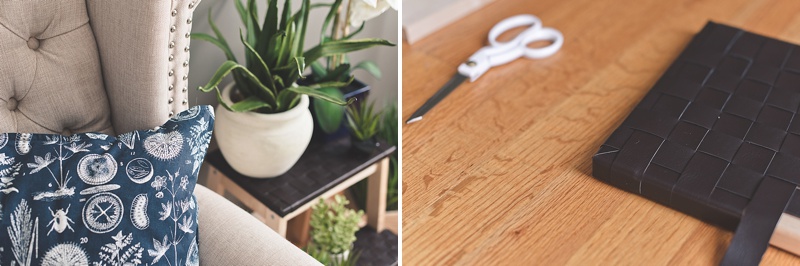
• A chic side table (like we have done!)
• A nightstand
• An unconventional dining room chair
• A plant stand (we did this, too!)
• A decor piece in your entryway
• A cat perch (for all you kitties out there)


Happily Ever Home is Tidewater and Tulle's DIY home series that is focused on modest & midsize home styling projects for newlyweds who are renters or first-time home owners. Neither of those? We love you, too, and hope you get inspired for your own "making a house a home" projects!
TUTORIAL CREDITS
Photography, Tutorial, and Styling: Chelsea LaVere | Vegan Leather: NAT Leathers via Etsy
Editor's Note: Specially curated by us, the above product links are partner-connected and purchasing through these links means we get a small commission from those brands that helps support this website. You can find our full affiliate disclosure policy here on Tidewater and Tulle.

