Words are everything, and we think those special collections of phrases and moments shared on a wedding day deserve its own keepsake! With the popularity of "His and Her" vow books out there, we wanted to give our own personal spin that is perfect for every kind of couple tying the knot, especially for those who are looking to make something handmade for their special day. Using a bit of metallic leather and a simple book binding stitch, your wedding vows are going to be quite gorgeous with our latest DIY. So grab your tools and let's get to making memories!


How to Make a Keepsake Wedding Vow Book
Difficulty Level: Easy
Color Inspiration: Rose gold and white
MATERIALS
• Rotary Cutter
• Rose Gold Leather
• White Cardstock or your choice of thick paper
• Embroidery Needle
• White Embroidery Floss
• 1 - roll of White Iron-On material
• Personal electronic cutting machine (e.g., Cricut)
• Weeding Tool
• Standard Grip Adhesive Cutting Mat
• Downloadable "Vows" Graphic
• X-acto Knife
• Iron or Cricut EasyPress
• Ironing Board
• Ribbon of your choice

INSTRUCTIONS
1. Using your rotary cutter on a cutting mat, cut down your leather to 12"x6" to create a 6"x6" book. (That's why we recommended the rose gold leather above since it's already pre-sized at 12"x12" so you can get two books in one sheet!)
2. Set leather pieces aside, download "Vows" graphic, upload into your Cricut Design Space or other program, and cut out your iron-on graphic using your preferred electronic cutting machine. We recommend sizing this graphic two inches smaller than your folded vow book size, so in this case, we sized our graphic to 4" so it would fit nicely in the center on the book cover.
IMPORTANT NOTE: For iron-ons, you will cut with the shiny side down, and you must make sure it is a mirror image before you cut. Or it will iron-on backwards on your book! Your software should have the option clearly marked before cutting.
3. Heat up your iron on the highest temperature. While you wait, prepare your iron-on by weeding out the bits that will not be on your final cover. The only white iron-on material that should be left is your actual design.

4. Iron on your graphic in quick motions. In about a minute, check the corner of your iron-on to make sure it is adhered onto your leather. Once ready, peel off. This will be a "warm peel" meaning you want to take off the shiny backing when it is still hot/warm to the touch.
QUICK TIP: To get your leather to fold well, use the iron to also help you create a crease and then set it underneath something super heavy overnight.

5. Now the book binding begins! If you're already familiar with book binding and stitches, this might be familiar to you, but if not, here's a very easy entrance into your first book binding experience.
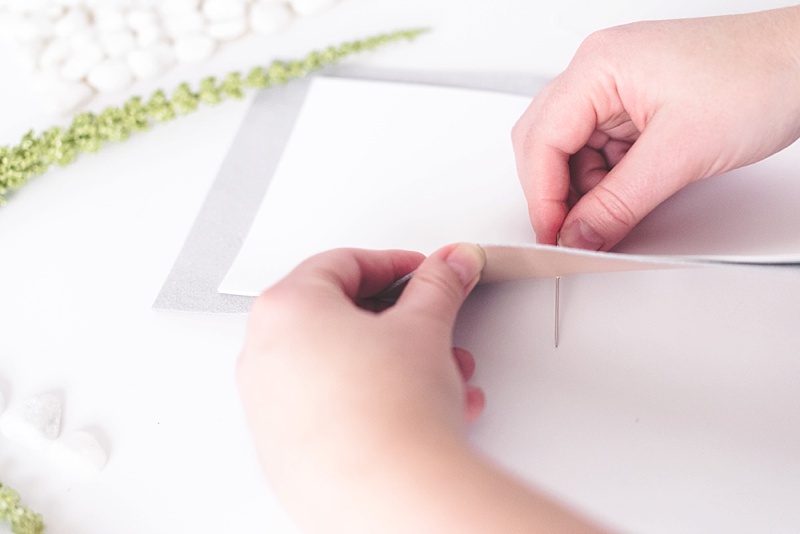
6. Cut three pieces of white cardstock paper into 10"x5" strips (or one inch smaller than your book). Gently fold your pages in half so they are now 5"x5". Using a ruler or the grid on your cutting mat, find the 2" and 5" marks and make a cut notch accordingly with your X-acto knife. This will give a nice length when you bind the book.

7. Once your notches are made, open up to the center of your pages on top of the inside of your leather cover. Using your X-acto knife again, line up the pages and puncture a hole through the leather.
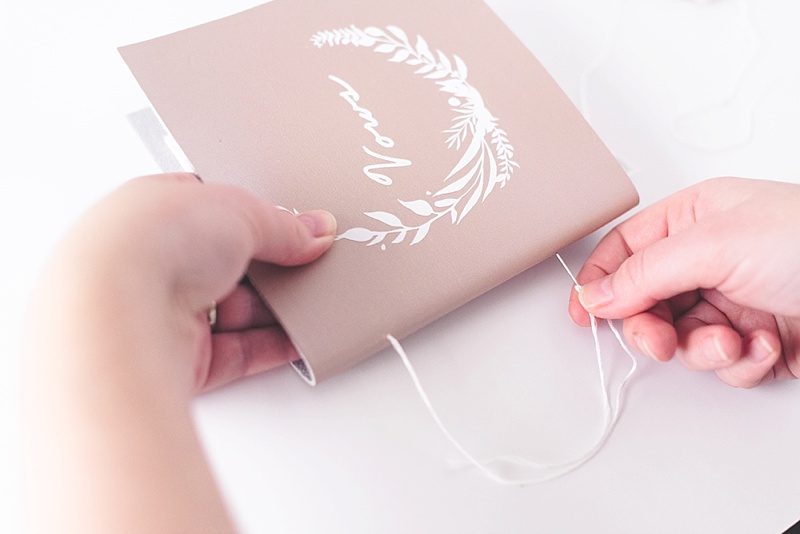
8. Thread one of your embroidery needles with your white embroidery floss, and be generous with how much floss you cut/thread as you can always cut off any extra at the end. Unlike sewing, do not tie a knot at the end of your floss as the floss should glide through all the way, unhindered. We will be making two "long stitches" to bind this book which means it will look like two long lines on the outside of the cover!

9. Starting on the inside top hole of your pages, push your flossed needle to the outside of your book, effectively tying your paper and your leather together. Be careful to leave a lot of floss behind you as you will be making two long stitches. Now, push the needle into the outside second bottom hole and through the pages inside.
10. Repeat following the same path as before to create a second long stitch. Your needle's final resting place should be on the inside of your book when you're done. You have essentially made two "loops" through the spine of your book.


11. Once you have two long stitches that have secured your pages to your cover, carefully tie a knot on the centerfold and then double knot it. Trim off the excess embroidery floss.
QUICK TIP: Use the needle to help get a precise knot by sliding it where you want it to go.
12. Fold your pages and your cover for a nice crease.


13. Add some ribbon to your book and get ready to say I Do!


TUTORIAL CREDITS
Photography, Tutorial, and Styling: Chelsea Barton
Editor's Note: Specially curated by us, the above product links are partner-connected and purchasing through these links means we get a small commission from those brands that helps support this website. You can find our full affiliate disclosure policy here on Tidewater and Tulle.

