
From the local-inspired street sign reception centerpieces to the family tradition of being married by the groom's father, I don't even know where to s…

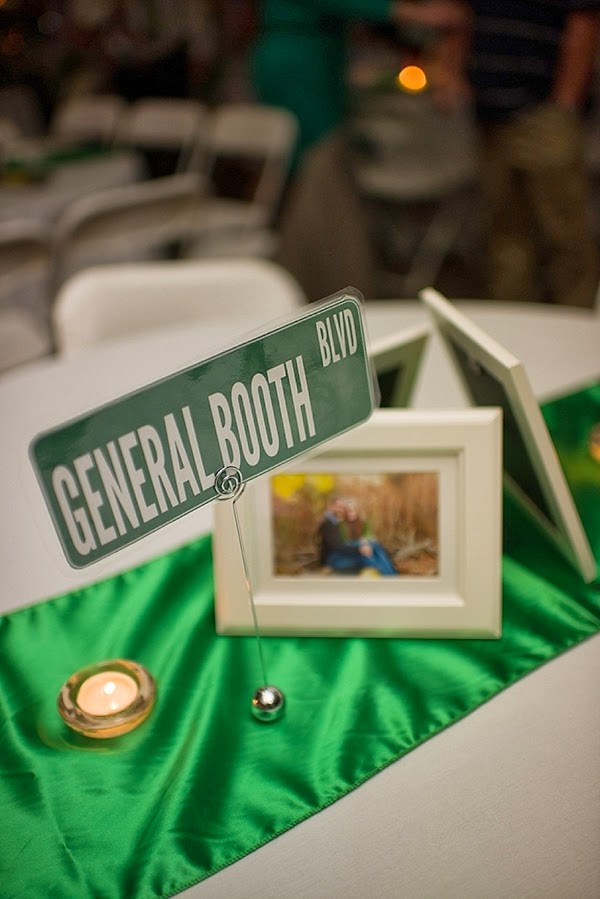
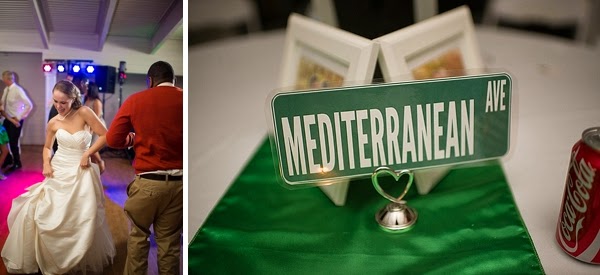
From the local-inspired street sign reception centerpieces to the family tradition of being married by the groom's father, I don't even know where to start with this sentimental and personalized special day! I really need to just let this lovely bride Christina take the stage and tell her and Kiel's story-- all visually documented by Beth of Beth Hamilton Photography. :)


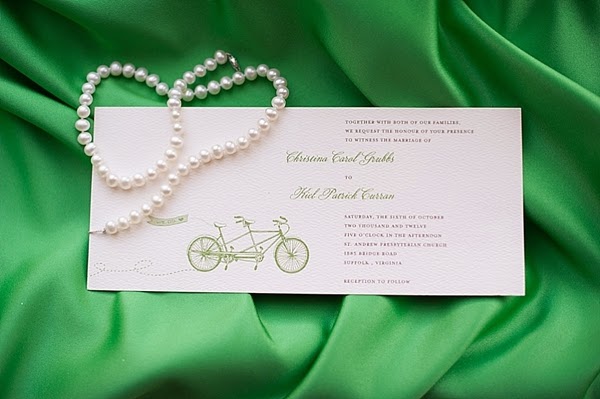


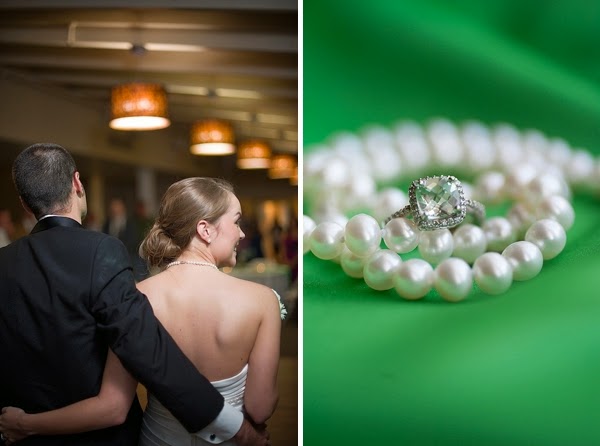

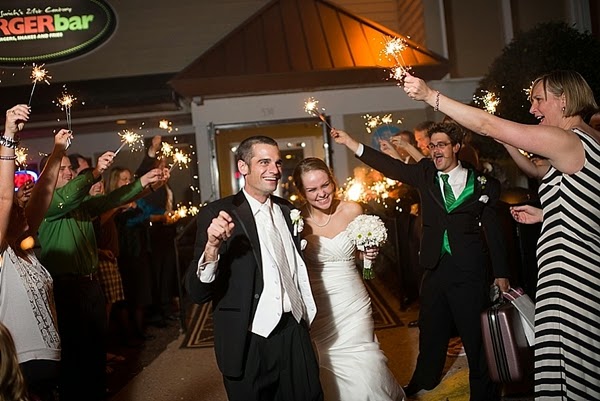
I grew up in Hampton Roads and have lived here my entire life. All of my family still resides in the area here locally, and within the last ten years, Kiel's mother and father moved to Hampton Roads. To bring in tradition, his father is the minister at St. Andrew Presbyterian Church in Suffolk and officiated our service. My husband is the second oldest of four boys, and in their family, it is tradition for his father to officiate their wedding ceremony. It really made our day extra special to have someone that we love marry us and lead us into that next chapter in our lives.
But there were so many great memories from that day, it is hard to choose! I guess my most vivid memory of that day would be the moment I got ready to walk down the aisle. Kiel and I had agreed that we would not see each other until then. It was a tradition I wanted to carry forward in my family. The anticipation of seeing him made seeing him at the altar so much more special.
In the bridal room by myself, there was just this moment that I had where I could hear the music playing as the girls were walking down the aisle. I remember thinking to myself, "I'm getting married in a few minutes!" All day I had been excited, but in that moment, I was beyond excited. I remember looking around the corner of the door frame to see my uncles waiting for me to come out. I went to them and stood in front of the closed doors of the church, waiting to hear the processional music cue.
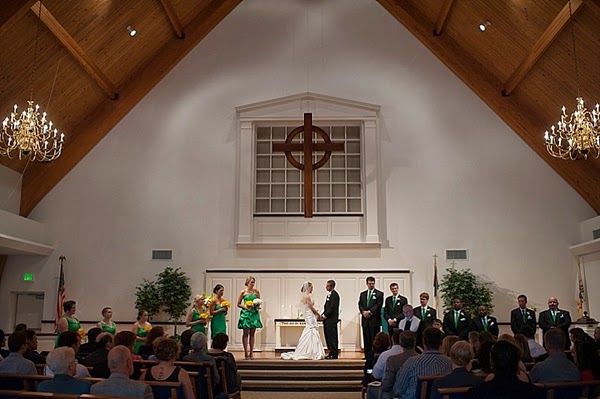
Within a few seconds, we heard it start, and the doors opened. When I rounded the corner of the aisle and I saw Kiel for the first time that day, it took my breath away. There he was, my sweet husband, crying tears of joy to see me walking towards him. It was my favorite moment of that day. I started to cry as well as I neared him, and all I wanted to do was run to him. I saw the last eight years of our knowing each other flash in my mind. My heart was so full of love for him, and it still is.


VENDOR CREDITS:
Photography: Beth Hamilton Photography // Ceremony Venue: St. Andrew's Presbyterian Church // Reception Venue: The Water Table // Hair and Makeup: Behind the Veil Studio // Stationery: Wedding Paper Divas // Florals: DIY by Family // DJ: Colonial DJs // Bridal Gown: David's Bridal // Menswear: Men's Wearhouse // Caterer: Mojo Bones // Cake Designer: Plaza Bakery // Submitted via Two Bright Lights>
Photography: Beth Hamilton Photography // Ceremony Venue: St. Andrew's Presbyterian Church // Reception Venue: The Water Table // Hair and Makeup: Behind the Veil Studio // Stationery: Wedding Paper Divas // Florals: DIY by Family // DJ: Colonial DJs // Bridal Gown: David's Bridal // Menswear: Men's Wearhouse // Caterer: Mojo Bones // Cake Designer: Plaza Bakery // Submitted via Two Bright Lights>

This past Tuesday, we had our second Quick Bytes in Hampton! It was all about Google+, and it was so great to hear the excitement about that social media plat…

It's a little departure from our typical Thursday inspiration, but it's a question I receive often as a wedding photographer and now recently as an wed…

A senior and portrait photographer, Sarah of Sarah Elle Photography was taken aback when Danielle and Lance contacted her to shoot their engagement session. S…
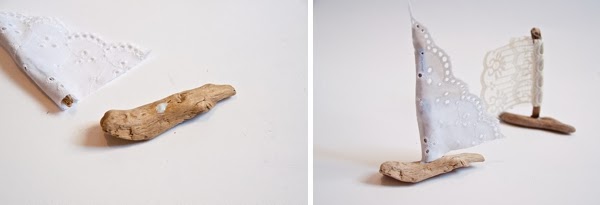
We're so excited to be able to share our first DIY project! Ever since our readers asked for it in our January survey, we've been researching and trying to figure out some easy-to-do project that isn't common and could be completely locally sourced. Anyone who knows me knows I'm so not a DIY girl, so that's where Kay (aka my Mom) stepped in and took charge of this fun craft project for all of you beach and nautical lovers out there. :)

Sourced from CereusArt and a few other stores around the area, we'll be making sailboats using unique driftwood pieces and lace or cotton eyelet fabric! These could be used as place cards, favors, or even as part of a reception centerpiece. However you decide to use them, they add a very nice vintage nautical feel to any wedding décor.
You can buy lace or cotton eyelet from most any fabric stores-- it can be found in the “trim” or “notions” area. You can be super creative and find a curtain or table runner that has the pattern that you like. Second-hand stores are a great resource, and there are also sellers on Etsy that have vintage linen pieces (a table runner, curtains or even a doily may work-- depending on how many boats you are making). A nostalgic idea may be to even use Grandma's lace handkerchief (just remember that you will be cutting it up).
In this tutorial, we will use lace, cotton eyelet, and cotton with lace trim.

SUPPLIES:
INSTRUCTIONS:
To get started, sort the driftwood and match the masts with its boats. Choose pieces that are about the same length as each other.
Once sorted, take the boat pieces and choose the flattest side for the bottom. The top may be uneven; sometimes it makes it more interesting, but the bottom needs to be flat so the boat will sit flat on the surface you will be putting it on (table,etc). If your pieces are a little too uneven, try taking a piece of sandpaper to file the bottom down.
Next, work with the lace/fabric you have chosen. You may need to spray the fabric with starch and lay it flat to dry so it has some stiffness to it. You may have to press an iron to it briefly if it's not stiff enough by just spraying it.
Now find the middle of each boat piece and drill a hole into it. Make sure to use a drill bit close to the size of the mast to be inserted.

Try not to drill all the way through the boat, but if you do, that's okay. You can cover it with a piece of construction paper or fabric and no one will ever know! Just make sure to glue the mast in place without pushing it through the bottom or it won't stand up straight.
Once the holes are drilled, fit the mast into it. It should fit tightly with a tiny bit of room around the edges.
The fabric sail should be a little shorter (about ¼") than the length of the mast. Cut a piece of lace/fabric into a triangle shape-- one long edge should be the length of the mast. The short edge will go across the boat piece as the bottom of the sail; you will want to add about ½" longer than the boat so you can wrap the fabric around the mast to keep it in place. Try to leave the finished edge of the lace/fabric for the outer edge of the sail. Scalloped edges look really nice for that finished look!

If you are using a round doily, it's super easy! Just fold the doily in half, cut through the middle, then fold that half over again and cut through the middle of the other half! It's already a triangle! (You may need to trim it to fit the mast.)
If your boat piece of driftwood is 4 inches, the longest edge of the sail to go up/along the mast should be 3 ¾” long. Remember you will be inserting the mast into the hole so you will need to allow for that. The shortest edge should be 4 ½". If you are unsure of the size, use a homemade paper triangle first to measure, trim it, and then use it as a template/pattern to place on top of other fabric pieces and cut it perfectly every time!
Now, take the mast and place the longest edge of lace along it. Add a long bead of wood glue from the top to the bottom of the mast. Lay it down on a flat surface, take the lace and press it into the glue strip. Let it sit to dry while you work on the other sails. Make sure the glue has dried completely before handling the mast again. You will add another bead of glue close to the edge of the lace already applied. Wrap the lace around the mast and make sure to cover that original edge by pressing out the glue lumps. Again, let it dry laying on a flat surface.
Once the mast is dry, add a small drop of glue into the hole in the boat piece of driftwood and attach the mast into the hole.
If glue comes out of the hole once the mast is inserted, simply wipe it off before it dries. Set your boat with its sail standing up straight. You can set it aside for now to dry. Follow this process for each sailboat. Once dry, you can admire your handiwork and decide how to stage them for your wedding or event! If using for place cards, find small paper tags to attach to the boat or even write in silver ink on the boat. Possibilities are endless!

All photos and tutorial created for Tidewater and Tulle. Some of the above product links were the actual products used and purchasing through these affiliate links helps support future DIY projects. You can find our full affiliate disclosure policy here on Tidewater and Tulle.
Sourced from CereusArt and a few other stores around the area, we'll be making sailboats using unique driftwood pieces and lace or cotton eyelet fabric! These could be used as place cards, favors, or even as part of a reception centerpiece. However you decide to use them, they add a very nice vintage nautical feel to any wedding décor.
You can buy lace or cotton eyelet from most any fabric stores-- it can be found in the “trim” or “notions” area. You can be super creative and find a curtain or table runner that has the pattern that you like. Second-hand stores are a great resource, and there are also sellers on Etsy that have vintage linen pieces (a table runner, curtains or even a doily may work-- depending on how many boats you are making). A nostalgic idea may be to even use Grandma's lace handkerchief (just remember that you will be cutting it up).
In this tutorial, we will use lace, cotton eyelet, and cotton with lace trim.
SUPPLIES:
- Driftwood pieces of various sizes -- flat pieces for the “boat” and cylindrical for the mast (Can be purchased locally from CereusArt)
- Lace or Linen Eyelet Fabric or Trim (Can be purchased locally at JoAnn Fabrics or on Amazon.com
)
- Scissors
- Wood Glue
- Spray Starch
- Drill with 1/8” drill bit
INSTRUCTIONS:
To get started, sort the driftwood and match the masts with its boats. Choose pieces that are about the same length as each other.
Once sorted, take the boat pieces and choose the flattest side for the bottom. The top may be uneven; sometimes it makes it more interesting, but the bottom needs to be flat so the boat will sit flat on the surface you will be putting it on (table,etc). If your pieces are a little too uneven, try taking a piece of sandpaper to file the bottom down.
Next, work with the lace/fabric you have chosen. You may need to spray the fabric with starch and lay it flat to dry so it has some stiffness to it. You may have to press an iron to it briefly if it's not stiff enough by just spraying it.
Now find the middle of each boat piece and drill a hole into it. Make sure to use a drill bit close to the size of the mast to be inserted.
Try not to drill all the way through the boat, but if you do, that's okay. You can cover it with a piece of construction paper or fabric and no one will ever know! Just make sure to glue the mast in place without pushing it through the bottom or it won't stand up straight.
Once the holes are drilled, fit the mast into it. It should fit tightly with a tiny bit of room around the edges.
The fabric sail should be a little shorter (about ¼") than the length of the mast. Cut a piece of lace/fabric into a triangle shape-- one long edge should be the length of the mast. The short edge will go across the boat piece as the bottom of the sail; you will want to add about ½" longer than the boat so you can wrap the fabric around the mast to keep it in place. Try to leave the finished edge of the lace/fabric for the outer edge of the sail. Scalloped edges look really nice for that finished look!
If you are using a round doily, it's super easy! Just fold the doily in half, cut through the middle, then fold that half over again and cut through the middle of the other half! It's already a triangle! (You may need to trim it to fit the mast.)
If your boat piece of driftwood is 4 inches, the longest edge of the sail to go up/along the mast should be 3 ¾” long. Remember you will be inserting the mast into the hole so you will need to allow for that. The shortest edge should be 4 ½". If you are unsure of the size, use a homemade paper triangle first to measure, trim it, and then use it as a template/pattern to place on top of other fabric pieces and cut it perfectly every time!
Now, take the mast and place the longest edge of lace along it. Add a long bead of wood glue from the top to the bottom of the mast. Lay it down on a flat surface, take the lace and press it into the glue strip. Let it sit to dry while you work on the other sails. Make sure the glue has dried completely before handling the mast again. You will add another bead of glue close to the edge of the lace already applied. Wrap the lace around the mast and make sure to cover that original edge by pressing out the glue lumps. Again, let it dry laying on a flat surface.
Once the mast is dry, add a small drop of glue into the hole in the boat piece of driftwood and attach the mast into the hole.
If glue comes out of the hole once the mast is inserted, simply wipe it off before it dries. Set your boat with its sail standing up straight. You can set it aside for now to dry. Follow this process for each sailboat. Once dry, you can admire your handiwork and decide how to stage them for your wedding or event! If using for place cards, find small paper tags to attach to the boat or even write in silver ink on the boat. Possibilities are endless!

We're so excited to be able to share our first DIY project! Ever since our readers asked for it in our January survey , we've been researching and tryi…

There's just something deeply beautiful about a ceremony of three, the number most associated with balance and completeness. With just two other loved on…
Subscribe to:
Posts (Atom)
